In this article, we’ll discuss the Penalty for acquiring, selling, or possessing a belt buckle knife, the Styles of belt-buckle knives, and their efficacy as self-defense weapons. Finally, we’ll explain the legalities of carrying a belt-buckle knife in California. The legality of carrying depends on your state and the type of knife that you’re planning to carry.
We will look at:
The Belt buckle knife
Penalty for selling, transferring or possession
Styles of belt buckle knives
Buckle knife as a self-defense weapon
Carrying a belt buckle knife in California
Penalty for selling, transferring, or possessing such knives
Penal code 16590 (PC) lists generally prohibited weapons, including the belt buckle knife. According to the statute, a person can be guilty of selling, transferring, or possessing if he or she has knowledge that it can be used to commit a crime. Moreover, a person is prohibited from manufacturing, distributing, or selling the knife.
A BBK can be charged with PC 20410, although a defendant does not have to intend to use it for a crime. The intent is irrelevant. It’s still illegal to possess or sell it, if you were not in the habit of using it. Therefore, an attorney can argue for a lesser sentence based on the illegal use of a weapon argument.
The Penalty for selling, transferring, and possessing is the same as that of a firearm. It’s illegal to carry one with you when you are in public. If you do, you’ll face county jail time and high fines. However, you can avoid this charge by following the law and not knowingly transferring it to another person.
A person carrying a legal knife is prohibited from using it in places where it is illegal to carry a firearm. For instance, a person is prohibited from carrying a belt buckle knife while watching a sport event or a demonstration. In addition to these crimes, carrying a belt buckle knife is illegal while in public as it can cause a person to be arrested.
The SS 265 law also prohibits the sale, transfer, or possession of a belt buckle knife. However, in most cases, the knife is considered a dangerous weapon even when it’s not being used. However, the NY Penal code does not preempt federal law, which makes assisted opening knives a viable option in this case. It’s possible to find such a knife, but a New York court must rule on it.
Styles of belt buckle knives
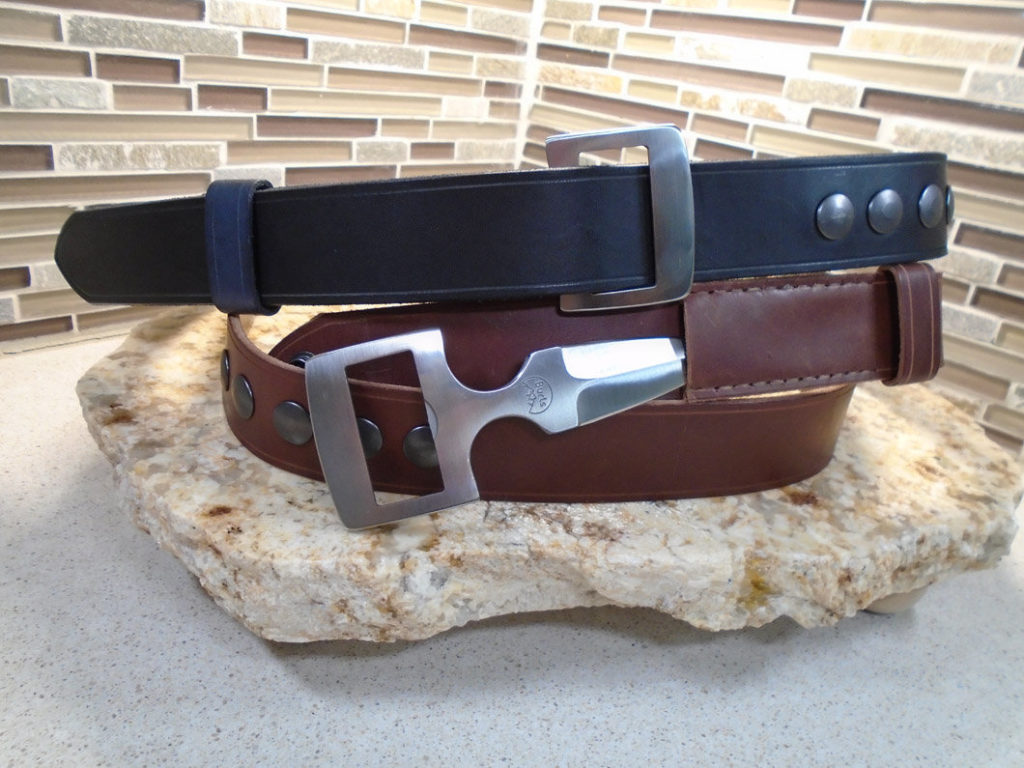
A belt buckle knife is a type of edged instrument that can be hidden in a belt buckle. The knife can be opened and used whenever necessary. These knives are popular among self-defense enthusiasts and outdoorsmen alike. However, many regions in the United States and certain countries prohibit them. There are many styles of these knives. Each one has its own benefits and drawbacks. Listed below are the most common styles:
One of the main differences between a belt buckle knife and a conventional folding knife is their design. A traditional folding knife looks similar to a belt buckle knife, except that it has a smaller blade. The blade is attached to the handle by a hook or a small latch. The blade is either hidden or easily accessible depending on its style. Folding belt buckle knives are a popular choice for everyday carry because they take up as little space as a traditional belt buckle.
It is a handy tool that can be used when the need arises. It is typically shorter than a regular knife, but has a thicker handle. Such a knife is a great option if you’re in a fight because it can be deployed instantly. They can be a countering weapon as well. You can even carry one while wearing a belt. You can also buy one to give to your father as a gift. If you’re looking for something special for him, then this can be a great gift idea.
Another option for a belt buckle knife is a military-grade model. These knives are known for their extreme strength and durability. They are typically made of stainless steel, and feature a half serrated blade. Some have two finger grips. These knives are often made of 420 stainless steel, and feature either a single-edge or double-edge blades. This style is most common, but you can also find a tactical one.
Efficacy of the knife as a self-defense weapon
There are many reasons to own such a blade. This small but highly functional knife is an excellent emergency tool, an EDC knife, or a throwable self-defense weapon. They are small enough to conceal in a pants pocket and can be quickly deployed to defend the user. It is especially effective for self defense because of its size, concealability, and speed of deployment.
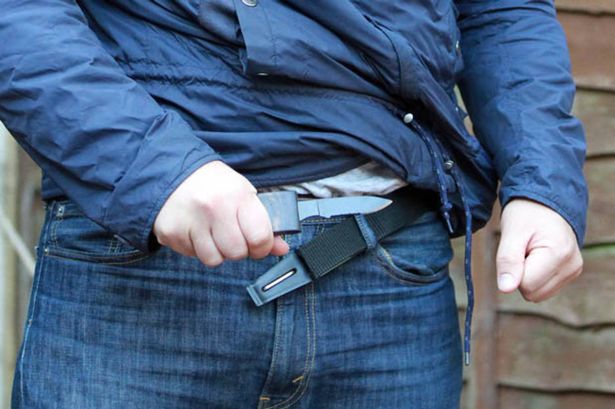
As you know by now it is a small, concealed blade that attaches to a belt buckle. It is a unique, specially designed belt buckle that conceals a blade. Because the blade is hidden inside the belt buckle, it can easily be drawn when needed. Its design also makes it easy to separate from the belt and convert into a small knife. This self-defense tool also comes with a locking mechanism, making it safe to use if it is needed.
This hidden knife allows you to extend your attack range, allowing you to avoid an attacker’s attention while remaining concealed behind the buckle. This self-defense tool allows you to surprise your attacker by revealing a hidden knife that you can use to escape. You can also use it to stab or slash your attacker with, or to distract them from approaching you by sneaking it out of sight. Another benefit of a belt buckle knife is that it’s easy to carry and can be used for a wide variety of tasks.
Such a weapon is a powerful tool. When used correctly, it can deliver shocking amounts of force. Its hook-and-loop design enables it to deliver lacerating damage, and it is also a quick and easy way to protect yourself in an attack. It is an excellent option for self-defense because it is easy to carry and carries little risk of being stolen.
Legality of carrying in California
A belt buckle knife is a type of concealed weapon, specifically designed to be hidden inside a belt buckle. The blade is enclosed inside a metal casing that the user opens by flicking the buckle open. However, not all belt buckle knives meet California’s definition of an illegal weapon. In California, a belt buckle knife is defined as a knife that is a part of a belt buckle and has a blade length of at least two and a half inches.
Despite their small size, belt buckle knives pose a danger when compared to other weapons. Having one of these knives on your person could put you at risk of being arrested and prosecuted for a misdemeanor or felony. If convicted, you could end up serving up to a year in jail or even three years in prison. This makes owning and carrying such a knife illegal in California a serious responsibility.
While carrying a knife isn’t illegal in most states, it can get you in trouble with law enforcement. Cops routinely ticket and arrest people who are carrying something that’s illegal. A fine won’t make up for the time you miss and the cost of hiring an attorney. Additionally, state laws and ordinances differ widely from one another. It’s important to check the legality of carrying a belt buckle knife in California before using it on the street.
In addition to California state law, cities and counties can enact their own laws on how to carry knives. In Los Angeles, for example, knife carrying is prohibited unless it is concealed in the waistband. Furthermore, knives with blades longer than three inches are illegal in the city of Los Angeles. A belt buckle knife is also illegal in the city of Sacramento. But the law is not as strict as in California.
However, this particular knife is still not legal for carry in California unless it is hidden or accompanied by another item. While knife carrying is not illegal in many cities, carrying one in a belt buckle can be a hazard on the street. Therefore, the law on knives is generally very broad and does not prohibit the use of a belt buckle knife in California. If you have any questions about whether carrying a belt buckle knife in California is legal, please contact a local law enforcement agency.
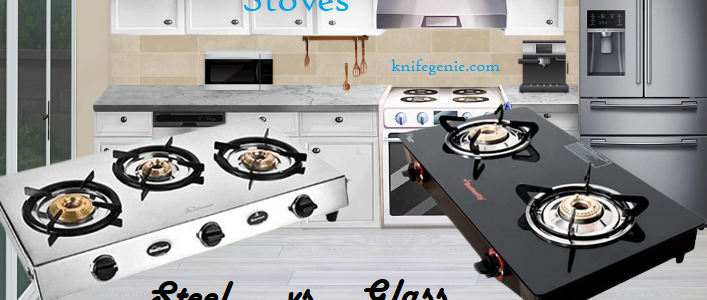
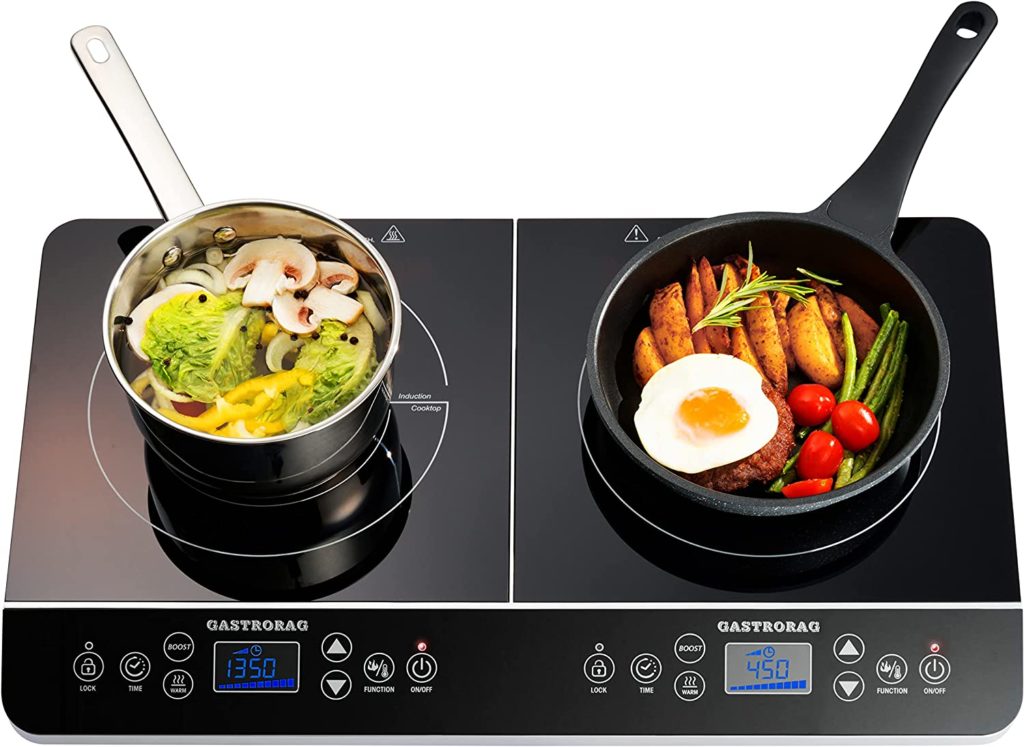
When shopping for a gas stove you may be wondering which gas stove is best – steel or glass? It can be difficult to choose between a steel or glass top model. Although glass top gas stoves are more expensive and have a more delicate surface, they are also more efficient. Read on for more information on both types. In the end, it really comes down to personal preference. If you want a sleek look for your kitchen, opt for a glass stove. The downside to glass top gas stoves is their higher price.
Glass top gas stoves are more efficient
A glass top gas stove has a number of features that a conventional stove does not. One of the biggest advantages of this type of stove is the fact that the glass top prevents heat from escaping. This is great news for anyone concerned about the safety of their children. Another benefit of this style of stove is that it cools down much more quickly when the pan is touched. A glass cooktop stove also has exemplary heat control and is almost as efficient as a conventional gas stove.
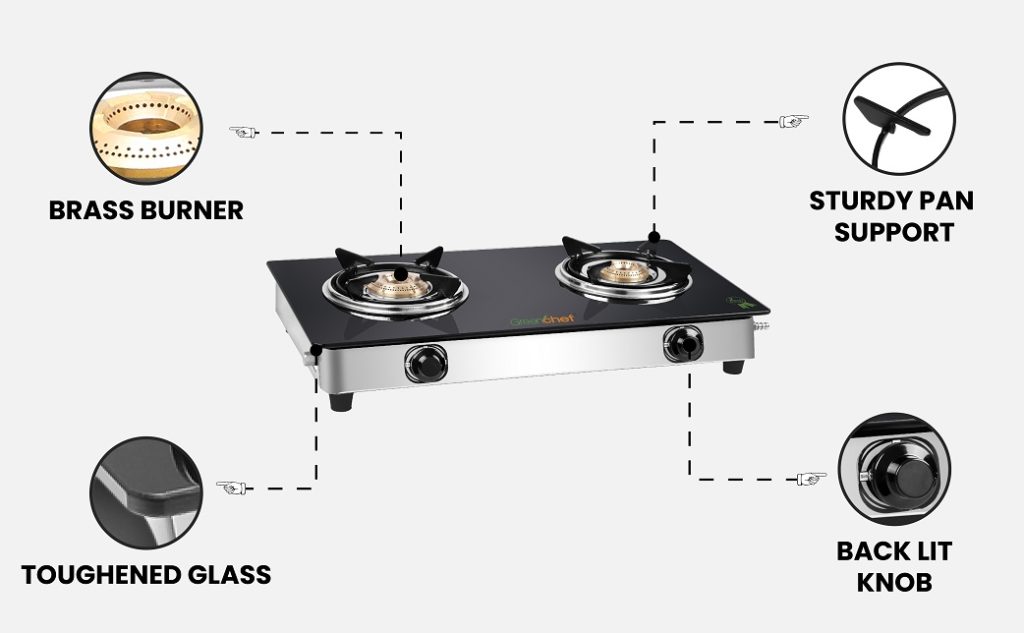
Gas stoves with a glass top feature better heat distribution than stoves with stainless steel surfaces. They are made with a durable glass top that resists scratches and corrosion. While they are more expensive than stainless steel gas stoves, they often come with additional features. These include auto-ignition, more burners, and superior quality. Some models feature custom knobs that rotate 360 degrees, flame failure safety, child lock, and digital timers.
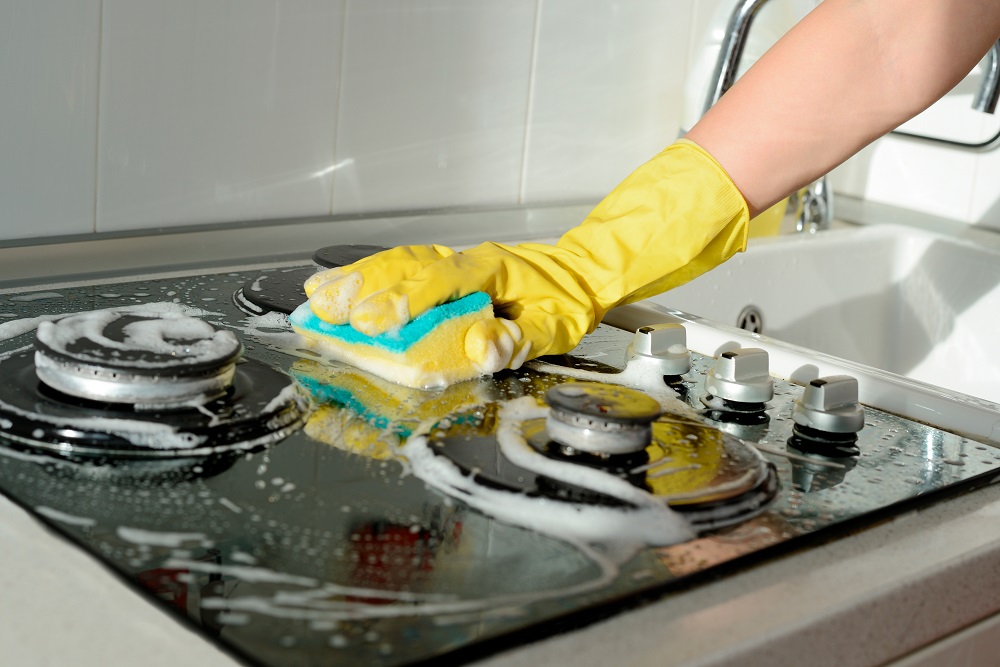
A glass top gas stove is safer than a stainless steel model because of the even distribution of heat. The tough glass top acts as a safety element and is five times more durable than ordinary glass. However, one important factor to consider when purchasing a glass top gas stove is proper maintenance. You should avoid scratching your glass stove top by using ceramic or cast iron cookware. Using scouring tools or abrasive cleaners can also cause tiny scratches on your glass stove.
Choosing between a gas and an electric stove can be tricky. Electric stoves may look similar but perform quite differently. Glass top gas stoves may be better for those who want a gourmet-style kitchen. The gas stoves may be better for families with children, but the disadvantages of glass top gas stoves should be taken into consideration. You should also consider the type of oven you need in your kitchen. A glass top stove can be easier to maintain than an electric model.
There are two main types of glass top gas stoves. Manual and automatic ignition. In the case of the latter, you must use a lighter to start the flame, while automatic ones need you to turn a knob. Some people find automatic ignition to be more convenient, but their repair cost is too high. A glass top gas stove will allow you to adjust the temperature without having to turn on the ignition. So, when choosing a gas stove, remember to consider all these factors.
Gas stoves produce pollutants and have an adverse effect on the quality of air. Without exhaust hoods, gas stoves emit nitrogen dioxide, carbon monoxide, and formaldehyde into the air. These compounds are not good for your health, especially if you suffer from respiratory ailments. If you are concerned about your health, you might want to consider an induction stove. These stoves are much safer to use and are more efficient than gas stoves.
They are more expensive
As with all types of appliances, gas stoves are more expensive than electric models. However, some manufacturers have midrange products that include gas and electric options. These are available in both contemporary and traditional styles. There are also very high-end electric models that come with additional features, including a grill or fan. If you have a limited budget, an electric model may be a better option. Just keep in mind that a higher-quality stove will last for a longer time.
One of the major drawbacks of stainless-steel gas stoves is that you have to use matches or a lighter to start the fire. A glass-top model will automatically light the fire, but it may cost more. Stainless-steel models are typically more expensive, but you can get them for less than half the price. They also come with features that allow them to withstand the heat generated by the flame.
Stainless-steel gas stoves are a good option for many home cooks. They come with toughened glass tops that resist heat from the gas burner. You can choose the thickness of the glass top, from 4mm to 6mm. Some glass top gas stoves are also more expensive than stainless-steel ones, so do your research and buy the best gas stove for your budget. While stainless-steel models are not as beautiful as glass stoves, they are more durable and do not break easily.
Electric and gas stoves cost less than electric ones. Electric stoves have automatic ignition, whereas gas stoves are manually operated. You can also choose a gas stove that works with liquid propane or a gas line. Some gas stove models will work with liquid propane. However, the price difference will depend on your state. For home use, electric and gas stoves will cost you between $30 and $45 per year.
For those who prefer the look of glass and steel stoves, Elica is a globally recognized brand. The Vetro Glass Top 3 Burner Gas Stove by Elica is a stylish choice. The Euro-coated glass top and durable brass burners make it easy to clean. The gas burners are also incredibly efficient, ensuring a consistent flame and efficient use of gas. If you prefer to cook on gas, make sure the burners are installed properly and that they are evenly spaced for even heat distribution.
Glass top models are more expensive than their stainless steel counterparts. However, they do come with more features. The Lifelong Glass Top 3 Burner Gas Stove, for instance, costs Rs. 2,429, and has a spill-proof design. Nevertheless, they may be difficult to maneuver. Buying an ideal gas stove in India is a Herculean task. So, how can you find the perfect gas stove?
They are more fragile
Both glass and steel gas stoves have their advantages and disadvantages. A glass top gas stove will be easier to clean, as its glass surface is more durable than a stainless steel one. Stainless steel stoves can lose their sheen over time, and they are also less likely to break if dropped. However, a steel or glass gas stove may not be as attractive as a glass one. If you are looking for a stove that will withstand years of use, then a glass top model might be the best option.
However, steel and glass gas stoves can be a great option for people with less money or limited space. While both materials are durable and heat resistant, glass top stoves tend to be more expensive than their steel or glass counterparts. Because of their high cost, glass stoves aren’t cheap, and they require special maintenance. But the benefits of this type of stove are well worth the price difference. They will not break as easily as a stainless steel stove, but they will look great for a long time.
Stainless steel and glass gas stoves are more durable than glass, but they are also less aesthetically pleasing. The glass top stoves are more likely to chip if they are used frequently, and they can easily break under pressure. Glass top gas stoves are also more difficult to clean, because they cannot be cleaned with a scrubber. Stainless steel stoves also look more attractive than glass, so you may prefer them if you’re a minimalist.
A glass gas stove is ideal for those who want a premium look to their modular kitchen. However, be sure to take proper care of glass gas stoves to protect them. They can be more expensive than glass stoves, but they can add a luxury look to your kitchen. However, you must be sure to take care of them to avoid scratches or breakages. For these reasons, glass stoves are a better choice for those with a budget.
Glass and steel gas stoves are less fragile than their counterparts. As long as you can afford them, you should be happy with your new gas stove. Just remember to choose a cookware made of high-quality materials. It will last you for many years. You should also consider the safety features. Safety is always your number one priority when purchasing a new gas stove. When shopping for cookware, consider all these factors. You’ll be glad you did.
Glass and steel gas stoves are both more expensive than their glass counterparts. But they both come with their benefits. A glass top stove is easier to wipe down than its steel counterpart. Nonetheless, you must be careful while cleaning it. A glass top gas stove is more likely to break if you use a hot pan with a rough bottom. It is also more vulnerable to scratches if you use metal scouring pads or other harsh cleaning materials.
To create your own custom diy lanyard, you’ll need to braid a length of cord and tie a knot. Next, you’ll need to secure the lanyard hook. Once you have the hook secured, you can thread the strands of fabric to create your own lanyard. These steps are easy to follow and will help you create the perfect lanyard for your needs. If you’re having trouble, read this article for some tips.
Steps to make a diy lanyard
Braiding a lanyard cord
Lanyard tie knot
Secure a lanyard hook
Threading lanyard strands
Finishing a lanyard
How to braid a lanyard cord
To make a DIY lanyard, you’ll need a length of paracord approximately twice as long as you’d like it to be. Start by doubling the length of the cord, preferably on a sturdy nail. This will form the core of the lanyard. The remaining 90 feet of cord should be positioned behind the core, with the ends secured with rubber bands. Use square knots to tie around the core. Be sure to bring the right knot to the left side of the core strands. After you’ve finished braiding the cord, you can begin attaching it to the carabiner.
Make sure the cord is three to four feet long. Choose a different color if possible. Then, braid the two cords in a circle. Pull the loops of the circle through each other, double over the strands and draw them up towards the center of the lanyard. Repeat this process until you’ve used up all the material. Once the lanyard is complete, you’re ready to wear it.
How to make a lanyard tie knot
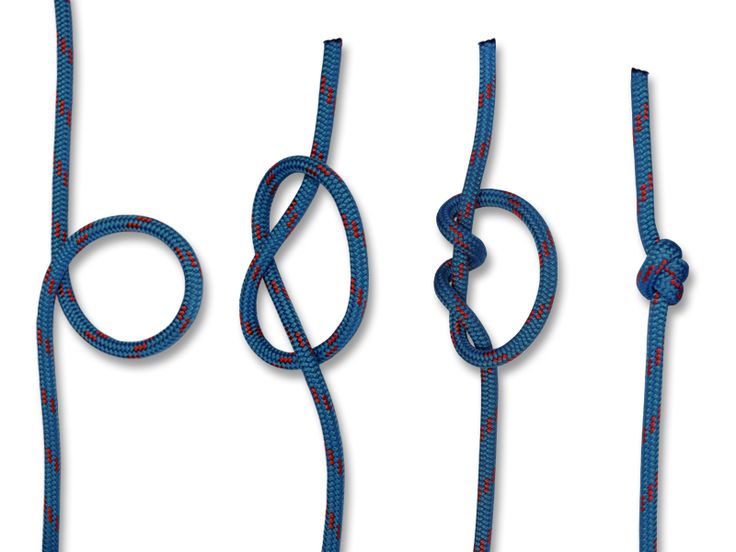
In this article I’ll walk you through the steps to create a DIY lanyard tie knot. The steps are pretty simple, but it’s always good to have a little help. If you’re not sure what to do, you can use pictures. First, cut the Paracord. Then, make a bight from the end of the cord. Next, you’ll make a decorative knot. You’ll then use a flame from a lighter to tie a lanyard knot.
To make the snake knot, begin by folding your fabric in half. Then, fold it in half again and place a lobster clip at one end. Then, sew along the raw edges. Make sure the seam allowance is about 1/4 inch or six millimeters. Once the loop is complete, remove the clips and cut the excess cord. If the ends are fraying, melt them with a lighter before you close the loop.
How to secure a lanyard hook
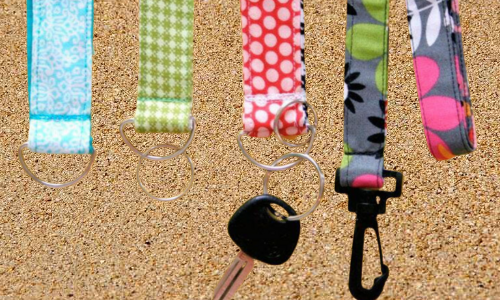
How to secure a ring or a lanyard hook to a keychain or a pocket? To make your DIY lanyard more secure, you need to know how to properly install a lanyard hook. Lanyard hooks are usually attached to zipper pulls, key rings, and other items. The lanyards themselves are made of string and should be secure in order to keep the device safe.
To make a DIY lanyard, gather two lengths of material. It should be three to four feet long, preferably in different colors. Then, double over these strands. After double strands are arranged, place a lanyard hook in the center and draw it up through the loops. Once it’s securely attached to the keychain, use the scissors to trim the extra cord strands.
How to thread lanyard strands
In order to make a DIY lanyard, you’ll need two strands of material, each about three to four feet long. Make sure they’re different colors, and double over them to form a loop. Thread the lanyard hook through the center of both strands, then pull them tight and trim them to length. Once you’ve made a custom lanyard for yourself or a friend, here are the steps you should follow.
First, you need to fold your lanyard fabric in half or quarters. Attach a lobster clip at one end. Sew the loop closed with a 1/4 inch or six mm seam allowance. Repeat the process with the other end. When you’re done, you’ll have a lanyard that looks professional and elegant. After you’ve made it, be sure to keep it symmetrical by securing it with a keychain or clip.
How to finish a lanyard
Whether you’re making a DIY lanyard for a key chain, belt loop, or water bottle, you can always use a lanyard to hang your stuff. Here are some tips for finishing your lanyard. First, make sure that all strands are the same length. Next, you need to knot them all together. If you’re using more than two colors, make sure you wrap the strands around the other side of the strand.
Photo Source: WikiHow.com
Next, you’ll want to finish the lanyard by adding a clasp. Place the clasp near the seam where you joined the short ends of the strap. Pin or clip the clasp in place. Once it’s secure, the lanyard is ready to use. You can repeat the steps above each semester, but you’ll likely want to use the same lanyard for school. Using a clasp also prevents the lanyard from unraveling.
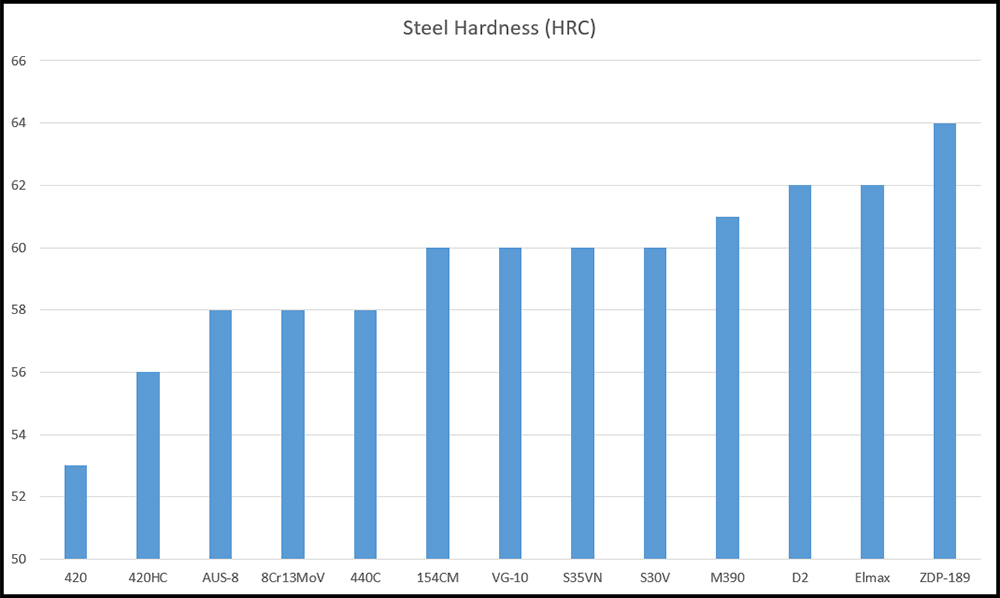
Look at a knife steel chart before choosing a knife steel because you should know its composition and hardness . There are different points on the Rockwell scale, depending on the purpose of the knife.
Source: Offgridweb.com
The following table lists the most common knife steels, along with the amount of each. It also includes the percentage of carbon and Chromium and other important attributes.
Most common knife steel
Carbon
Chromium
Chromium alloys
Carbon content
Hardness
If you’re planning to make production knives, you should pay attention to the Carbon and Chromium content. However, it may not be enough to find the perfect knife steel for your needs.
Carbon
Before buying a new knife, it is important to understand what type of steel you need. Different types of steel have different hardness levels, and it is important to know how you plan to use your knife to determine which one is best for your needs. A knife with a high carbon content, for example, can be very rigid and can chip easily. If you’re buying a knife for everyday use, you should look for a knife with a lower carbon content to keep it from bending or breaking when you’re using it.
Another important consideration is the knife’s performance. Stainless steel blades have superior corrosive resistance, but their edge retention is limited. This is because stainless steel requires a certain amount of carbon in order to resist corrosion. But carbon is not the only consideration. Heat treatment is also crucial. It’s essential to compare knife steel composition to other similar steels to ensure you’re getting the best quality. The chart shows the most common temperatures that will cause your knife to rust, and the type of heat treatment used to make it.
Another important characteristic is corrosion resistance. While the highest-grade carbon steel is essentially the hardest steel, too much carbon will cause it to break or chip. If a knife is too hard, it’s likely to chip or break when used frequently. If it rusts under the right conditions, it will eventually break. So it’s best to choose a knife with a higher carbon content. The higher the carbon content, the harder the knife will be, but the trade-off is increased strength and anti-corrosion capabilities.
Chromium Steel
A knife’s performance is determined by the type of steel it is made of. Steel is a carbon and iron alloy that is enriched with certain elements, such as chromium. Different types of steel have different chromium content, depending on their use. While chromium increases corrosion resistance, it also absorbs some of the chromium in carbon steels. Chromium is added to the steel during the manufacturing process, making it a superior choice for blades.
Stainless steel contains the most chromium, and is the most common. Unlike carbon steel, stainless steel does not rust in air. Its sharpness isn’t very long-lasting, but it’s better than low-quality carbon steel. This steel also requires less sharpening than other types of knife steel, and can easily be sharpened without using power tools. 420 stainless steel, used in many Buck knives, has less chromium than 440. It’s tougher than 440, but will dull quickly.
Carbon is the main element in steel, and varies in percentage to create various properties. Chromium is an anti-rust additive, while manganese makes blades harder and more durable. High amounts of manganese, on the other hand, can make a knife steel brittle and prone to chipping on hard surfaces.
Carbon-based knife steel contains a high amount of carbon, but does not have the chromium content that stainless steel needs to resist corrosion. Additionally, a high amount of carbon also leads to rusting, which is undesirable for a knife’s performance.
Some chromium steels have a five-digit SAE/AISI designation instead of two, which indicates their carbon content. When comparing chromium content between two different knives, you can choose the best for your needs. You can even choose a knife that is made of different materials. Fortunately, there are plenty of high-quality stainless steel options available on the market. The main consideration is whether it is a good choice for your purposes.
Chromium alloys
Many knives use the SAE/AISI designation of D2, a Japanese tool steel containing almost enough chromium to be considered stainless steel. While D2 knife steel is tough and corrosion-resistant, it lacks hardness in comparison to cheaper alloys. Nevertheless, it retains a first-class edge for a long time. While D2 is prone to rust, it is still a good choice for a knife. This steel contains 12% chromium.
Other popular grades of steel used in knifemaking include CTS-204P, CPM-20CV, and ATS 34. CTS-204P is comparable to CPM-20CV, but has a higher percentage of vanadium. While M390 is very hard, it is difficult to sharpen, making it an ideal choice for knives that will be used frequently in salt water environments. ATS 34 is the toughest type of steel, although it also has an extra dose of chromium.
Another type of alloy is niobium. Niobium is a silver-gray transitional metal that can absorb chromium and contribute toughness. Niobium is a silver-gray transitional metal that adds toughness and improves corrosion resistance. Chromium is an essential element for knife steel, but some knives do not contain it. While all stainless steels have high chromium content, these blades are still susceptible to rusting when exposed to extreme environments.
SAE 300 series stainless steel is made from chromium-nickel alloy. It is made with a ferritic crystalline structure. It contains chromium and nickel, and has a higher corrosion resistance and harderness than austenitic structures. SAE 301 Full Hard is commonly used for knife blades and stainless trays. It is also more pliable than SAE 400 series stainless steel.
Carbon content
Knife steels can vary in the amount of carbon they contain. High carbon steels are tougher and more resistant to elements than low carbon steels. High carbon steels are typically used for knives that are subjected to aggressive environments. They can contain chromium, nickel, and titanium in various ratios. However, they can also contain other elements, including aluminum, silicon, and copper. In most cases, higher carbon content does not affect a knife’s hardness.
Some common Japanese carbon steels contain up to 1.3% carbon. CPM 4V, for example, has 0.74% carbon and 0.54% vanadium, which are good indicators of toughness and heat treatment characteristics. Alternatively, CPM 9V contains less carbon, and more vanadium to improve toughness. Another proprietary knife steel is CPM CRU-WEAR, which is an upgraded version of conventional Cru-Wear. The alloys added to this steel increase its wear resistance and ductility.
Stainless steel is another common type of knife steel. The carbon content in this steel ranges from 0.05% to 2.1%. Most knives are made of carbon steel, and manufacturers often refer to all of their steel as such. Carbon steel is hard, but other materials can add hardness and corrosion resistance. A hard knife will also be brittle and prone to rust. A good carbon steel is a balanced blend of high carbon content and minimal additions as describe in our knife steel chart above.
Another high carbon knife steel is ATS 34. This tool steel has a carbon content of 1.5 percent. This steel has an edge-holding performance comparable to ATS 34 and is considered tough enough for surgical use. This steel also has a high hardness level. In fact, it is almost as tough as CPM S90V steel. It is also more rust-resistant than CPM S90V, and is used in most cases.
Knife Steel Hardness
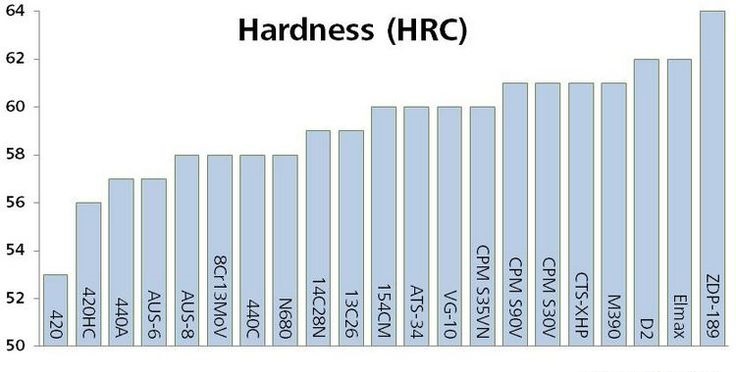
To choose the best knife steel, determine its hardness. Its hardness is measured on the Rockwell scale, and the harder the steel, the better the knife will hold its edge. Harder steel will hold an edge longer but is less durable. Knife steel with a HRC rating of 55 or higher will hold an edge longer, but they are more difficult to sharpen when dull. Knives made of soft steel are easier to maintain, but will lose their sharpness more easily.
A high-quality knife steel will also be tough. It is a measure of its resistance to breakage, chipping, and cracking. Toughness is the opposite of brittleness. However, testing for toughness is not standardized, and the results are often difficult to correlate with hardness measurements. Common toughness tests include various impact and bend fracture tests. In general, knives with a 57-59 HRC hardness rating are recommended, but some cheaper models may be as low as 50.
In general, the higher the Rockwell number, the more durable the knife. This is especially true of high-carbon steel knives. A good example of this is the Benchmade 581 Barrage, which is made of M390 steel. This knife is one of the few knives available with M390 steel. A similar model is made of CPM-S35VN steel. However, there are other hardness grades available, such as D2 and HRC.
In addition to the hardness, knife steel also has some other properties that determine its performance. For instance, knife steels are classified based on their toughness and wear resistance. They are also rated by their resistance to corrosion. All these factors can make the difference between a good knife and a great one. And, in general, the tougher the knife steel, the better. So, how do you decide which knife steel is best? Consult your knife steel chart beforehand.
Using Resorcinol glue, Epoxy resin, Micarta, or Wood as a stabilizing bone for knife handles is the standard method for restoring knives. But what if you’d like to make your own handle? Read on to learn about the benefits of these materials and how they can be used to repair a bone handle. We’ll also explore the pros and cons of each method. Ultimately, it’s all about personal preference.
Resorcinol glue
A good handle material is Resorcinol glue it is a durable industrial adhesive that keeps things together even in wet and dry conditions. Its high strength allows it to withstand high temperatures and has a very low water absorption rate. This glue is also highly resistant to corrosive conditions, such as saltwater and abrasion.
Manufactured from resorcinol, Resorcinol glue is a natural compound obtained by reacting a large amount of resin with potassium hydroxide. It has many medical uses, from surgery to cosmetic products. Because it’s so strong, resorcinol is an excellent choice for knife handles.
Epoxy resin handles
The process of stabilizing wood is an excellent way to protect your handle from wear and decay. It can also make softer woods hard enough for heavy use. Whether you’re making a knife handle for your own use or for selling, this process can help you make a great handle.
It takes just five simple steps: load the wood, saturate it with resin, cure it, and color it. Wood is the most common material for knife handles, but it is susceptible to change in temperature and humidity. For this reason, it can be difficult to manufacture knife handles with tight tolerances.
Although cow and giraffe bones are the most common types of bones used for handle materials, you can also find handles made from giraffe and elephant bone. These are both dense and add a sense of exoticism to your knife. Keep in mind, though, that bone handles can become porous over time, so it’s important to keep this in mind when deciding on the material for your handle. Luckily, there are a number of products on the market that are already stabilized and dyed with phenolic resin.
Knife Handle from Wood
When making a knife handle from wood, there are a couple of important considerations to consider. Wood needs to be stabilized before the knife maker can start crafting. First, wood handles need to be dried in a vacuum before applying resin. If the wood is solid and cool, it may be sufficient for a knife handle. If it isn’t, the next step will be applying a dye to the wood.
Another option for staining the bone is to use glue. Glutamate glue is a type of glue made from skin and bone material. It comes in liquid form and in hot glue granules. However, this type of glue is not waterproof. Alternatively, epoxy glue can be used. Epoxy glue is a transparent, gap-filling material that bonds the bones tightly together. It is particularly suitable for repairing tiny defects in the bone.
Micarta knife handle material
Micarta is a thermoplastic material created from layers of paper, linen, or canvas. Micarta is a registered trademark of Norplex-Micarta Industrial Plastics and is an excellent material for knife handles. Micarta is lightweight and resistant to abrasion and bending. It is also relatively indestructible. It is an excellent material for custom makers and is now also used on some production knives.
A thermoplastic grivory will outlast a blade, if properly maintained. It contains no metal whatsoever, so it should last for decades. It is also extremely strong and will most likely outlast the blade. Micarta is not a single material, but rather a composite of materials soaked in plastic. Micarta can be made from canvas, linen, carbon fiber, fiberglass, or paper.
Antlers are solid and stable
The use of antler is very common for knives. The antler crown has a central core that provides a very solid and stable surface for carving, inlaying gemstones, and other artwork. These antlers can be carved into belt buckles, conchos, and other pieces of jewelry. The antlers are quite resilient, so the use of them as knife handles doesn’t need any special care.
There are several different types of antler used for making knife handles. A good example of this material is that of the Sambar stag in India. While the Sambar antler has been banned for export for several years, the material remains a collector’s item. Traditional pocketknives have been made of this material. Other options include Micarta, which uses a resin-saturated substrate, and G-10, which uses a fiberglass substrate.
We’ve taken a look at the Spyderco Native 5 and Spyderco Para 3 Lightweight and examined the knives’ lock designs, stainless steel blades, and lock design. We’ll also discuss the new CTS-BD1N blade that Spyderco has recently introduced. Read on to learn more about these new Spyderco knives. Weigh in at only 2.6 ounces, the Spyderco Para 3 Lightweight is a small, but impressive blade.
Spyderco Para 3 Lightweight
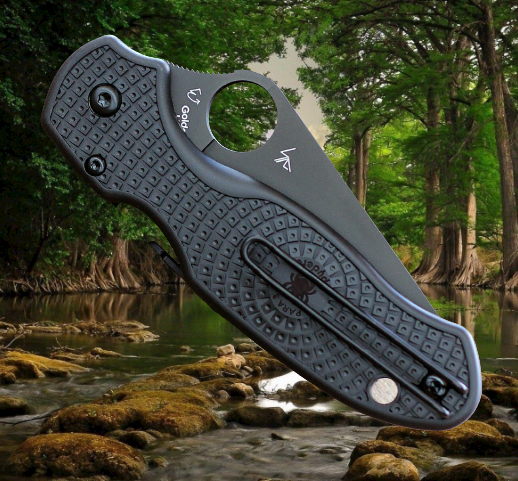
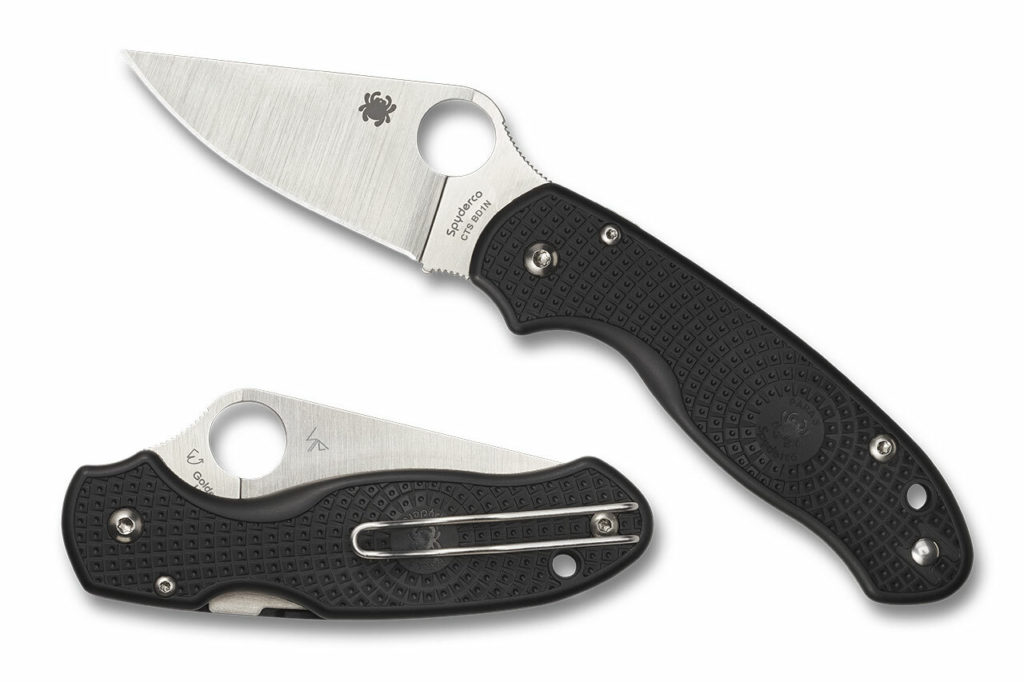
The lightweight construction of the Spyderco Para 3 Lightweight scale allows for nearly 30 percent weight savings over the original model. FRN scales are used in the Para 3 Lightweight. The scales’ bi-directional texturing provides a secure grip. Compression locks nest underneath the front scale. The knife’s stainless steel blade and lockbar boast high carbon and nitrogen content for balance and strength. The Para 3 Lightweight scales also feature a molded threaded insert.
For installation, you’ll need basic tools and knowledge of electronic instruments. You’ll need a high-quality torx bit set for screws and pivots. A video can help you get started. Because there are so many small parts, taking apart the Spyderco Para 3 isn’t recommended unless you’re a professional or have access to a shop. Also, attempting to disassemble the scale yourself may void your warranty.
Spyderco Native 5
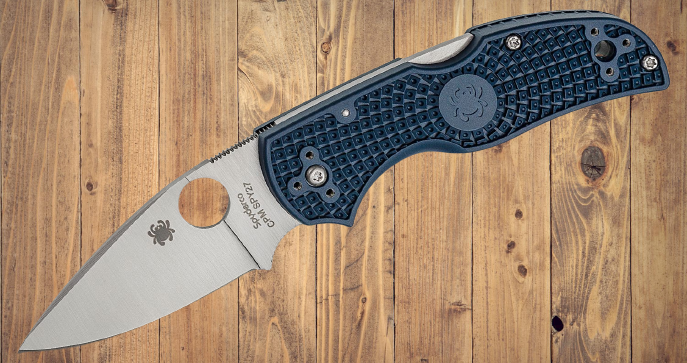
The Spyderco Native 5 Lightweight has a satin M4 steel blade and Mint Green FRN scales. The Native series is known for its excellent ergonomics and excellent build quality. The Native 5 is designed to allow you to choose between two different grip styles, offering the ultimate in leverage and control. With a back-lock system and strong lockback, the Native 5 is ready for the job.
One of the biggest differences between the Native 5 and its competitors is the handle. The Native 5 is made with a deep carry paperclip design, which is similar to the handles of many $20 Chinese production knives. This means that you won’t have to deal with the full-size pocket clip when carrying your knife. The Native 5 is also very durable, and it’s easy to maintain and sharp. The Spyderco Native 5 weighs 2.7 oz.
Spyderco Para 3 Lightweight’s lock design
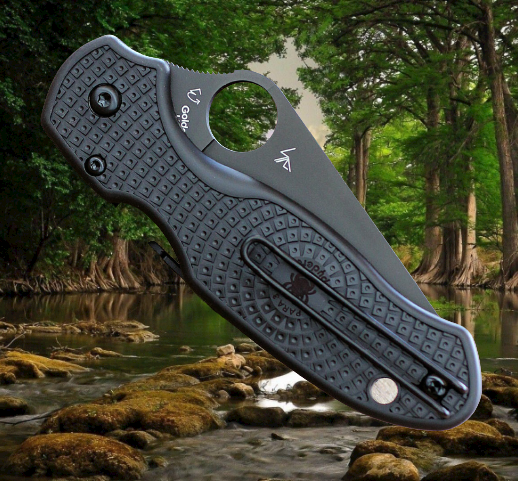
The lock design on the Spyderco Para 3 Lightweight is unique in many ways. The knife’s leaf-shaped lock is easy to open and close, and the blade’s point is super strong. It has a slightly raised belly, which is perfect for slicing, and an oversized thumb hole. The Spyderco Para 3 is made in Golden, Colorado. We tested it ourselves to see what we thought.
The Para 3 Lightweight’s lock design is also innovative, combining textured FRN scales with a lockbar insert. The lockbar insert wedges between the blade and the stop pin when it’s in the open position. This feature makes it ideal for fidgety users, but it does mean that you won’t be able to open your blade if you’re holding it at an angle.
Spyderco’s new CTS-BD1N stainless steel blade
The Spyderco Para 3 Lightweight has a compact design that makes it 30 percent lighter than other similar-sized folding knives. It features an open-backed construction with high-traction Bi-Directional Texture and a stainless steel lock bar, inset into the handle’s interior. A nitrogen-enriched high-carbon chromium steel blade (CTS-BD1N) provides superior edge retention and corrosion resistance.
This knife has a high-quality CTS-BD1N stainless steel blade with a satin finish. The CTS-BD1N steel has a CTS-BD1N hardness of 60-63HRC, and is complemented by a textured black FRN handle. The blade also has a notch for a lanyard or other accessory, making it an excellent choice for tip-up carry.
Spyderco’s maroon linen micarta scales
RC BladeWorks‘ maroon linen micarta lightweight scale kit is a great replacement for factory G10 scales. Made in the USA, these scales feature a smooth surface and a comfortable grip area. Customizing your Spyderco with these lightweight scales is an excellent option for serious bladesmiths. Just be sure to consult Spyderco’s warranty prior to installation, as doing so may void your warranty.
The Spyderco Para 3 knife is a great value at $82 and comes with a 92″ stainless steel blade, FRN handle, and maroon linen micarta PC. For a small additional cost, you can purchase replacement micarta scales in Worn Blue Denim or Maroon linen. These knives also have a stainless steel or titanium blade, as well as a pocket clip.
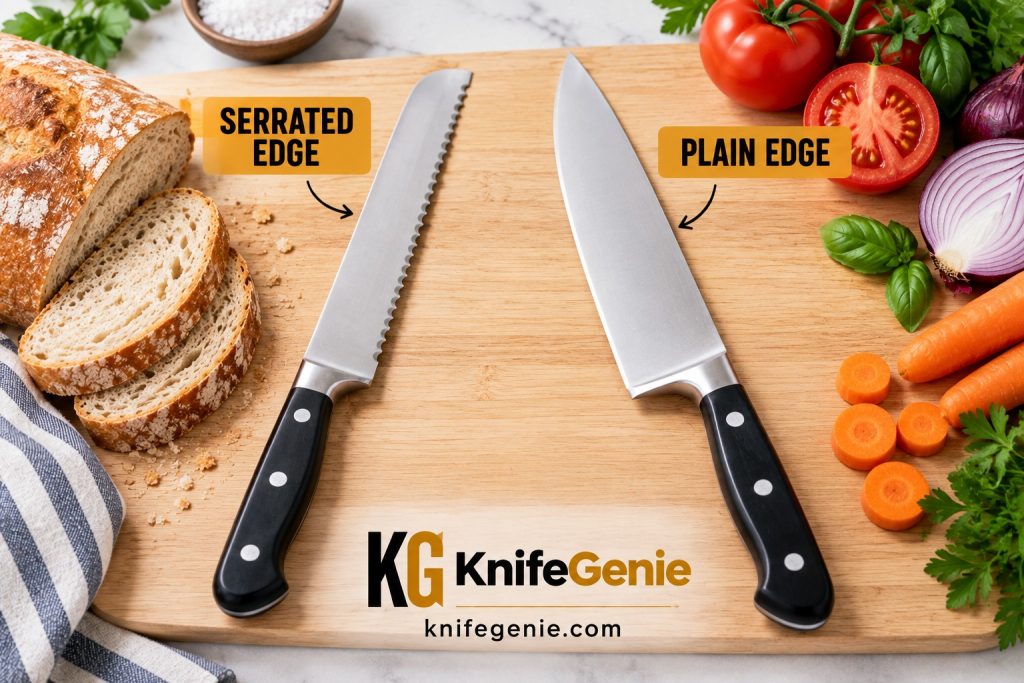
Serrated and plain-edge kitchen knives excel at different cutting tasks.
If you’ve ever tried to slice a crusty loaf with a chef’s knife—or chop an onion cleanly with a bread knife—you already know that serrated and plain edges aren’t interchangeable.
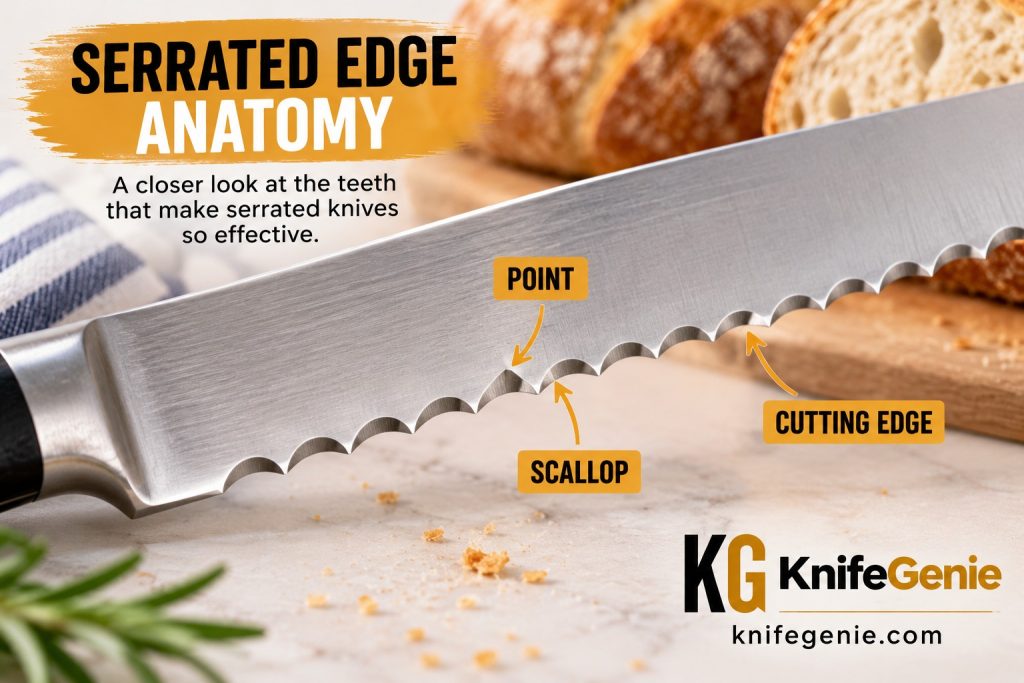
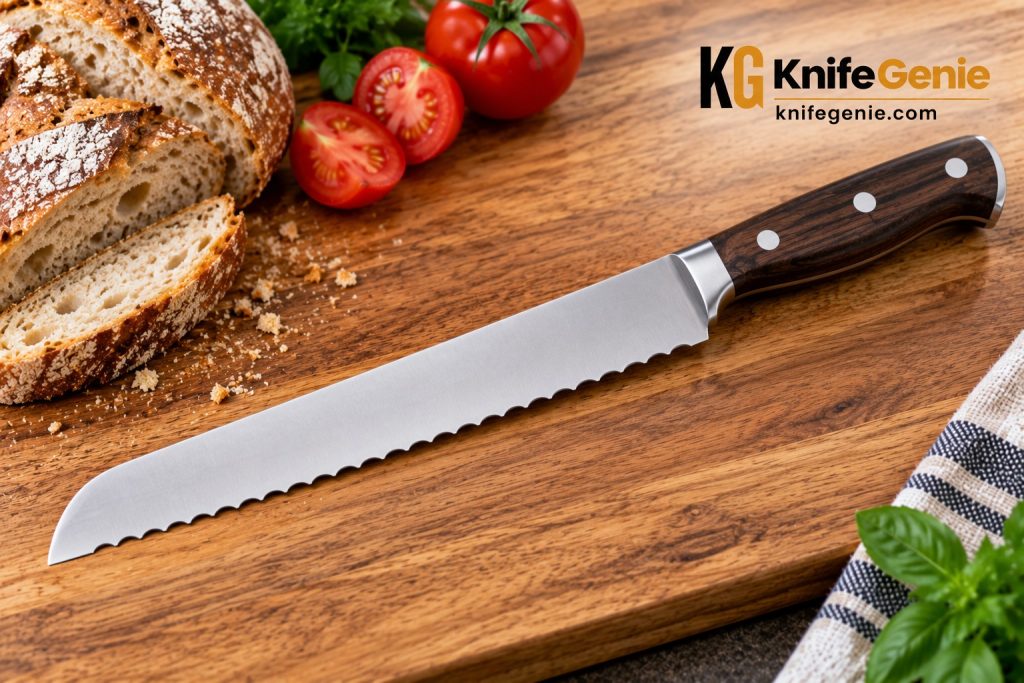
Ever ask yourself this question? Serrated vs plain edge kitchen knives: Which is better? Well, here we will answer it for you. A serrated knife has a row of pointed teeth and recessed scallops along its cutting edge. Those teeth help the knife bite into foods with a tough exterior and softer interior, which is why serrated knives are so effective on bread and ripe tomatoes.
A plain-edge knife has one continuous cutting edge. It gives you cleaner, more controlled contact with the cutting board and is usually the better choice for chopping, dicing, mincing, slicing meat and most everyday food preparation.
So which should you buy?
🔪 The Quick Answer
For most everyday kitchen work, choose a good plain-edge chef’s knife.
It is the more versatile option for vegetables, herbs, raw meat, cooked meat and general food preparation.
But that doesn’t make a serrated knife unnecessary.
A serrated bread knife is one of the most useful companion knives you can own, particularly if you regularly cut crusty bread, soft rolls, cakes or ripe tomatoes.
For a well-equipped home kitchen, therefore, the answer isn’t really serrated or plain edge.
The important point is that serrations don’t automatically make a knife sharper or better. The two edge styles simply apply cutting force differently.
SERRATED VS PLAIN EDGE
Serrated and plain-edge knives cut differently, making each better suited to particular kitchen tasks.
🔪 What Is a Serrated Knife Edge?
Look closely at a bread knife and you’ll see a series of teeth and recessed scallops rather than one uninterrupted edge.
That’s a serrated edge.
When you begin a slicing motion, the projecting points make initial contact with the food. They can bite through a resistant exterior while the recessed sharpened sections continue the cut.
This is especially useful when a food has contrasting textures.
Think about a loaf of sourdough:
Hard crust outside. Soft crumb inside.
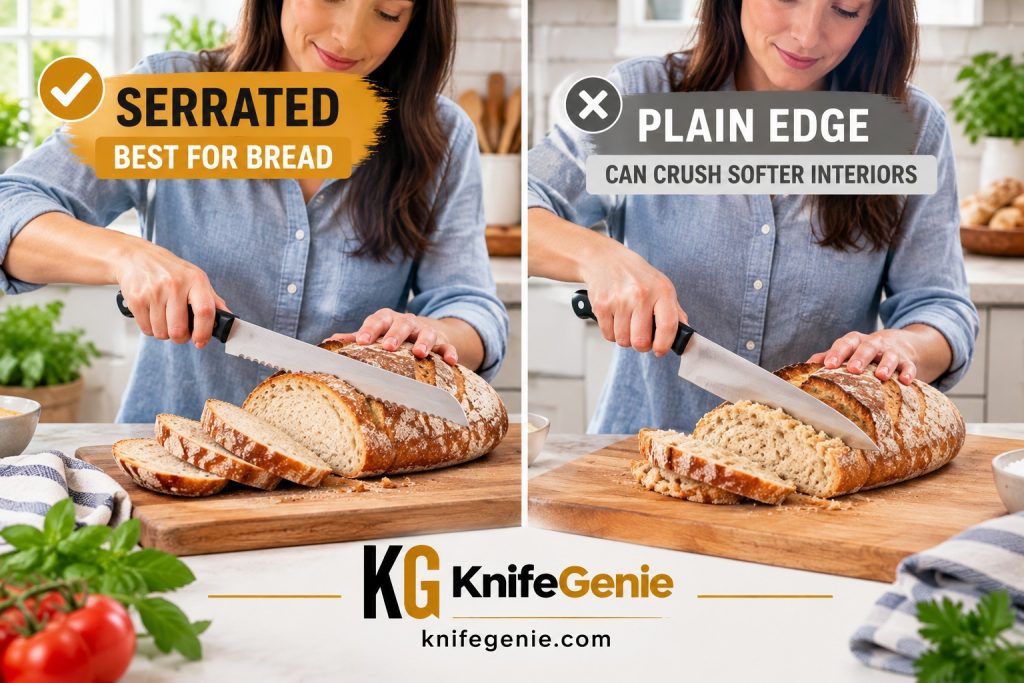
Pressing down with a dull or unsuitable knife can crush the loaf before the blade gets through the crust. A long serrated bread knife allows you to use a controlled back-and-forth slicing motion instead.
The same principle helps with:
crusty bread
bagels and rolls
ripe tomatoes
citrus fruit
cakes with firmer exteriors
some thick-skinned fruits
That doesn’t mean serrated knives are automatically superior cutters. Their advantage comes from matching their edge geometry to the food. Let’s continue with our serrated vs plain-edge kitchen knives comparison.
SERRATED EDGE ANATOMY
The projecting points help initiate the cut while the sharpened scallops continue slicing through the food.
A plain—or straight—edge has a continuous sharpened edge from heel toward tip without serrations.
Your chef’s knife, santoku, gyuto, paring knife and many carving knives use some form of plain edge.
Its greatest advantage is continuous, predictable contact with the ingredient.
When you’re chopping an onion, mincing parsley or slicing chicken breast, you usually don’t want a blade that saws through the food. You want a sharp edge that passes cleanly through it.
A plain edge is therefore much better suited to the cutting motions used in everyday meal preparation:
Rock. Push. Slice. Chop. Dice. Mince.
It is also considerably easier for most owners to sharpen.
PLAIN EDGE ANATOMY
A plain edge provides continuous blade contact for clean slicing, chopping and dicing.
🍅 How Do Serrated and Plain Edges Actually Cut?
This is where the comparison becomes more useful.
A serrated knife concentrates the initial cutting pressure at its projecting points. With a slicing motion, those points can penetrate resistant skins and crusts without requiring you to push heavily downward.
A plain edge distributes the cutting action along a continuous sharpened edge.
When properly sharpened, that continuous edge produces exceptionally clean cuts.
That’s why a serrated knife can feel surprisingly effective on a tomato even when it hasn’t been sharpened for a long time, while a dull chef’s knife may skid across the skin.
But compare that same serrated knife with a properly sharpened chef’s knife while dicing an onion and the advantage reverses.
The plain edge gives you cleaner, more predictable cuts.
🍞 Which Is Better for Bread?
Winner: SERRATED
This is the easiest category to call.
A long serrated bread knife is designed to slice through a resistant crust while minimizing compression of the softer interior.
That’s particularly noticeable with:
sourdough
baguettes
artisan loaves
bagels
soft sandwich loaves
bread rolls
A very sharp plain-edge knife can slice bread, but there’s little reason to make it do the job if you have a good bread knife available.
KnifeGenie verdict
If bread is the main food you’re cutting, buy serrated.
BREAD CUTTING TEST
A serrated bread knife is designed to cut through firm crust while reducing pressure on the softer bread inside.
🍅 Which Is Better for Tomatoes?
Winner: SERRATED—unless your plain edge is very sharp
Tomatoes expose dull knives immediately.
Their thin skin resists penetration while the soft flesh underneath is easily crushed.
A small serrated utility or tomato knife bites into the skin with very little downward pressure. That makes it exceptionally forgiving.
But here’s the important qualification:
A properly sharpened plain-edge chef’s knife should also slice a tomato beautifully.
In fact, a very sharp chef’s knife can produce exceptionally thin, clean slices.
If your chef’s knife squashes tomatoes rather than slicing them, that’s often telling you more about the condition of its edge than about plain-edge knives in general.
KnifeGenie verdict
For effortless tomato slicing, serrated has an advantage.
For a sharp knife that can slice the tomato and then handle the rest of your meal prep, plain edge wins on versatility.
🥩 Which Is Better for Meat?
Winner: PLAIN EDGE
For most meat preparation, plain edge is the clear choice.
Raw meat benefits from clean slicing rather than a sawing action. A suitable chef’s, boning, carving or slicing knife can make controlled cuts without unnecessarily tearing the fibers.
A plain edge is preferable for jobs such as:
trimming meat
portioning boneless cuts
slicing chicken breast
carving roast meat
slicing steak
removing fat
general meat preparation
There are exceptions. Serrated steak knives are common at the table, and a serrated knife can be useful on foods with a particularly crisp exterior.
But don’t confuse that specialist role with general meat preparation.
KnifeGenie verdict
Choose a plain edge for kitchen meat preparation.
🥕 Which Is Better for Vegetables?
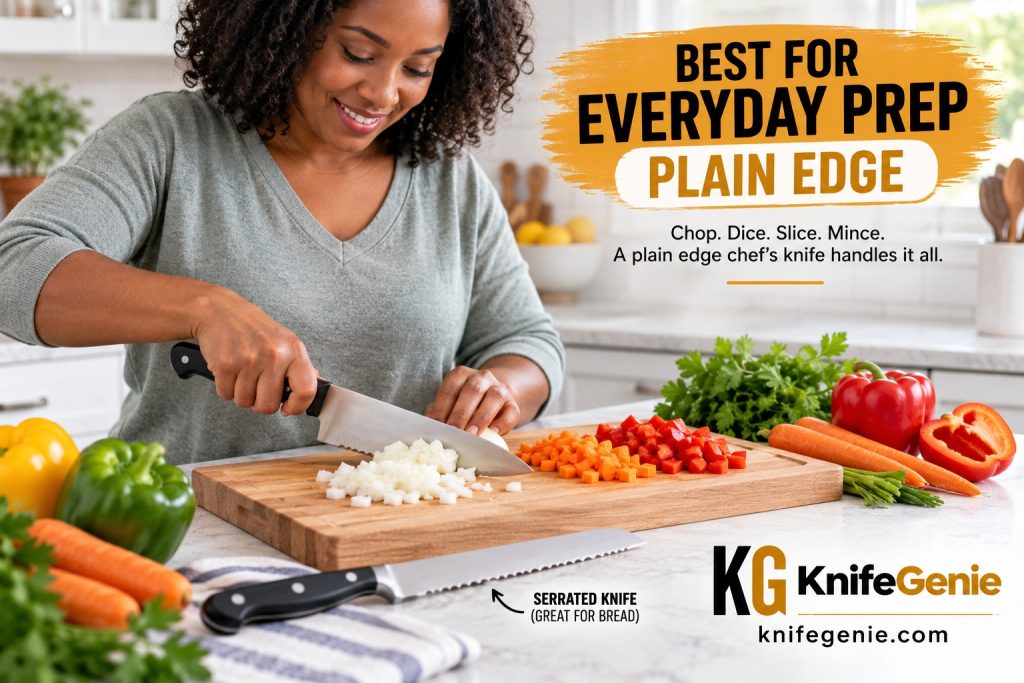
Winner: PLAIN EDGE
For the majority of vegetables, this isn’t close.
Imagine preparing dinner with onions, carrots, celery, peppers and herbs.
You need to:
chop → slice → dice → mince.
A sharp chef’s knife or santoku can perform all of those jobs efficiently.
A serrated knife’s teeth can catch and tear softer ingredients, and its sawing action isn’t well suited to repetitive board work.
There are some exceptions.
A serrated utility knife can be useful for vegetables and fruits with slippery or resistant skins and softer interiors.
But for everyday vegetable prep, choose plain edge.
VEGETABLE CUTTING TEST
For chopping, dicing and mincing vegetables, a sharp plain-edge chef’s knife is generally the more versatile choice.
⏱️ Which Edge Stays Sharp Longer?
This question needs a little nuance.
You’ll often hear that serrated knives “stay sharp longer.”
In practical use, they can certainly remain functional for a long time.
Part of the reason is their geometry. The recessed portions of the edge receive less direct contact with the cutting board than a continuous plain edge does.
But that doesn’t mean serrated knives never become dull.
They do.
The points can wear, the scalloped cutting surfaces can lose sharpness and eventually performance deteriorates.
A plain edge receives more consistent contact with food and the cutting board, so regular maintenance becomes more noticeable.
The trade-off is important:
Plain edges generally need attention more often, but they’re much easier to maintain and resharpen.
🪨 Sharpening: The Biggest Maintenance Difference
This is one of the most important differences between the two styles.
The precise method depends on the knife and its edge geometry.
The major advantage is that you’re dealing with a continuous edge.
That makes sharpening comparatively straightforward.
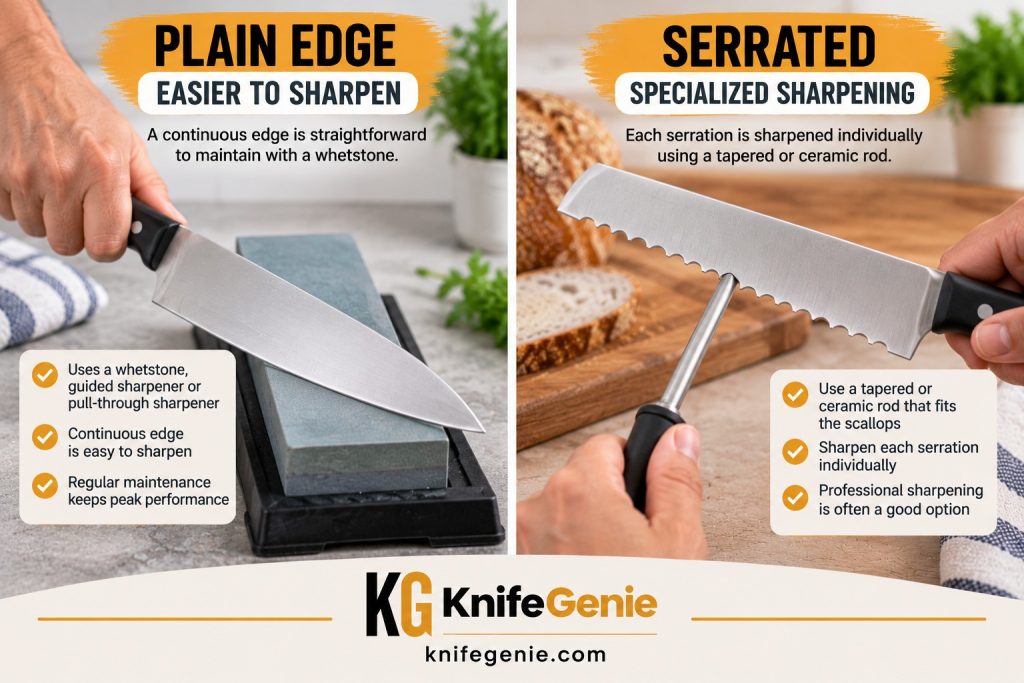
Sharpening a Serrated Edge
A serrated knife requires a different approach.
You generally should not simply run a serrated blade through an ordinary straight-edge pull-through sharpener unless its manufacturer specifically states that the device is suitable for that blade.
Instead, serrated edges may require an appropriately sized tapered or ceramic sharpening rod that fits the scallops.
The individual serrations are worked while maintaining the existing bevel. Afterward, any resulting burr on the opposite side is removed carefully.
That requires more time and precision than sharpening an ordinary plain edge.
And serrations vary.
Some are wide. Some are narrow. Some knives use unusual scallop patterns, micro-serrations or double serrations.
For expensive serrated knives—or whenever you’re unsure of the correct technique—professional sharpening is often the safer choice.
Important
Always follow the knife manufacturer’s instructions before sharpening a serrated blade. Don’t assume a sharpener that works with your chef’s knife is also suitable for your bread knife.
SHARPENING COMPARISON
Plain edges are generally easier to sharpen, while serrated blades may require a tapered rod or professional sharpening.
👍👎 Serrated Knife Pros and Cons
👍 Pros
Excellent for crusty bread
Very good for tomatoes
Works well on foods with firm skins and soft interiors
Requires little downward pressure when used correctly
Recessed sections of the edge receive less cutting-board contact
Useful specialist addition to a home knife collection
👎 Cons
Poor choice for most chopping and mincing
Can tear delicate foods
Less versatile for everyday preparation
More difficult to sharpen properly
Different serration patterns may require different sharpening tools
Not a replacement for a chef’s knife
👍👎 Plain-Edge Knife Pros and Cons
👍 Pros
Excellent all-purpose kitchen edge
Clean, controlled cuts
Ideal for chopping, slicing, dicing and mincing
Excellent for vegetables
Better suited to raw meat preparation
Easier to sharpen
Available on chef’s knives, santokus, gyutos, paring knives and more
👎 Cons
A dull edge may skid on tomato skin
Requires regular edge maintenance
Less effective than serrations on hard bread crust
Poor sharpening technique can alter the intended edge geometry
This is the option I would recommend to most home kitchens.
You don’t need two competing versions of the same knife.
You need two knives designed for different jobs.
A quality plain-edge chef’s knife handles the bulk of food preparation.
A long serrated bread knife takes over when you encounter bread, delicate baked goods and other foods where its toothed edge offers a genuine advantage.
That’s a much more practical setup than trying to make either knife do everything.
BUYING DECISION
Choose a plain edge for general food preparation and add a serrated knife for bread, tomatoes and other specialist slicing tasks.
❓ Frequently Asked Questions
Are serrated knives sharper than plain-edge knives?
Not inherently.
Sharpness depends on edge condition, geometry, steel and sharpening. Serrations do, however, concentrate initial contact at their points, helping them penetrate foods such as crusty bread and tomato skin effectively.
A properly sharpened plain edge can be extremely sharp.
Are serrated knives better for tomatoes?
They’re extremely good for tomatoes because the points readily penetrate the skin without requiring much downward pressure.
However, a properly sharpened chef’s knife can also slice tomatoes very cleanly.
Can you sharpen a serrated kitchen knife?
Yes, many conventional serrated knives can be sharpened.
Can a serrated knife be sharpened? Yes
A tapered sharpening rod sized to fit the scallops can be used to work individual serrations while maintaining their original bevel. Because the process is more complicated than sharpening a plain edge, professional sharpening is often worthwhile.
Some specialized or micro-serrated edges may have different maintenance requirements, so check the manufacturer’s instructions.
Can I use my regular knife sharpener on a serrated knife?
Don’t assume you can.
Many conventional pull-through sharpeners are intended for straight edges and can damage or alter serrations.
Only use a sharpening device on a serrated knife when the manufacturer specifically says that combination is compatible.
Is a serrated knife good for cutting meat?
It can cut meat, but for most kitchen meat preparation a suitable sharp plain-edge knife is preferable because it makes cleaner, more controlled cuts.
Serrated steak knives are useful at the table, but that’s a different job from trimming, portioning or carving meat during food preparation.
Is a serrated knife better for vegetables?
Generally, no.
A sharp plain-edge chef’s knife or santoku is much more versatile for chopping, dicing and mincing vegetables.
Serrated knives are particularly useful for produce with resistant skins and soft interiors, such as ripe tomatoes.
Do serrated knives need sharpening?
Yes.
Serrated knives can remain useful for a long time, but the edge eventually wears. When cutting performance deteriorates noticeably, the knife may need sharpening.
🏆 Overall Recommendation
Choose a plain-edge knife as your everyday kitchen workhorse.
Plain edge chef knife
If you’re buying your first serious kitchen knife, a versatile chef’s knife, santoku or gyuto with a plain edge should normally come before a bread knife.
It will handle far more of your daily preparation.
We’ve taken a look at the Spyderco Native 5 and Spyderco Para 3 Lightweight Scale and examined the knives’ lock designs, stainless steel blades, and lock design. We’ll also discuss the new CTS-BD1N blade that Spyderco has recently introduced. Read on to learn more about these new Spyderco knives. Weigh in at only 2.6 ounces, the Spyderco Para 3 Lightweight is a small, but impressive blade.
Spyderco Para 3 Lightweight
The lightweight construction of the Spyderco Para 3 Lightweight scale allows for nearly 30 percent weight savings over the original model. FRN scales are used in the Para 3 Lightweight. The scales’ bi-directional texturing provides a secure grip. Compression locks nest underneath the front scale. The knife’s stainless steel blade and lockbar boast high carbon and nitrogen content for balance and strength. The Para 3 Lightweight scales also feature a molded threaded insert.
For installation, you’ll need basic tools and knowledge of electronic instruments. You’ll need a high-quality torx bit set for screws and pivots. A video can help you get started. Because there are so many small parts, taking apart the Spyderco Para 3 isn’t recommended unless you’re a professional or have access to a shop. Also, attempting to disassemble the scale yourself may void your warranty.
Spyderco Native 5
The Spyderco Native 5 Lightweight has a satin M4 steel blade and Mint Green FRN scales. The Native series is known for its excellent ergonomics and excellent build quality. The Native 5 is designed to allow you to choose between two different grip styles, offering the ultimate in leverage and control. With a back-lock system and strong lockback, the Native 5 is ready for the job.
One of the biggest differences between the Native 5 and its competitors is the handle. The Native 5 is made with a deep carry paperclip design, which is similar to the handles of many $20 Chinese production knives. This means that you won’t have to deal with the full-size pocket clip when carrying your knife. The Native 5 is also very durable, and it’s easy to maintain and sharp. The Spyderco Native 5 weighs 2.7 oz.
Spyderco Para 3 Lightweight’s lock design
The lock design on the Spyderco Para 3 Lightweight is unique in many ways. The knife’s leaf-shaped lock is easy to open and close, and the blade’s point is super strong. It has a slightly raised belly, which is perfect for slicing, and an oversized thumb hole. The Spyderco Para 3 is made in Golden, Colorado. We tested it ourselves to see what we thought.
The Para 3 Lightweight’s lock design is also innovative, combining textured FRN scales with a lockbar insert. The lockbar insert wedges between the blade and the stop pin when it’s in the open position. This feature makes it ideal for fidgety users, but it does mean that you won’t be able to open your blade if you’re holding it at an angle.
Spyderco’s new CTS-BD1N stainless steel blade
The Spyderco Para 3 Lightweight has a compact design that makes it 30 percent lighter than other similar-sized folding knives. It features an open-backed construction with high-traction Bi-Directional Texture and a stainless steel lock bar, inset into the handle’s interior. A nitrogen-enriched high-carbon chromium steel blade (CTS-BD1N) provides superior edge retention and corrosion resistance.
This knife has a high-quality CTS-BD1N stainless steel blade with a satin finish. The CTS-BD1N steel has a CTS-BD1N hardness of 60-63HRC, and is complemented by a textured black FRN handle. The blade also has a notch for a lanyard or other accessory, making it an excellent choice for tip-up carry.
Spyderco’s maroon linen micarta scales
RC BladeWorks’ maroon linen micarta lightweight scale kit is a great replacement for factory G10 scales. Made in the USA, these scales feature a smooth surface and a comfortable grip area. Customizing your Spyderco with these lightweight scales is an excellent option for serious bladesmiths. Just be sure to consult Spyderco’s warranty prior to installation, as doing so may void your warranty.
The Spyderco Para 3 knife is a great value at $82 and comes with a 92″ stainless steel blade, FRN handle, and maroon linen micarta PC. For a small additional cost, you can purchase replacement micarta scales in Worn Blue Denim or Maroon linen. These knives also have a stainless steel or titanium blade, as well as a pocket clip.
When is it good to fish after a storm? This depends on the kind of fish you’re targeting. For instance, smaller fish may bite sooner, while larger predators may need more time to recover after a storm. If you’re fishing after a storm, the first thing to do is to make sure you’re fishing for species that will thrive in the storm’s aftermath. Read on for some tips and tricks.
Bass bite better after a storm
Many recreational anglers have a misconception about when bass bite after a storm. The truth is that the bass bite better after a storm because they are tucked away in the deeper areas. Once the storm passes, the bass slowly begin to return to their lazy and clam states. When the weather is nice, the bass will become aggressive, which is great for the recreational angler. However, after a storm, bass are not as active, so it’s important to fish the right area immediately after a thunderstorm to get the best bites.
As the storm moves through an area, barometric pressure will drop, which will entice the bass. During the storm run, you should be able to find some baitfish. You should be careful to watch for lightning and heavy rains on the surface, as these can spook the fish. After the storm passes, a cold front will move in, bringing clearing skies and a sharp rise in barometric pressure.
A strong wind will affect the water in a storm, and this can affect the bass. Use a fish finder to locate the fish in murky water. Try a lipless crankbait or other highly vibrating lures in murky water. Make sure to use the right retrieve speed and twitching motions during the storm. If you can’t see the bass, try fishing along feeder streams.
After a storm, bass migrate, leaving their usual hiding places for open water. When there is food in open water, they become aggressive. This is an ideal time for you to catch a bass because they leave their hideouts for more oxygen. You can also try fishing in these areas after a storm, so don’t forget to take some time to find them. You’ll be surprised at how aggressive they can be!
Surface runoff brings nutrients into the water, and the muddy water draws out minerals and oxygen from the soil. Bass will hang out in these areas and feed on the food. If you can find a spot where there is overhanging ground, that’s another great place to locate bass. This is also a good time to fish for panfish. A good place to look for them is near an overhanging snag, or in shallower waters, where they can feed on baitfish.
Flounder bite better after a storm
A few things can make a storm improve flounder fishing. Storm tides can be strong, forcing baitfish to the bottom where they lie in wait. Flounder have trouble navigating heavy tides, so the eddies present a prime opportunity for them to feed. Flounder are also more active at this time of year, which means you’ll have more chances to catch them. Here are some tips to get the most out of storm tides:
The following day, a storm usually brings a mass of cold, high-pressure air and winds. Once this mass clears the sky, the barometric pressure goes up quickly. Flounder will typically become active around 72 hours after the storm. As the barometric pressure returns to normal levels, they will be more likely to bite than they were before the storm hit. However, you must be prepared to deal with this.
When fishing during a storm, be sure to pick a spot where the barometric pressure drops to the lowest. Flounder will feed better after a storm as the pressure drops. However, be sure to avoid heavy rains and lightning during this period. They are easily scared by the sudden change in temperature, and lightning isn’t a good sign. After a storm, expect a few days of great fishing.
Another reason why the flounder bite better after a storm is because the water is murky. Fishing in this murky water can make fishing in the muddy waters difficult. If you’re an experienced angler, you’ll want to make sure you’re prepared and aware of the conditions. A storm isn’t necessarily a bad thing, but preparing is crucial to success. You should always avoid fishing in areas that are under high waves or on the beach.
Crab bite better after a storm
There’s one time when catching a crab bite is a lot easier than it is during the rest of the year. A storm brings up some nasty tides, and crabs become more active in these waters. During stormy weather, the best time to crab is right after the storm has passed. However, if you’re in the mood for some outdoor activity, crab fishing after a storm is the way to go.
Although crabs can be caught throughout the year, certain temperatures yield better catch rates. In the coldest part of winter, when the water temperature drops below 50 degrees Fahrenheit, crabs are not active. In the warmest part of the year, around 65 degrees F, crabbers can harvest bigger crabs. Early morning and late evening are also prime times for crab fishing. Typically, crabs are at their best during the spring and fall months.
When deciding on the best time to go crabbing, the warmer the waters, the better. The cooler the water gets in winter, the crabs will migrate to warmer waters to survive the harsh weather. Also, when crabbing in northern waters, be sure to consider the climate. Colder water temperatures can cause crabs to migrate, and crabs that are inactive in the winter will be inactive in warmer waters.
It depends on the type of crab you want to catch. Bluefin are active near the Davenport fingers, so if you’re looking for bluefin, be patient. These fish tend to be deeper than the rest of the ocean, so the weather might have some bearing on the number of crabs that you catch. If you’re planning to go out on a late night crab fishing trip, however, you’ll need to be prepared for windy conditions.
Crabs are good bait for fishing after a storm
A rainstorm is an excellent time to catch crabs. As a matter of fact, they are one of the best baits for fishing after a storm. The storm brings up nasty tides beneath the surface, making the crabs more active. Crabs are attracted to these conditions and are likely to be more plentiful after a storm. So, what are the best baits for fishing after a storm?
You can find good crabs in a few ways. First, use a bait box. Crabs prefer to remain on a piece of bait if it is kept in a plastic bait box. Another method is to use a crab ring, which will prevent the crab from tearing off your bait. Crabs will tend to settle in the channels where tides are strongest, so they are an excellent choice for fishing after a storm.
Fishing Offshore After Stormy Weather
Another method is to fish offshore. During a storm, offshore fish don’t feed much, so you can continue to bottom fish. But when things calm down, the fish are ready to eat. For freshwater fishermen, surface plugs are a good bait for fishing after a storm. Because the water column is still cloudy, a crab or other freshwater bait will attract hungry fish.
Another way to identify a crab is to look for the swollen back swimmer fin. This is the newly developed soft shell swimmer fin, and it can be easily identified. Just make sure you scoop the crabs up with the help of a crab net. If you are unsure about the sex of the crab, create a new thread. This will allow other people to ask about the issue.
Mole crabs are another good bait for the surf. You can collect them by hand or use commercially available scoops. You can cut the crabs in half and use the other half for bull reds, drum, and smaller reds. Also, crab knuckles make good bait for croakers. If you’re interested in using crabs for fishing after a storm, it is important to gather plenty of them.
If you’re new to blade making, learning how to sharpen a convex blade can be quite difficult. If you’ve already made some blades, however, you probably don’t find it difficult. In fact, you may have made many blades and have already learned how to hone them. Either way, it’s important to learn how to sharpen a convex blade properly and avoid common mistakes.
Easy to make
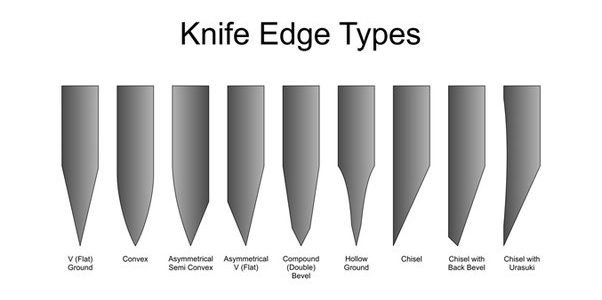
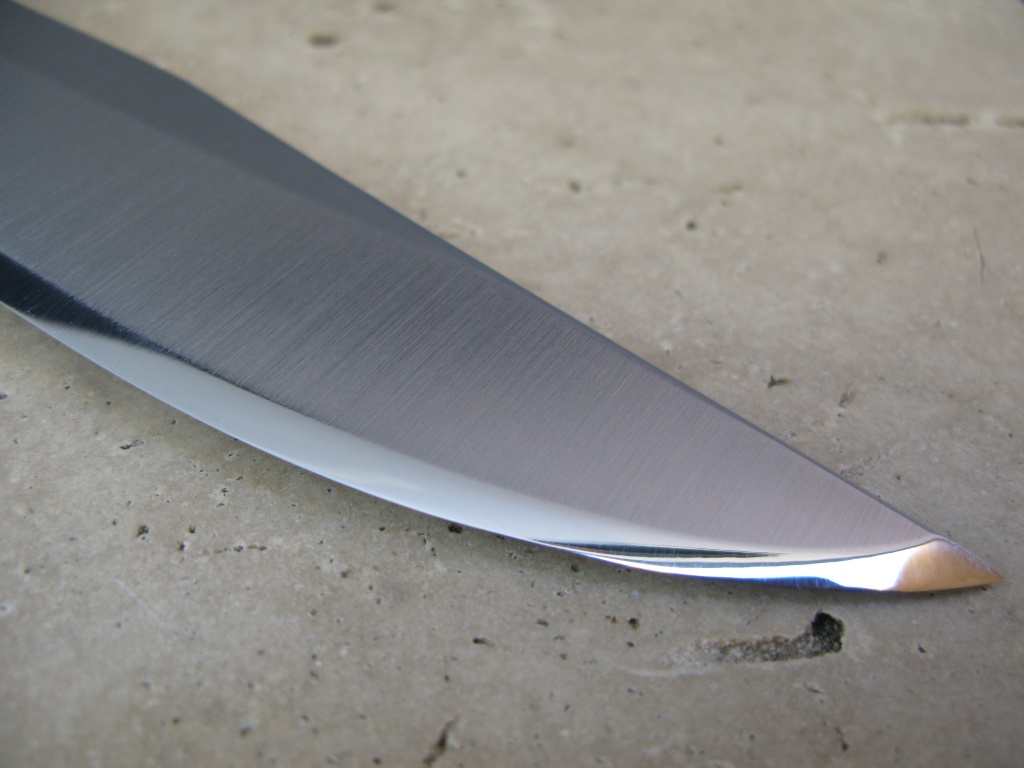
How to sharpen a convex edge? Convex edges are the same as regular blades and can be sharpened at any angle, even a higher or lower angle. These edges are made up of many facets, the more facets there are, the smoother the curvature. As the angle and grit change, the convex edges will smooth themselves out and be sharper.
A convex edge is often known as a Moran grind. It is a rounded shape that tapers to the point where the blade cutting edge is sharpest. This grind type is considered superior to other types because of its durability and wear down properties. It also produces less drag when sharpening a blade than other types of edge. A convex edge is not a new blade sharpening technique, but it does require some basic knowledge.
Once you’ve got the basic set-up and are ready to grind, you can begin sharpening your convex blade. You should first make sure that the edge is damaged before sharpening. If it’s not, you should start with a coarse edge and work evenly. You can also try to remove a burr, which is a piece of metal that pushed off the blade. This is similar to breaking a thin piece of metal by hand.
Easy to sharpen
One of the first things you should know about how to sharpen a convex blade is how it cuts. Blades do not always cut uniformly. Every cut has its own nuance. The shape of your blade, its steel type, and how it is crafted can all play a role in its ability to cut. It is important to know how to sharpen a convex blade properly so that you can use it effectively for different tasks.
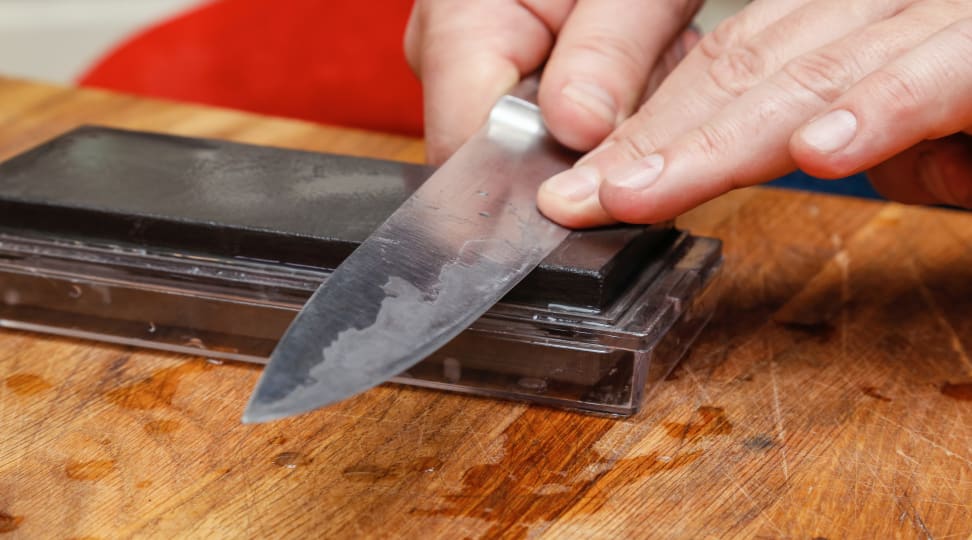
To sharpen a convex blade, you should start by soaking the stone with water. Generally, you should soak it for at least 10 minutes. The water can be dripped on the stone, so that it is wet but not saturated. The next step is to reverse the process and sharpen the other side of the blade. You can also use an Original Knife & Tool Sharpener to do the job for you.
Disadvantages of convex grinds
The disadvantages of convex grinds when sharpened blades are similar to those of flat grinds. The flat grind is a more palatable choice for some blades because of its middle ground strength and lack of binds and waviness. Flat grinds are similar to convex grinds in their curvatures and lack of secondary bevels, and some even call them Scandi grinds.
A convex grind is a bit stronger than a hollow grind, but the flat grind is more efficient. Convex grinds also are easier to sharpen, which is an important feature when sharpening a blade. Regardless of their strength, however, they often dull the edge faster than their counterparts. This is why convex grinds are often called “Axe Grinds.”
A convex grind has an angled edge that is flat in the middle, but is slightly bowed outward. This grind tends to be the most durable and sturdiest grind, and it has the least contact with material. Because it is more expensive, convex grinds are usually used on custom-made blades. They require special equipment and are not widely available outside of the custom market.
Ways to maintain convexity while thinning blade
There are several ways to maintain the convexity of your knife edge while thinning. Generally, convex edges have a longer and more supportive material than their V-grind counterparts, and they retain their edge better than their V-grind counterparts. However, when you switch from one type of edge to the other, you may find that it requires more grinding to achieve the desired result.

















 Jump to What You Need