

Why Kitchen Knives Get Dull So Quickly

Why kitchen knives get dull so quickly
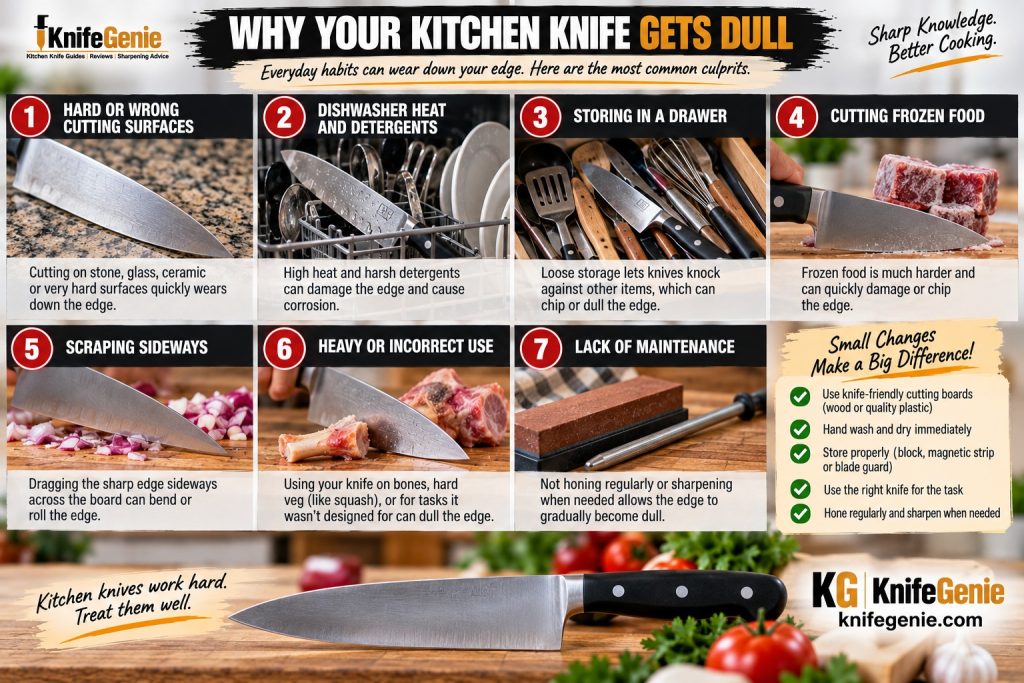
Several everyday kitchen habits can make a knife lose its sharp edge faster.

Have you ever sharpened a kitchen knife, enjoyed that wonderfully crisp edge for a while, and then wondered:

Why is this knife dull again already?

You’re not imagining it.

Every kitchen knife eventually loses sharpness. But if your knives seem to get dull unusually quickly, the knife itself may not be the main problem.

Your cutting board, storage method, cleaning habits, cutting technique and even the foods you prepare can all affect how long an edge lasts.

The Quick Answer

Kitchen knives get dull because their extremely thin cutting edges gradually wear, bend, roll or become damaged during normal use.

The process happens much faster when you:

❌ Cut on glass, ceramic or stone

❌ Scrape food sideways with the cutting edge

❌ Put knives in the dishwasher

❌ Store them loose with other utensils

❌ Cut bones, frozen foods or other materials the knife wasn’t designed for

❌ Ignore regular edge maintenance

The good news?

A few simple changes can help your kitchen knives stay sharp considerably longer.


🔎 About This Guide

This article is based on research into knife construction, sharpening, manufacturer care recommendations and established knife-maintenance practices. KnifeGenie has not personally tested every knife, steel or sharpening system mentioned. The goal is to explain the principles behind kitchen-knife edge wear so home cooks can make better care and maintenance decisions.


 Jump to What You Need

The Quick Answer

👉 Why Do Kitchen Knives Get Dull?

👉 9 Reasons Kitchen Knives Get Dull So Quickly

👉 What Makes a Kitchen Knife Dull Faster?

👉 How Can You Tell When a Kitchen Knife Is Dull?

👉 Is Your Knife Dull—or Does It Just Need Honing?

👉 How to Keep Kitchen Knives Sharp Longer

👉 Frequently Asked Questions

👉 Final Cut: Why Kitchen Knives Get Dull So Quickly


Why kitchen knives get dull so quickly
Several everyday kitchen habits can make a knife lose its sharp edge faster.


🔪 Why Do Kitchen Knives Get Dull?

A sharp knife has an extremely thin cutting edge.

That thin edge is precisely what allows the blade to bite into tomato skin, glide through onions and slice meat cleanly.

But there’s a trade-off.

Because the edge is so thin, it takes repeated stress every time you use the knife.

Think about what happens while chopping an onion.

The knife passes through the onion…

Then the edge hits the cutting board.

Again.

And again.

And again.

During a long food-preparation session, that contact can happen hundreds of times.

Over weeks and months, the edge gradually changes.

Depending on the knife and how it is used, the edge may:

🔹 Become slightly misaligned

🔹 Roll to one side

🔹 Wear away microscopically

🔹 Develop tiny chips

🔹 Become rounded

Eventually, the edge no longer cuts as efficiently as it once did.

That is what we experience as a dull knife.

And some everyday kitchen habits accelerate that process dramatically.
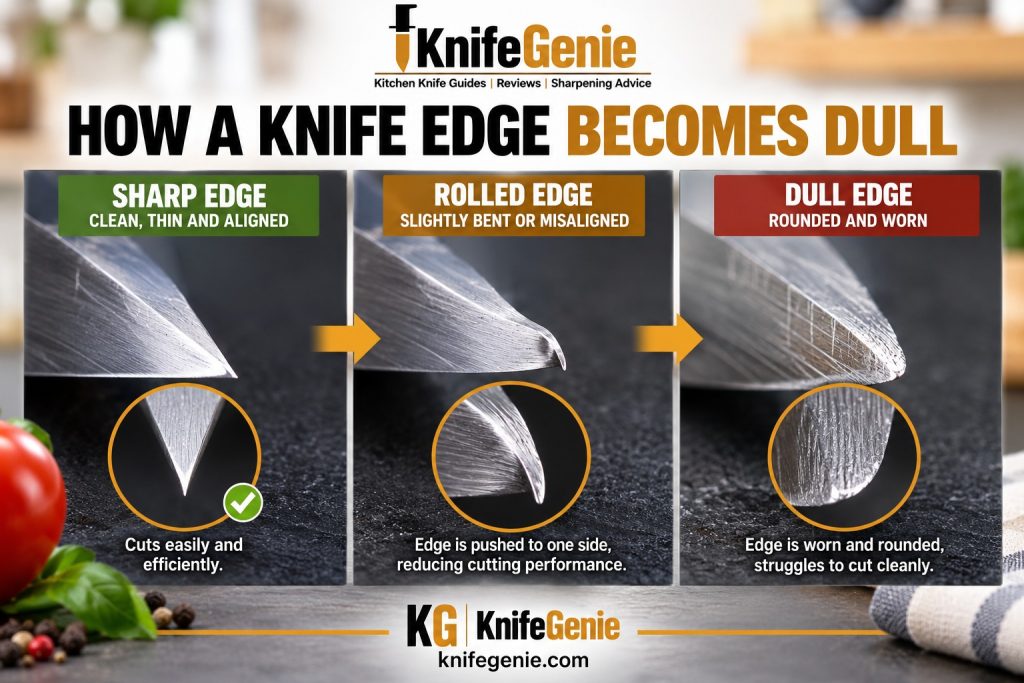

Sharp rolled and dull kitchen knife edges compared
A fine knife edge can gradually become misaligned, rolled or rounded through use.


🔍 9 Reasons Kitchen Knives Get Dull So Quickly

If your knife seems to lose its edge surprisingly fast, start with these common causes.


🪵 1. Your Cutting Board Is Too Hard

This is one of the first things to check.

Every time your knife completes a cut, its edge usually contacts the cutting board.

A forgiving cutting surface allows the knife edge to meet the board without taking unnecessary punishment.

A very hard surface does the opposite.

❌ Avoid Regularly Cutting On:

Glass

Granite

Marble

Ceramic plates

Stone countertops

Metal surfaces

These surfaces can be considerably harder and less forgiving than a suitable cutting board.

A beautiful glass cutting board might look hygienic and modern, but it is not friendly to a fine knife edge.

✅ Better Choices

For everyday kitchen use, wood and suitable plastic cutting boards are generally much kinder to knife edges.

If your expensive chef’s knife keeps becoming dull surprisingly quickly, check the board before blaming the blade.

💡 KnifeGenie Tip

Your cutting board is part of your knife-maintenance system.

A good knife on the wrong surface can lose performance far sooner than it should.
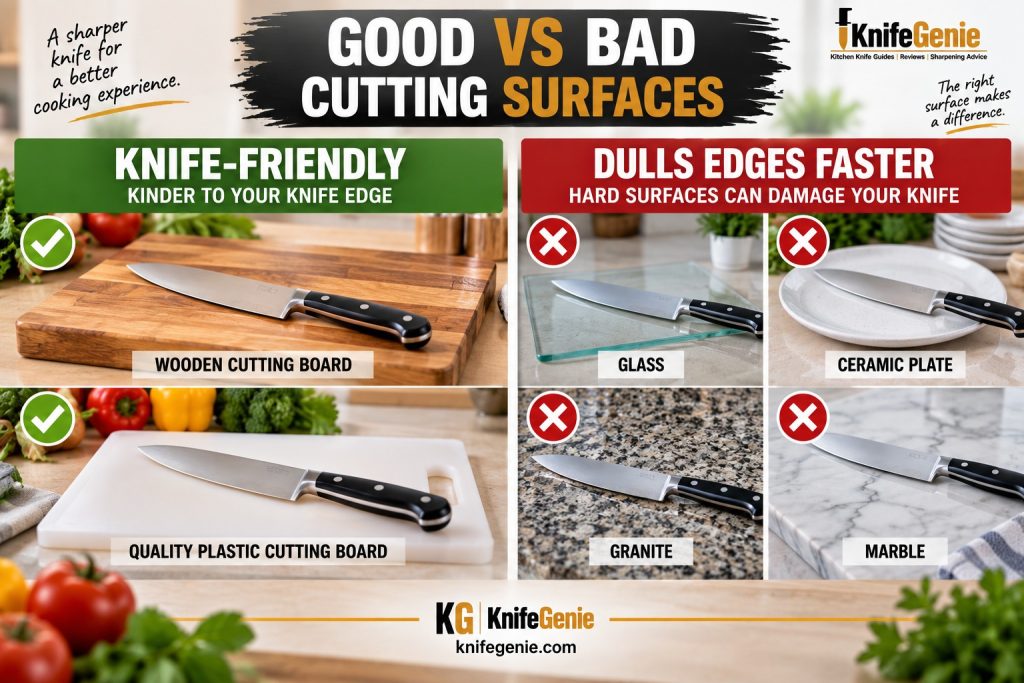

Knife-friendly wood and plastic cutting boards compared with glass and stone
Hard cutting surfaces can accelerate kitchen knife edge wear.


↔️ 2. You Scrape Food With the Cutting Edge

This habit is incredibly common.

You finish chopping onions.

Then you turn the knife sideways and drag the chopped pieces across the board using the sharp edge.

Convenient?

Absolutely.

Good for the edge?

Not really.

The knife is designed primarily to cut with forces directed through the edge.

Dragging that fine edge sideways across a cutting board subjects it to lateral stress.

💡 Better Habit

Turn the knife over and use the spine to move chopped food.

Even better, use a bench scraper when transferring larger quantities of vegetables.

It takes only a second and avoids unnecessary wear on your cutting edge.


Wrong and correct ways to move chopped food with a kitchen knife
Use the knife’s spine or a bench scraper instead of dragging the cutting edge sideways.


🧼 3. You Put Your Knives in the Dishwasher

A dishwasher might save time, but quality kitchen knives are generally better washed by hand.

Inside a dishwasher, several things can work against your knife.

There is prolonged moisture.

There are high temperatures.

There are strong detergents.

And the knife can potentially knock against racks, dishes or other utensils during the cycle.

That combination isn’t ideal for maintaining a fine cutting edge—or, depending on the knife, its handle and finish.

🏆 Better Routine

Wash your knife by hand with warm water, mild dishwashing liquid and a soft sponge or cloth.

Then dry it promptly.

It takes less than a minute.

And it is one of the easiest knife-care habits to adopt.

👉 Internal link: Can Kitchen Knives Go in the Dishwasher?
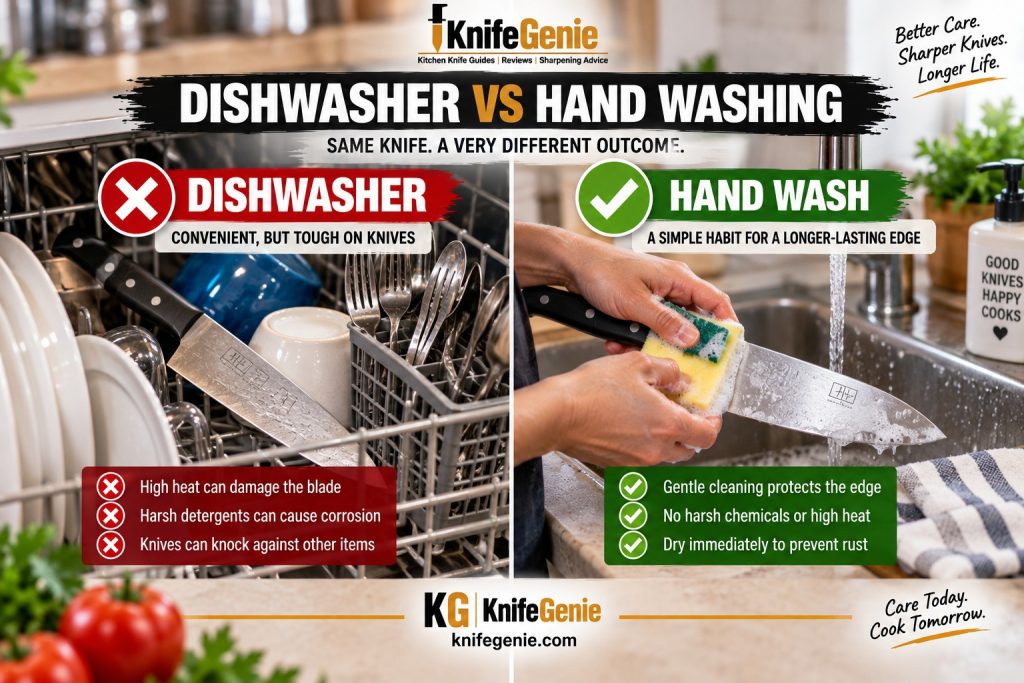

Kitchen knife in dishwasher compared with hand washing
Hand washing helps avoid the harsh conditions kitchen knives can encounter in a dishwasher.


🗄️ 4. Your Knives Are Loose in a Drawer

You wash your chef’s knife.

You dry it.

Then…

Clunk.

Into a drawer with forks, spoons, peelers and other knives.

Every time the drawer opens and closes, those objects can contact one another.

That isn’t how you want to treat a fine cutting edge.

Better Storage Options Include:

🧲 A suitable magnetic knife strip

🪵 A knife block

🛡️ Individual blade guards

🗄️ A dedicated knife drawer insert

The important principle is simple:

Protect the edge from unnecessary contact when the knife isn’t being used.

👉 Internal link: How to Store Kitchen Knives Safely
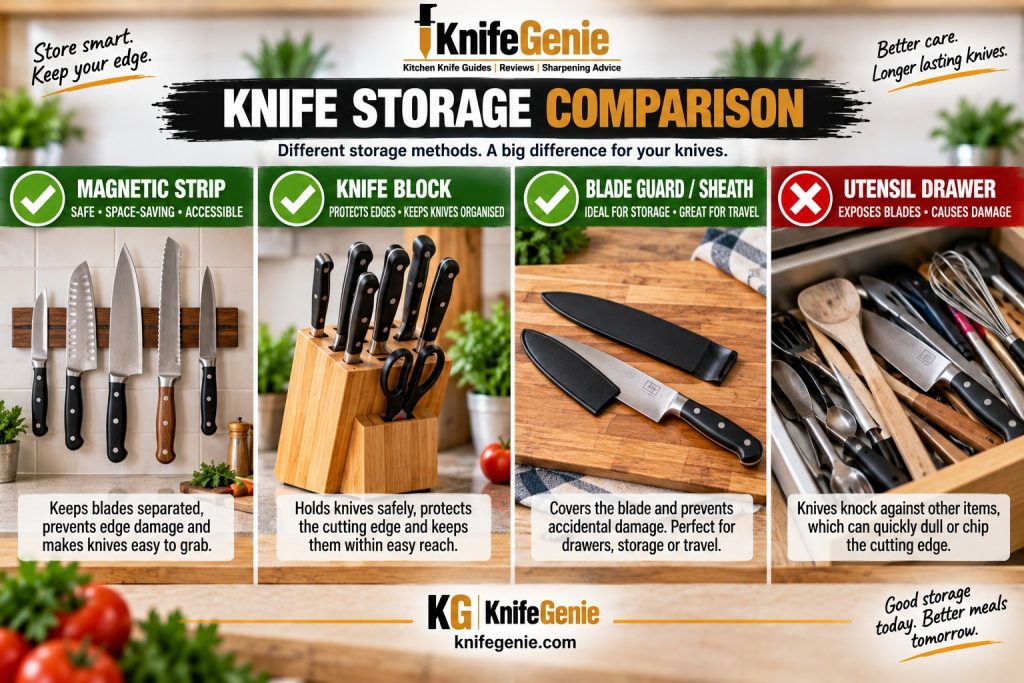

Knife block magnetic strip blade guard and loose drawer storage compared
Protecting the cutting edge during storage helps prevent unnecessary damage.


🦴 5. You’re Cutting Things Your Knife Wasn’t Designed to Cut

Your chef’s knife is versatile.

But versatile does not mean indestructible.

Trying to force a thin kitchen knife through extremely hard materials can damage the edge.

Be particularly cautious with:

🦴 Bones

🧊 Frozen foods

🐚 Hard shells

🍖 Thick joints

Extremely hard food can put more stress on the edge than the knife was designed to tolerate.

Depending on the steel and edge geometry, the result may be rolling, deformation or chipping.

💡 Use the Right Tool

A chef’s knife is excellent for vegetables, herbs, boneless meat and general food preparation.

It is not a substitute for a meat cleaver, bone saw or other specialized tool.

Using the appropriate knife for the task protects both the edge and the user.


🔪 6. Your Cutting Technique Is Hard on the Edge

How you use the knife matters too.

You don’t need to baby a good kitchen knife.

It is a tool.

But repeatedly twisting the edge while it is embedded in food, slamming it into the board or using excessive force can accelerate wear or damage.

Watch Out for:

❌ Aggressive chopping into the board

❌ Twisting the blade while cutting hard food

❌ Using the knife as a pry bar

❌ Using the tip like a screwdriver

❌ Striking bones with a thin chef’s knife

A sharp kitchen knife should do much of the work for you.

If you regularly need excessive force, either the knife is already dull or you may be using the wrong tool or technique.
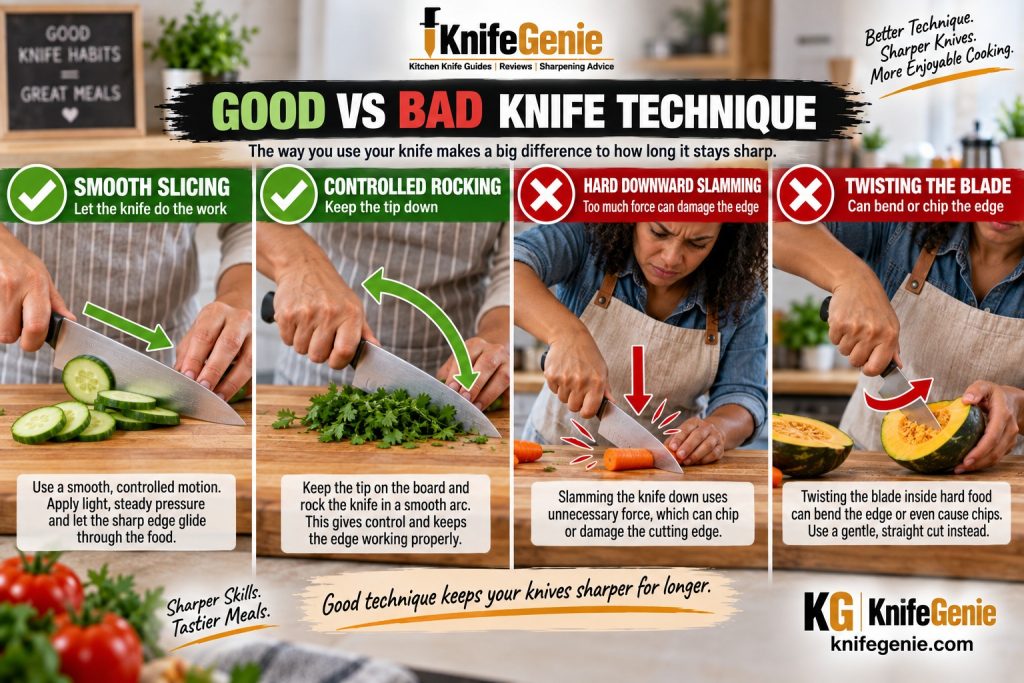

Good and bad kitchen knife cutting techniques compared
Twisting, prying and aggressive impacts can put unnecessary stress on a fine cutting edge.


🔩 7. The Steel and Edge Geometry Affect Edge Retention

Not every knife dulls at exactly the same rate.

Two chef’s knives can be used in the same kitchen and behave quite differently.

That’s because edge retention depends partly on factors such as:

🧪 Steel composition

🌡️ Heat treatment

💎 Steel hardness

📐 Edge angle

🔪 Blade geometry

🧱 Edge thickness

A relatively hard steel may support a fine edge and offer excellent edge retention.

But hardness isn’t everything.

Harder steels can sometimes be less tolerant of impacts or twisting, while somewhat softer steels may be tougher and easier to maintain.

⚠️ Important

Don’t judge a kitchen knife by hardness numbers alone.

A knife is a complete system.

Steel, heat treatment, geometry, sharpening and intended use all matter.


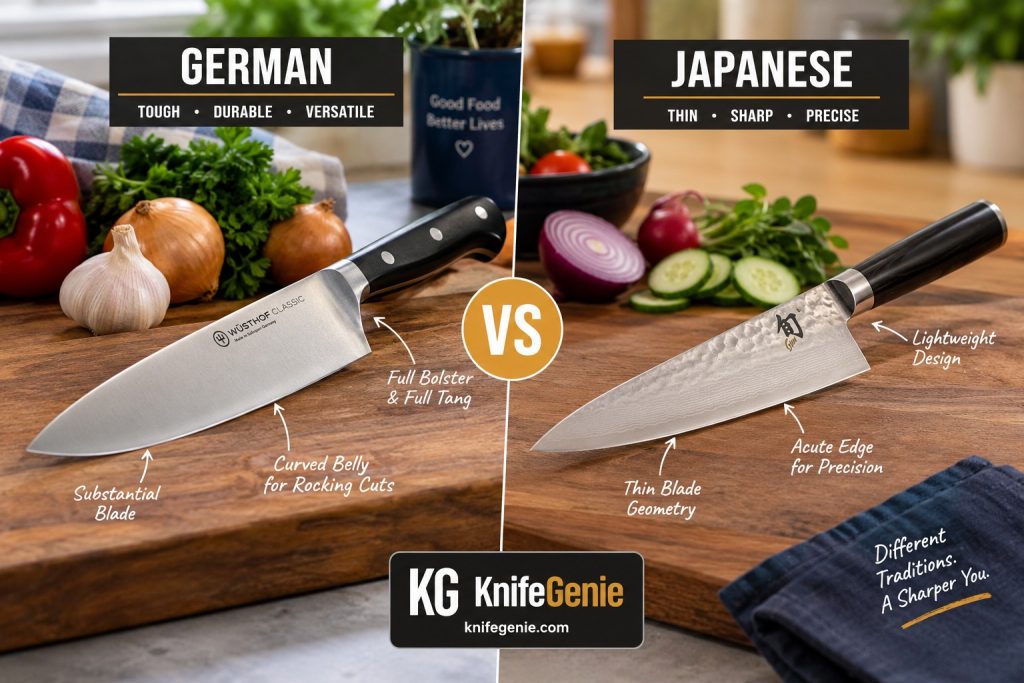
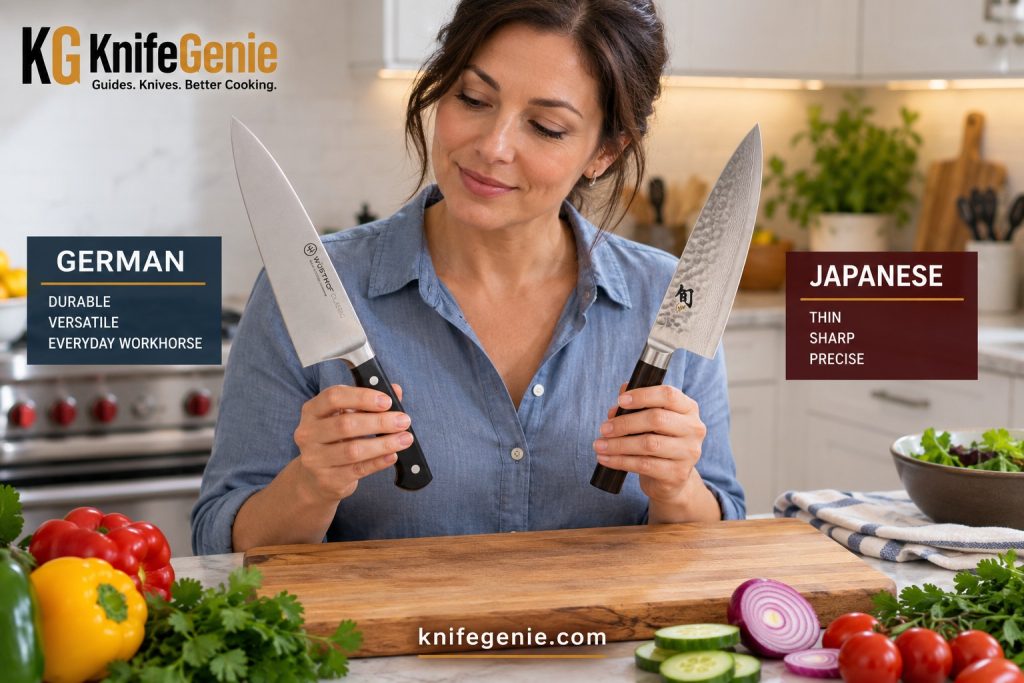
🇩🇪🇯🇵 8. German and Japanese Knives Can Dull Differently

This is where the difference between edge wear and edge damage becomes important.

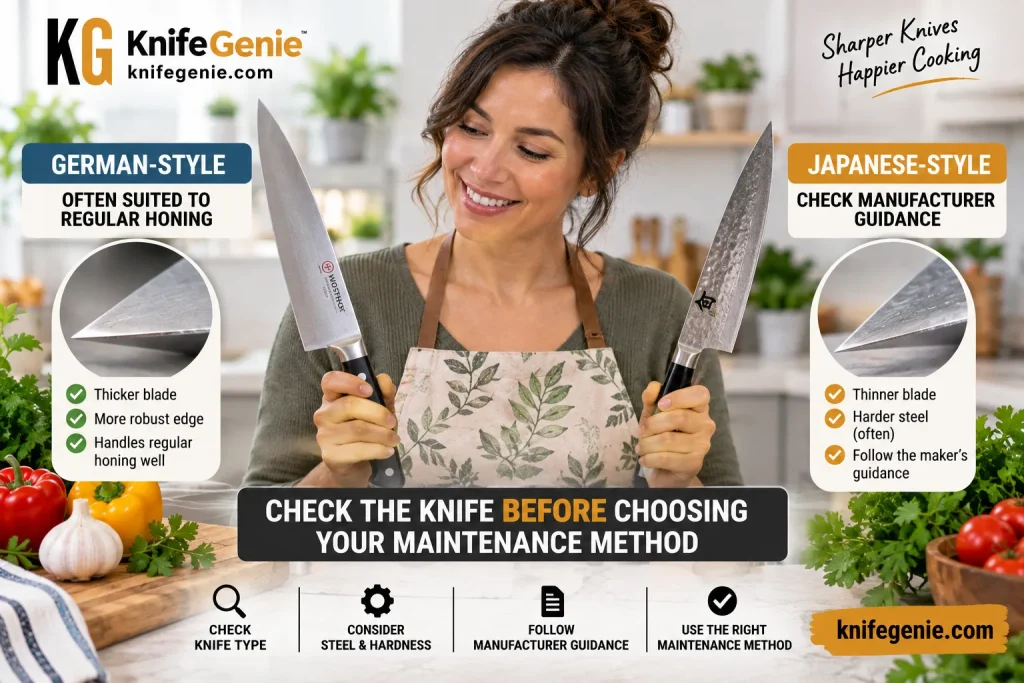
Traditional German-style kitchen knives commonly use relatively tough steels and robust edge geometries.

Many Japanese knives use harder steels and thinner, more acute edges.

That can create different maintenance characteristics.

🇩🇪 German-Style Knife

Often:

✔️ Tough

✔️ Relatively forgiving

✔️ Suited to regular honing when appropriate

✔️ More likely to tolerate everyday Western-style kitchen use

🇯🇵 Japanese-Style Knife

Often:

✔️ Harder steel

✔️ Thinner blade geometry

✔️ Fine cutting performance

✔️ Excellent potential edge retention

But that thinner, harder edge may be less tolerant of twisting, bones and other abuse.

Neither approach is automatically better.

They simply represent different design priorities.

👉 Internal link: German vs Japanese Kitchen Knives
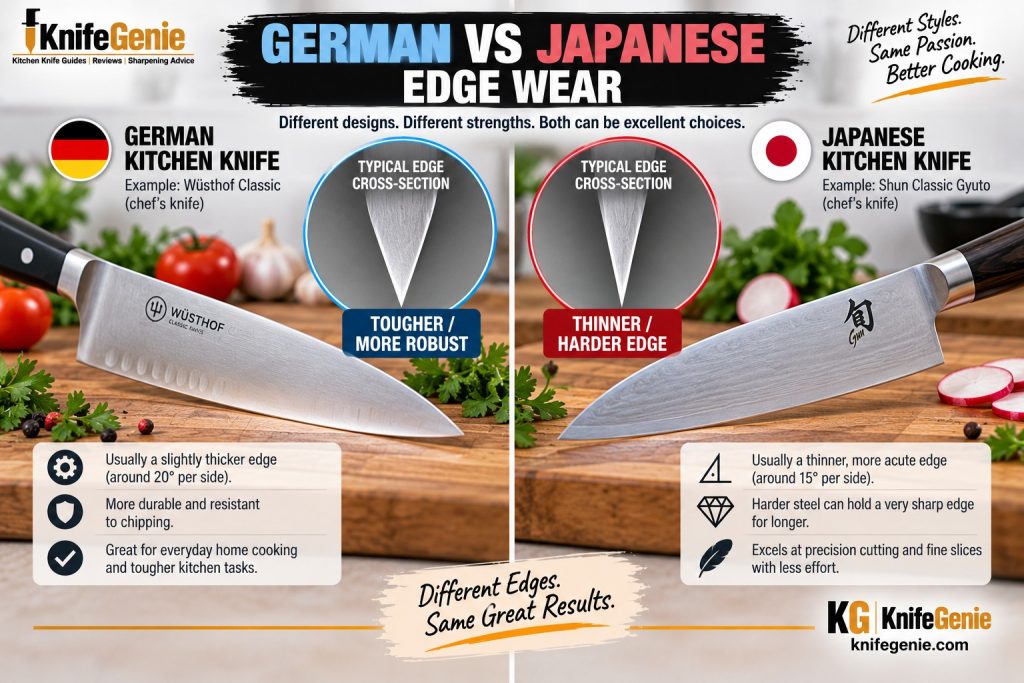

German and Japanese kitchen knife edge geometry comparison
Different steels and edge geometries can produce different edge-retention and maintenance characteristics.


⏱️ 9. You Use the Knife a Lot

Sometimes there is nothing wrong with your knife.

You simply use it frequently.

Imagine two people buying identical chef’s knives.

Cook A

Prepares dinner two or three times per week.

Cook B

Prepares breakfast, lunch and dinner almost every day.

Cook B’s knife might make thousands more cuts over the same period.

Naturally, its edge experiences more wear.

That’s why there is no universal sharpening schedule that works for everyone.

How often you sharpen should depend more on actual cutting performance than an arbitrary date on the calendar.

👉 Internal link: How Often Should You Sharpen Kitchen Knives?


📊 What Makes a Kitchen Knife Dull Faster?

Factor Effect on Edge Better Choice
Glass cutting board Very hard on edge Wood or suitable plastic
Ceramic/stone surface Accelerates wear Proper cutting board
Scraping with edge Adds sideways stress Use spine or scraper
Dishwasher Heat, detergent and contact Hand wash
Loose drawer storage Edge can contact utensils Block, guard or strip
Bones/frozen food Can roll or chip edge Correct specialized tool
Twisting blade Lateral stress Straight controlled cuts
Heavy use Normal accelerated wear Maintain as needed
No honing/maintenance Performance gradually declines Appropriate maintenance

Common reasons kitchen knives become dull quickly
Cutting surfaces, cleaning, storage, technique and heavy use can all influence edge life.


🧐 How Can You Tell When a Kitchen Knife Is Dull?

You don’t need laboratory equipment.

Usually, your food tells you.

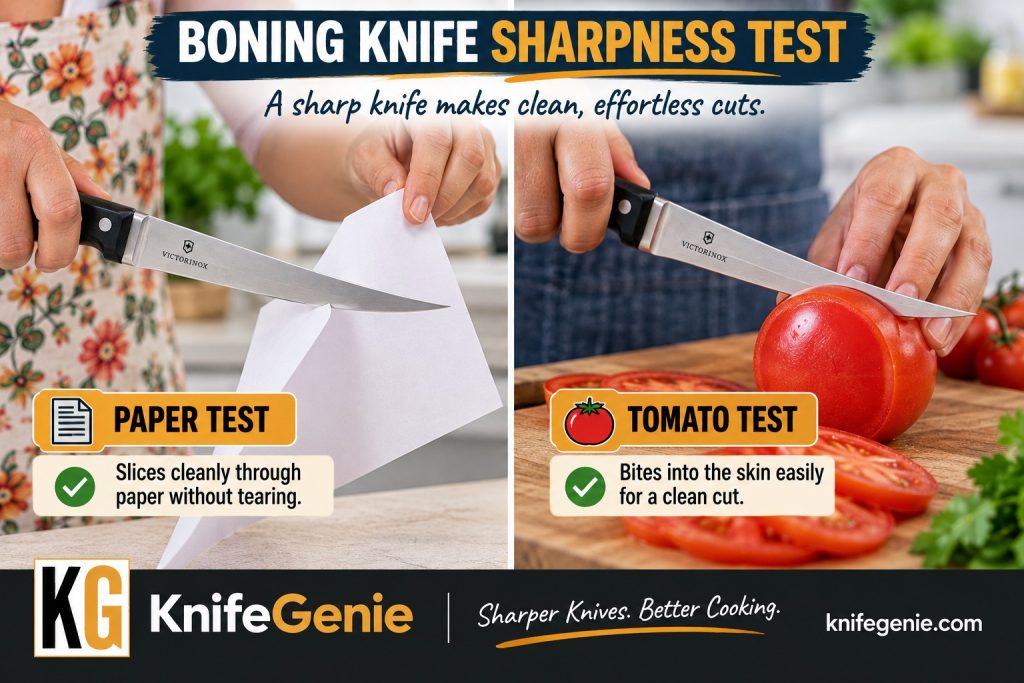
🍅 The Tomato Test

Place a ripe tomato on your cutting board.

Using normal safe cutting technique, try to begin a slice.

A properly sharp chef’s knife should bite into the skin without requiring excessive downward pressure.

If the blade slides across the skin or squashes the tomato before cutting, the edge needs attention.

🧅 Pay Attention During Normal Cooking

Other warning signs include:

❌ Onions becoming harder to slice

❌ Herbs bruising instead of cutting cleanly

❌ Meat requiring more sawing

❌ Carrots requiring noticeably more force

❌ The knife slipping rather than biting into food

❌ Cutting feeling less controlled

The change can happen gradually enough that you don’t notice it immediately.

Then you sharpen the knife and suddenly think:

“I forgot it was supposed to cut like this.”
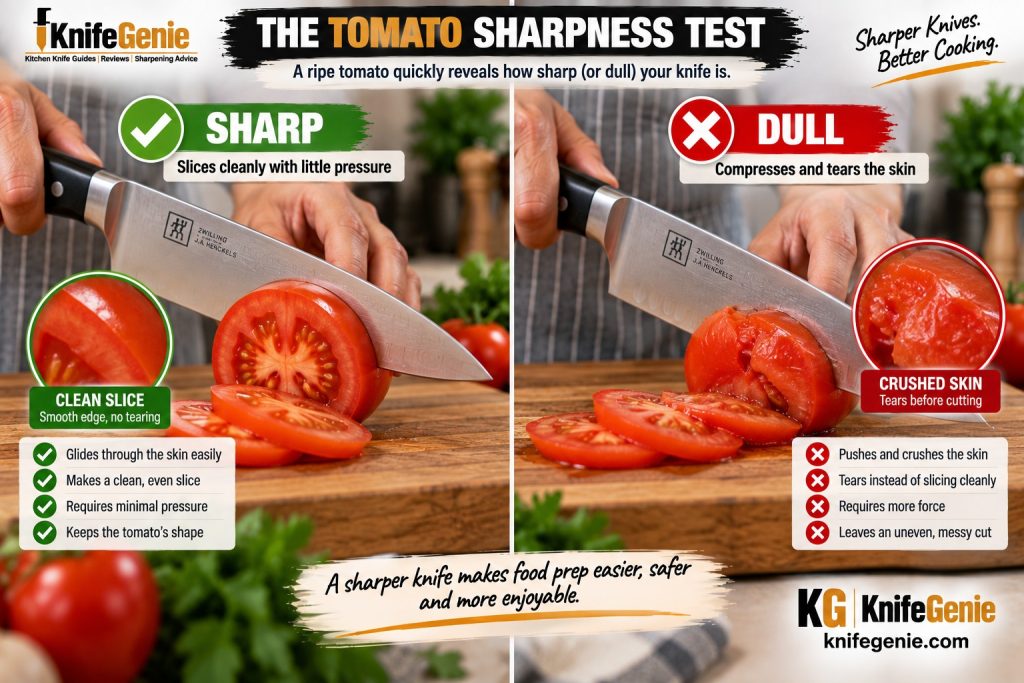

Sharp and dull kitchen knives cutting a ripe tomato
Difficulty biting cleanly into tomato skin is a practical sign that a knife edge needs attention.


🔧 Is Your Knife Dull—or Does It Just Need Honing?

This distinction can save you from sharpening unnecessarily.

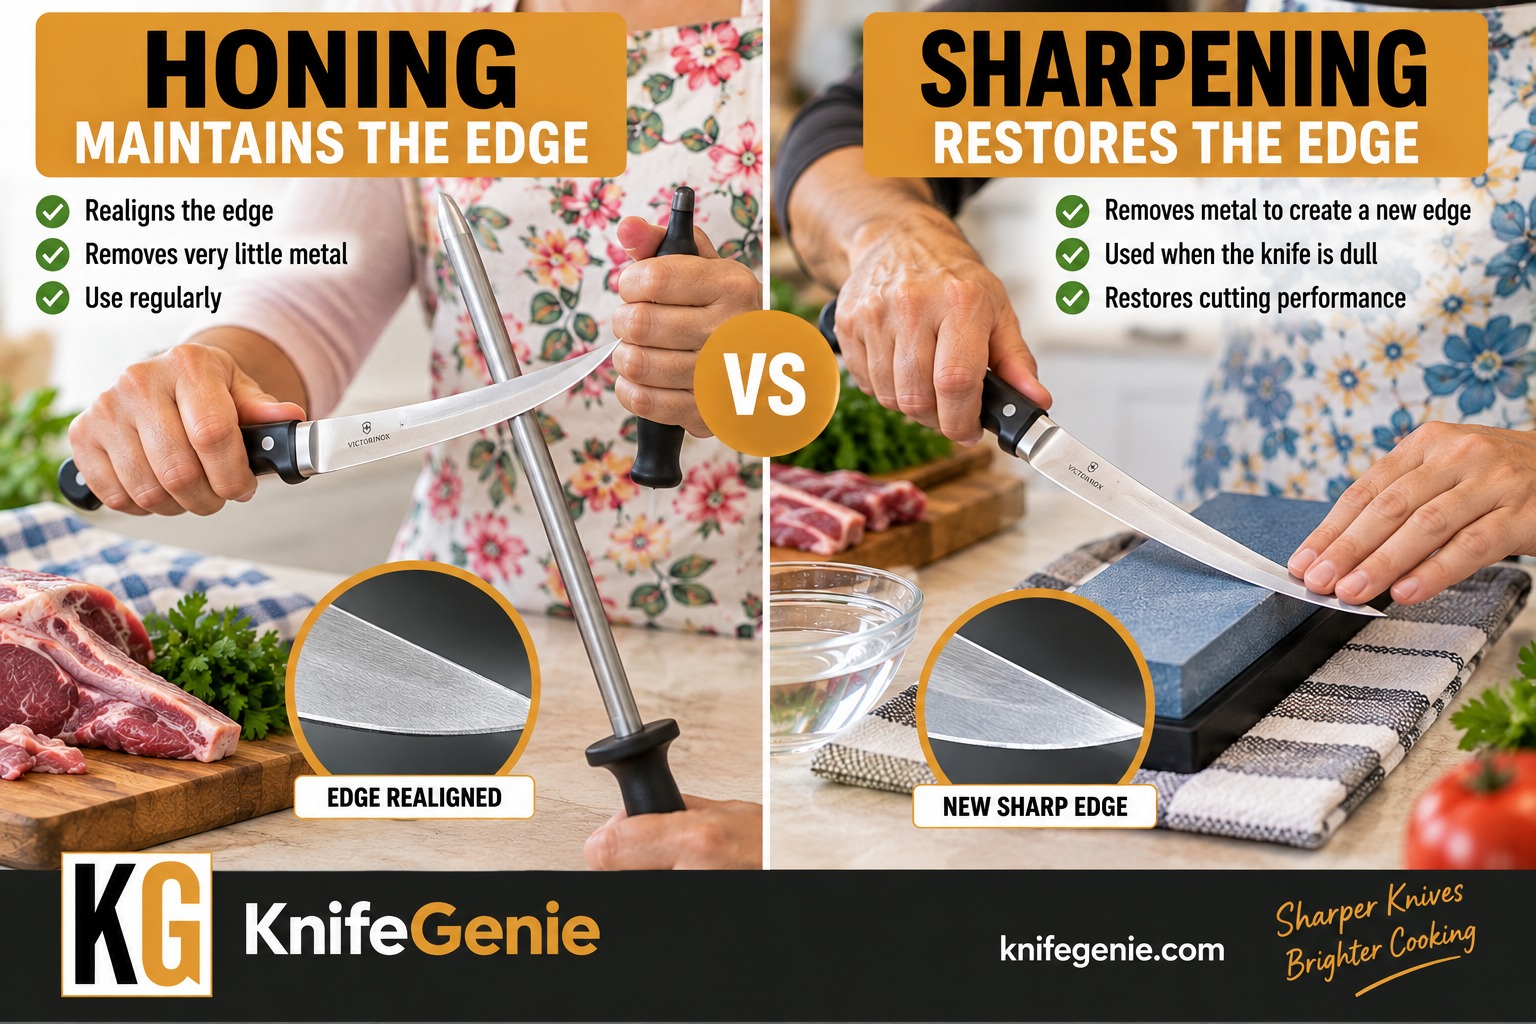
Honing and sharpening are not the same thing.

🔧 Honing

Honing primarily helps maintain or realign an existing edge.

Think:

Honing = edge maintenance

🪨 Sharpening

Sharpening uses an abrasive to remove blade material and restore the cutting edge.

Think:

Sharpening = edge restoration

If an appropriate honing method restores the knife’s performance, you probably don’t need to sharpen it yet.

If honing no longer helps, the edge may need actual sharpening.

👉 Internal link: Honing vs Sharpening: 7 Critical Mistakes to Avoid
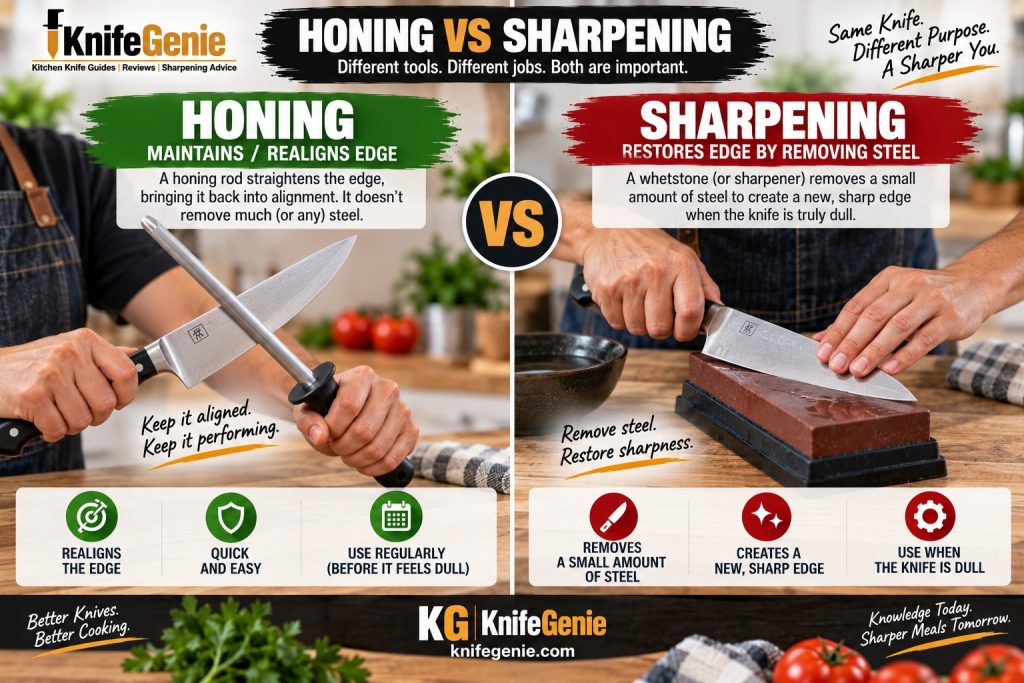

Honing rod compared with whetstone sharpening for kitchen knives
Honing maintains or realigns an edge; sharpening removes material to restore it.


🛡️ How to Keep Kitchen Knives Sharp Longer

Fortunately, preventing premature dulling isn’t complicated.

🏆 KnifeGenie Edge-Saving Routine

1. Use the right cutting board.

Choose wood or suitable plastic rather than glass, stone or ceramic.

2. Stop scraping with the cutting edge.

Flip the knife and use its spine, or use a bench scraper.

3. Hand wash your knives.

Clean them promptly and dry them thoroughly.

4. Store the edge safely.

Use a knife block, suitable magnetic strip, drawer insert or blade guard.

5. Match the knife to the task.

Don’t expect a thin chef’s knife to function like a meat cleaver.

6. Avoid twisting the edge.

Cut cleanly through food rather than applying unnecessary lateral force.

7. Hone when appropriate.

Regular maintenance can help certain knife edges continue performing between sharpenings.

8. Sharpen when necessary.

Once honing no longer restores satisfactory performance, it may be time to sharpen.

9. Don’t over-sharpen.

Sharpening removes steel. There’s no benefit in grinding away blade material when the knife doesn’t need it.


⚠️ A Dull Knife Isn’t Just Annoying

A dull knife makes food preparation slower and more frustrating.

It can also encourage you to compensate by pushing harder.

That’s not ideal.

A sharp knife generally requires less force to perform the same cutting task.

The goal isn’t to keep your kitchen knives razor-sharp simply for bragging rights.

The goal is to maintain a controlled, predictable cutting tool.

If you notice yourself forcing the knife through foods it once cut easily, investigate why.

It may need honing.

It may need sharpening.

Or your cutting board and maintenance habits may be wearing the edge prematurely.


🧠 The Biggest Mistake: Blaming the Knife

If your knife becomes dull quickly, it is tempting to assume:

“This must be bad steel.”

Sometimes poor steel or poor heat treatment can certainly contribute to disappointing edge retention.

But don’t jump to that conclusion immediately.

First check:

🪵 What are you cutting on?

🧼 How are you washing it?

🗄️ How are you storing it?

🔪 What are you cutting?

↔️ Are you scraping the board with the edge?

🔧 Are you maintaining the edge appropriately?

🍳 How frequently are you using it?

A reasonably good knife can perform poorly when treated badly.

Likewise, good maintenance can help a modest kitchen knife perform reliably for a long time.


🔗 Related KnifeGenie Guides

If you’re working on keeping your kitchen knives sharper and in better condition, continue with:

👉 How Often Should You Sharpen Kitchen Knives? — Learn when a knife actually needs sharpening.

👉 Honing vs Sharpening: 7 Critical Mistakes to Avoid — Understand when to hone and when to remove steel.

👉 Best Knife Sharpeners for Beginners — Compare beginner-friendly ways to restore an edge.

👉 Can Kitchen Knives Go in the Dishwasher? — Learn why hand washing is usually the better choice.

👉 How to Store Kitchen Knives Safely — Protect your knives between uses.

👉 German vs Japanese Kitchen Knives — Understand how steel, hardness and blade geometry affect performance and maintenance.


Frequently Asked Questions

Why does my kitchen knife get dull so fast?

Common causes include cutting on hard surfaces, scraping the cutting edge across the board, dishwasher cleaning, poor storage, cutting hard or frozen foods, heavy use and inappropriate maintenance. The knife’s steel, heat treatment and edge geometry also affect edge retention.

Do cutting boards dull knives?

All cutting involves some edge wear, but extremely hard surfaces can accelerate it. Wood and suitable plastic cutting boards are generally more forgiving than glass, ceramic, stone and metal.

Does cutting meat dull a knife?

Normal slicing of boneless meat is an appropriate job for many kitchen knives. Problems are more likely when the knife contacts bones, hard joints or other materials its edge wasn’t designed to cut.

Does cutting vegetables make knives dull?

Yes, eventually. Every time the edge passes through food and contacts the cutting board, it experiences wear. That’s normal. The goal isn’t to prevent all dulling but to avoid premature dulling.

Why shouldn’t I scrape food with my knife?

Dragging the cutting edge sideways across a board places lateral stress on the fine edge. Use the knife’s spine or a bench scraper instead.

Can a dishwasher make kitchen knives dull?

Dishwasher conditions can be unfriendly to knife edges because of strong detergents, heat, long wash cycles and potential contact with other items. Hand washing and prompt drying are generally safer for quality kitchen knives.

How often should kitchen knives be sharpened?

There isn’t one schedule that works for everyone. For many home cooks, sharpening roughly once or twice per year can be a useful starting point, but actual cutting performance is more important than the calendar. Heavy users may need sharpening sooner, while occasional users may go considerably longer.

Should I hone or sharpen my knife?

If the knife’s edge is simply slightly misaligned and appropriate honing restores cutting performance, sharpening isn’t necessary yet. If honing no longer restores the edge, actual sharpening may be required.

Do expensive knives stay sharp forever?

No. Every kitchen knife eventually requires maintenance. Better steel, heat treatment and geometry may improve edge retention, but price does not eliminate normal edge wear.

Do Japanese knives stay sharp longer?

Many Japanese kitchen knives use relatively hard steels and thin edge geometries that can provide excellent edge retention. However, those fine edges may also be less tolerant of twisting, bones or other misuse. Individual knife design matters more than country of origin alone.


🏁 Final Cut: Why Kitchen Knives Get Dull So Quickly

So why do kitchen knives get dull so quickly?

Because a knife edge is incredibly thin—and every cut puts that edge under stress.

Some dulling is unavoidable.

That’s simply what happens when you use a cutting tool.

But premature dulling is often preventable.

🏆 KnifeGenie Takeaway

If you want your knives to stay sharp longer:

🪵 Use a knife-friendly cutting board.

↔️ Don’t scrape the cutting edge across it.

🧼 Hand wash and dry your knives.

🗄️ Protect the edge during storage.

🦴 Don’t force chef’s knives through bones or frozen foods.

🔧 Hone appropriately.

🪨 Sharpen when the edge genuinely needs restoring.

And remember:

A knife that gets dull doesn’t automatically mean you bought a bad knife.

Sometimes the biggest improvement isn’t buying a more expensive blade.

It’s changing how you use the one you already have.

Sharp knives. Smart choices.

KnifeGenie

How to Store Kitchen Knives Safely: 5 Smart Storage Methods

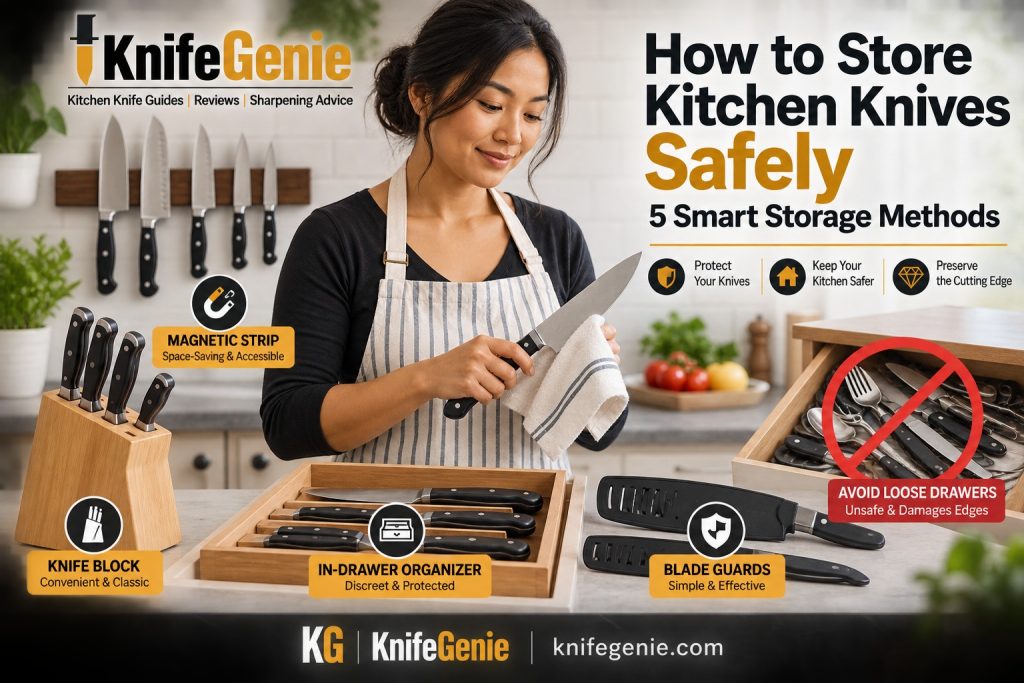
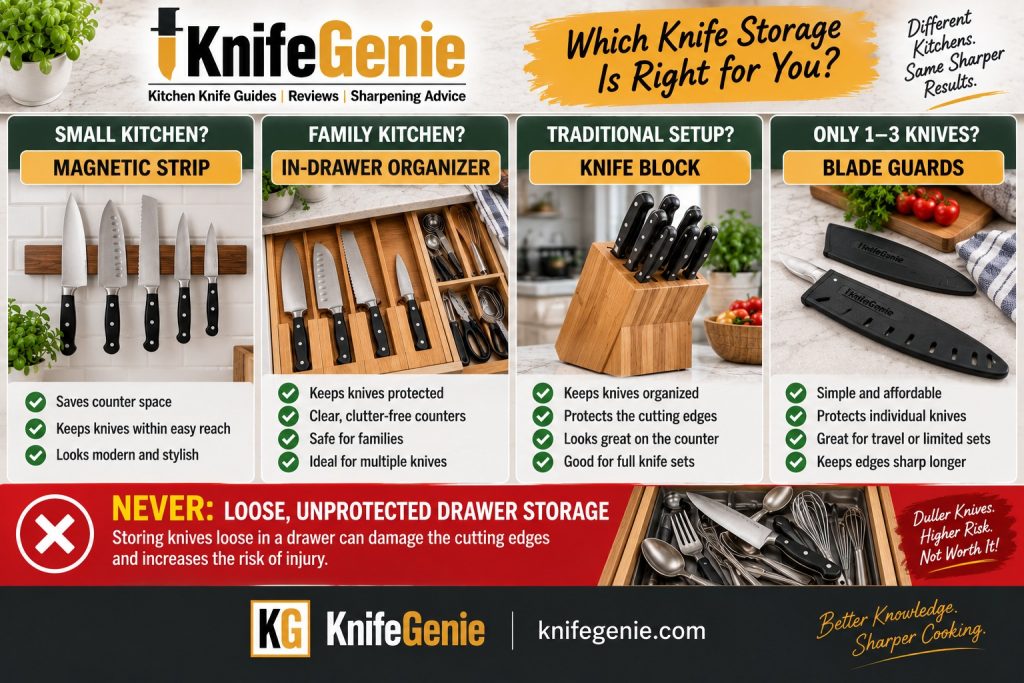
How to store kitchen knives safely using a knife block, magnetic strip, drawer organizer and blade guards

How to store kitchen knives safely using a knife block, magnetic strip, drawer organizer and blade guards
Safe kitchen knife storage methods include knife blocks, magnetic strips, in-drawer organizers and blade guards.


A sharp kitchen knife deserves a better home than the bottom of a crowded utensil drawer.

Proper knife storage isn’t only about keeping your kitchen organized. It helps protect the cutting edge, reduce accidental contact with sharp blades, keep knives dry and make the knife you need easier to reach safely.

For most home kitchens, the best options are a knife block, magnetic strip, in-drawer knife organizer or individual blade guard/sheath. The right choice depends on your available space, knife collection and whether you want your knives displayed or stored out of sight.

One method should generally be avoided:

Never leave good kitchen knives loose and unprotected in a drawer.

The blades can strike utensils and other knives, potentially damaging their edges, while exposed cutting edges create an unnecessary risk whenever someone reaches into the drawer.

This KnifeGenie guide is based on research into knife-care recommendations, storage designs and manufacturer guidance rather than personal testing of every storage product mentioned. The goal is to explain what makes a storage method safe and blade-friendly so you can choose the solution that makes sense in your kitchen.


🔽 Jump to What You Need

👉 Quick Answer
👉 Knife Storage Comparison
👉 Why Knife Storage Matters
👉 Knife Blocks
👉 Magnetic Knife Strips
👉 In-Drawer Knife Organizers
👉 Blade Guards & Sheaths
👉 Why Loose Drawers Are a Bad Idea
👉 Does Storage Affect Sharpness?
👉 Moisture & Knife Storage
👉 Knife Safety & Accessibility
👉 Which Storage Method Should You Choose?
👉 KnifeGenie Pro Tips
👉 Frequently Asked Questions
👉 Overall Recommendation


🏆 How Should You Store Kitchen Knives? The Quick Answer

For most home cooks, there isn’t one storage method that beats every other option.

🧲 Choose a Magnetic Strip If You Want:

✔ Easy access
✔ More counter space
✔ Flexible storage for different knife sizes
✔ Knives visible at a glance
✔ Good airflow around clean, dry blades

🗄️ Choose an In-Drawer Organizer If You Want:

✔ Knives kept out of sight
✔ Clear countertops and walls
✔ Individual protection for each blade
✔ A good solution for homes with limited counter space

🪵 Choose a Knife Block If You Want:

✔ Traditional countertop storage
✔ Fast, convenient access
✔ Dedicated slots for your everyday knives
✔ A self-contained storage system

🛡️ Choose Blade Guards or Sheaths If You Want:

✔ An inexpensive solution
✔ Protection for individual knives
✔ Safe drawer storage without a large organizer
✔ Protection while transporting knives

❌ Avoid:

Loose, uncovered knives mixed with utensils in a kitchen drawer.

🧙 KnifeGenie Tip: Good knife storage should accomplish four things: protect you, protect the cutting edge, keep the knife clean and dry, and make it easy to retrieve without grabbing near the blade.


KNIFE STORAGE METHODS COMPARED

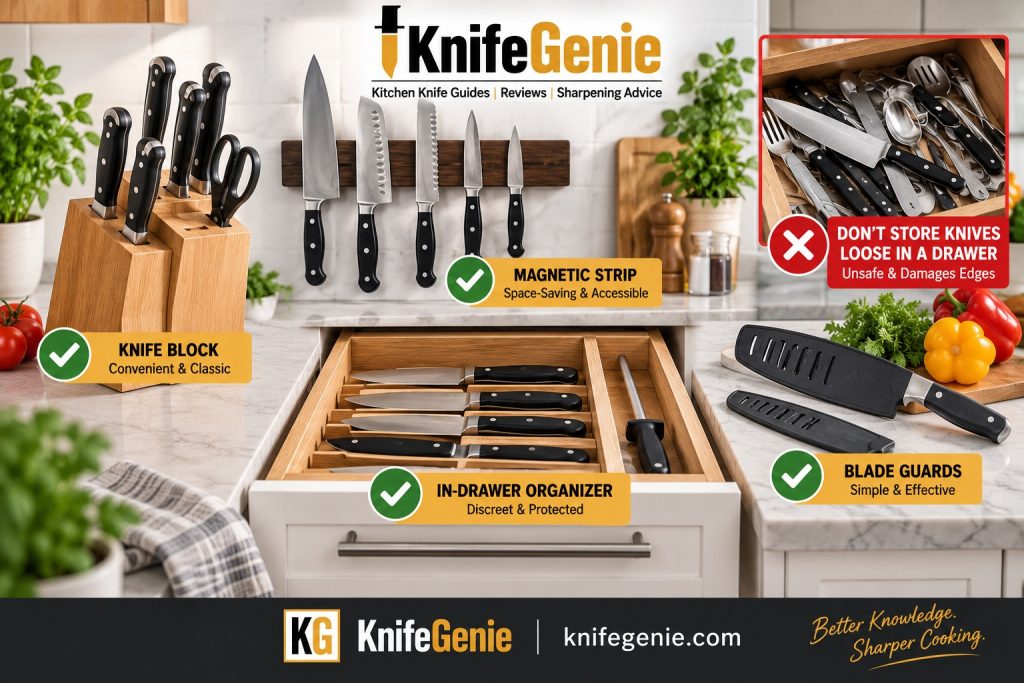
Knife block, magnetic strip, in-drawer organizer and blade guard compared for safe kitchen knife storage
Knife blocks, magnetic strips, in-drawer organizers and blade guards can all protect kitchen knives when used correctly.


⚔️ Kitchen Knife Storage Methods Compared

Storage Method Blade Protection Accessibility Space Use Main Consideration
🪵 Knife block Very good Excellent Uses counter space Slots should stay clean and dry
🧲 Magnetic strip Excellent when used carefully Excellent Saves counter space Requires secure installation and careful removal
🗄️ In-drawer organizer Excellent Very good Uses drawer space Drawer must have adequate clearance
🛡️ Blade guard/sheath Very good Good Minimal Guard must fit the blade properly
❌ Loose drawer Poor Poor Appears convenient Exposed blades can contact utensils and hands

For many households, in-drawer organizers and properly installed magnetic strips provide an excellent balance of safety, edge protection and efficient use of space.

Traditional blocks remain perfectly practical when kept clean and dry, while blade guards are particularly useful if you already have drawer space and don’t want to install a complete storage system.


🔪 Why Proper Knife Storage Matters

A kitchen knife’s cutting edge is surprisingly small.

When you sharpen a knife, you’re creating two surfaces that meet at a very fine apex. That fine edge is what allows the blade to pass easily through food.

Now imagine throwing that carefully maintained edge into a drawer containing:

🍴 Forks
🥄 Spoons
✂️ Kitchen shears
🔧 Metal utensils
🔪 Other knives

Every time the drawer opens and closes, the knife can shift and make contact with harder objects.

That is exactly what you don’t want.

Victorinox specifically advises against storing knives loosely in a drawer because unprotected blades can rub against one another, reducing sharpness and potentially damaging their cutting edges.

Proper storage therefore contributes to three important goals:

Safety → Edge protection → Knife longevity

Storage won’t eliminate the need for honing or sharpening, but it can help prevent unnecessary edge damage between uses.


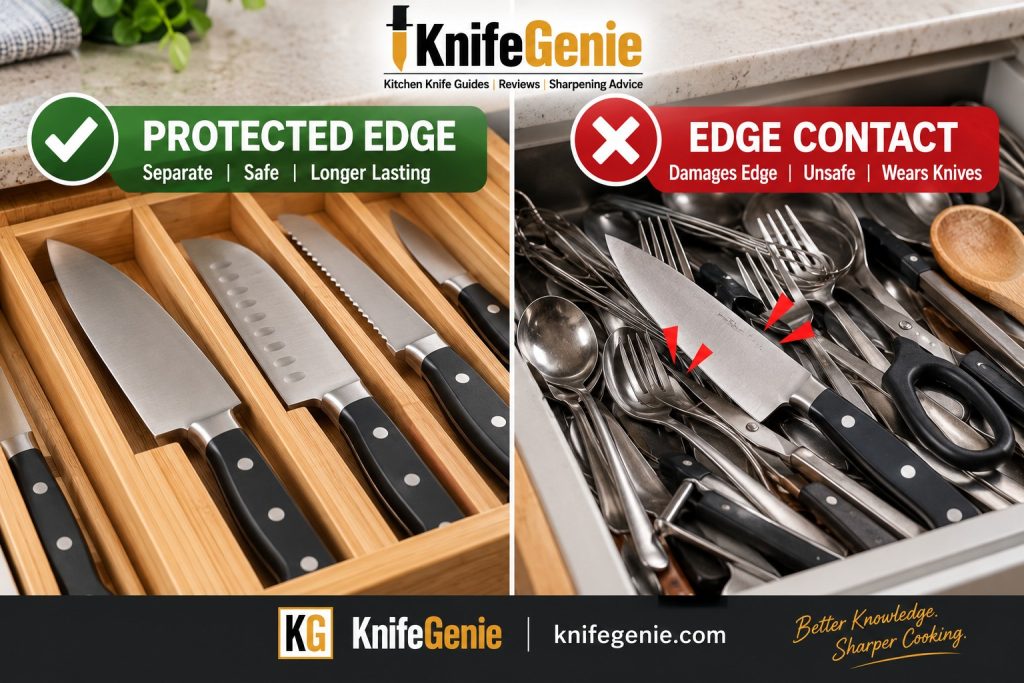
PROTECT THE EDGE

Protected kitchen knife edges in wooden organizer compared with loose knives contacting metal utensils in a drawer
Keeping kitchen knife edges separated from other utensils helps prevent unnecessary contact, damage and unsafe handling.


🪵 Knife Blocks: Traditional and Convenient

The classic wooden knife block remains popular for a reason.

It keeps several knives together, places them within easy reach and prevents their cutting edges from bouncing around against other utensils.

✅ Advantages

✔ Convenient countertop access
✔ Individual slots protect blades
✔ Easy to organize
✔ Available for complete knife sets
✔ No wall installation required
✔ Can also accommodate shears and honing tools

❌ Disadvantages

✘ Takes up counter space
✘ Fixed slots may not fit unusual knives
✘ Slots can collect debris
✘ Moisture can become a problem if damp knives are inserted
✘ Interior slots can be difficult to inspect and clean

One important habit makes a major difference:

Never put a wet knife into a knife block.

Wash the knife, dry the blade and handle thoroughly, and only then return it to storage.

Knife blocks should also be cleaned periodically, especially if crumbs or debris collect inside the slots.

🧙 KnifeGenie Tip

If your block uses horizontal slots, store the knife with its edge facing upward where the design allows it. That reduces unnecessary contact between the cutting edge and the slot as the knife slides in and out.

With vertical slots, avoid dragging the cutting edge heavily against the wood. Insert and remove the knife with control.


CORRECT KNIFE BLOCK STORAGE

Home cook drying a chef knife before safely placing it in a wooden knife block
Clean and completely dry kitchen knives before returning them to a knife block for storage.


🧲 Magnetic Knife Strips: Excellent for Accessibility

A good magnetic strip solves several storage problems at once.

It frees counter and drawer space, accommodates knives of different shapes and keeps your collection visible.

Instead of searching for the right knife, you can immediately see your chef knife, Santoku, bread knife and paring knife.

A magnetic strip can therefore be particularly useful in a small kitchen.

✅ Advantages

✔ Saves counter space
✔ Excellent accessibility
✔ Fits many knife shapes and sizes
✔ Easy to see which knife you’re selecting
✔ Allows air circulation around the blade
✔ Doesn’t require fixed slots

❌ Disadvantages

✘ Must be mounted securely
✘ Exposed knives may not suit every household
✘ Poor removal technique can cause the blade to strike the strip
✘ Placement matters where children are present
✘ Some strips may hold more aggressively than others

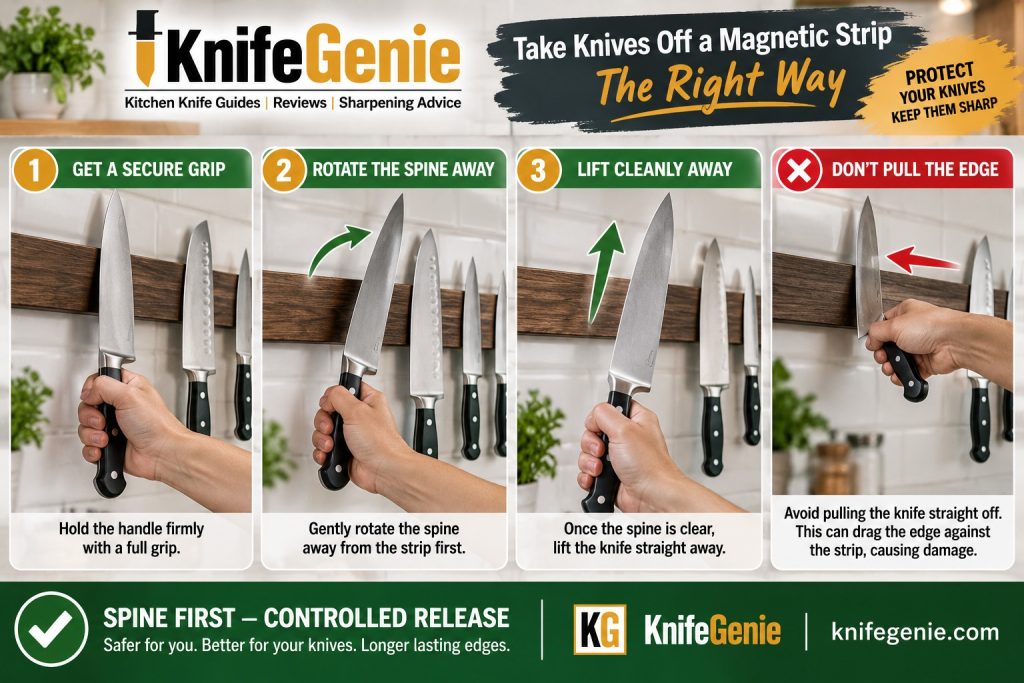
The important detail is how you remove the knife.

Don’t simply yank the blade straight toward yourself.

Grip the handle securely and gently rotate or roll the knife away so the spine releases before the cutting edge.

This gives you more control and reduces unnecessary edge contact.

⚠️ Think About Who Uses the Kitchen

A wall full of exposed knives may look fantastic.

That doesn’t automatically make it appropriate for every household.

If young children can reach the strip—or can climb onto nearby furniture or countertops—an enclosed or inaccessible storage solution may be more appropriate.

The strip should also be firmly anchored according to its installation instructions. A magnetic strip is only a safe storage system if the strip itself is securely attached.


MAGNETIC STRIP TECHNIQUE – How to Remove Knife From Magnetic Strip

Three-step method for safely removing a kitchen knife from a magnetic knife strip
Grip the handle securely, rotate the knife spine away first, then lift the blade cleanly from the magnetic strip.


🗄️ In-Drawer Knife Organizers: Safe and Discreet

An in-drawer organizer gives you the clean appearance of ordinary drawer storage without the disadvantages of leaving blades loose.

Instead of knives sliding around, individual slots or dividers separate them.

Manufacturers such as ZWILLING specifically design in-drawer organizers so individual slots hold knives securely while protecting blades from dulling. Because you need to protect your knife edge from premature dulling.

✅ Advantages

✔ Keeps blades covered and separated
✔ Clears countertop space
✔ Keeps knives out of immediate view
✔ Protects edges from other utensils
✔ Organized and easy to understand
✔ No wall installation required

❌ Disadvantages

✘ Uses valuable drawer space
✘ Organizer must fit the drawer
✘ Deep handles may interfere with drawer clearance
✘ Very large knives may not fit standard organizers

Before buying one, measure:

Drawer width × depth × internal height

Don’t forget the height.

A tall knife handle sitting in an organizer can prevent a shallow drawer from closing even when the organizer itself fits perfectly.

🧙 KnifeGenie Tip

Don’t turn an organized knife drawer into another junk drawer.

If forks, peelers, scissors and miscellaneous utensils are piled on top of your knife organizer, you’ve defeated much of its purpose.

Give the knives their own protected area.


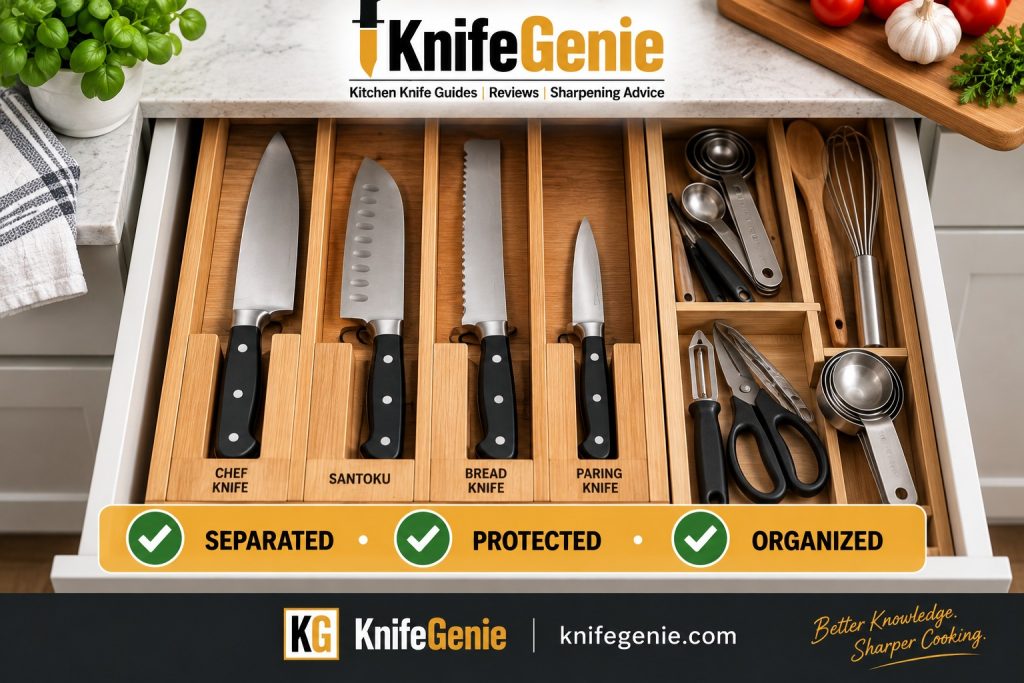
IN-DRAWER STORAGE – Safe In-Drawer Knife Organizer

Chef knife, Santoku, bread knife and paring knife safely separated in a wooden in-drawer knife organizer
An in-drawer organizer keeps kitchen knives separated, protected and organized while preventing their blades from contacting other utensils.


🛡️ Blade Guards & Sheaths: Simple Individual Protection

You don’t necessarily need a large storage system.

If you own only a few good knives, individual blade guards can be a practical solution.

A properly fitted guard covers the cutting edge and allows the protected knife to be stored in a drawer without exposing the edge to your hands or nearby utensils.

Victorinox describes blade guards as providing both safety and cutting-edge protection, while ZWILLING offers sheaths specifically for protected drawer storage.

Blade Guards Work Well For:

🔪 Individual chef knives
🔪 Santokus
🔪 Utility knives
🔪 Specialty knives
🔪 Knives transported in cases or rolls
🔪 Small collections without a dedicated block

Choose the correct guard for the length and height of the blade.

A chef knife shouldn’t be squeezed into a guard designed for a narrow utility knife.

And don’t treat the guard as a substitute for drying.

⚠️ Dry Before Covering

A sheath encloses part of the blade.

If you put the knife away wet, you’re potentially trapping moisture against the metal.

Clean → dry thoroughly → cover → store.

That’s the safer sequence.


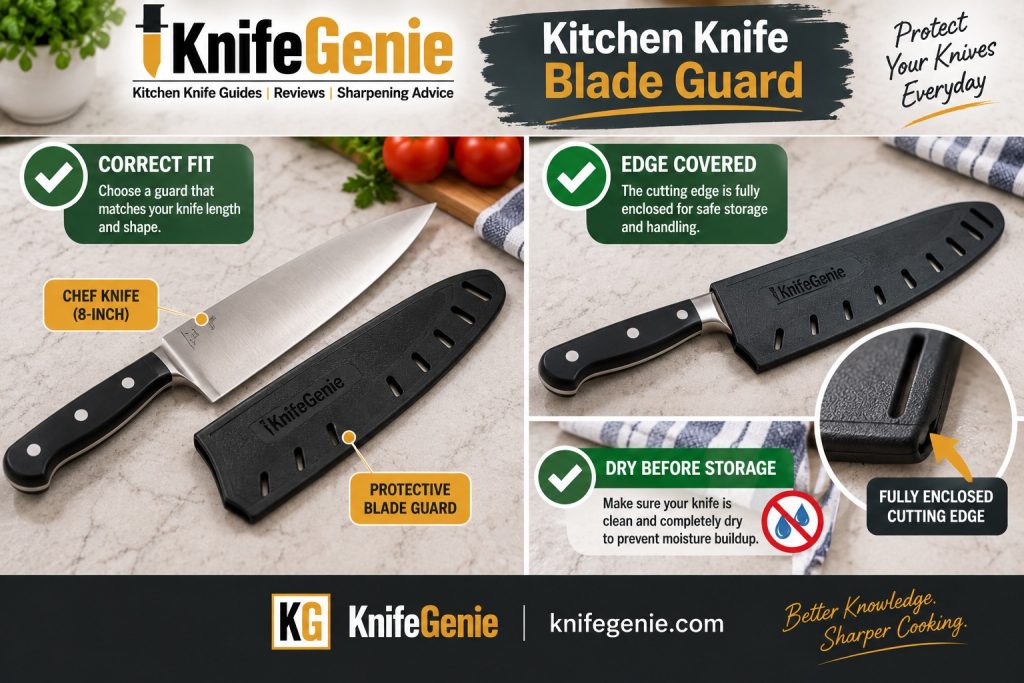
BLADE GUARD

Chef knife with correctly fitted blade guard covering the cutting edge for safe storage
A correctly fitted blade guard protects the cutting edge during storage. Always clean and completely dry the knife before fitting the guard.


Why Loose-Drawer Knife Storage Is a Bad Idea

A loose utensil drawer creates two obvious problems: exposed blades are harder to retrieve safely, and the cutting edge can repeatedly strike other utensils as the drawer opens and closes.

🩹 Problem #1: Safety

Someone reaching into the drawer may contact an exposed cutting edge before realizing where the knife is.

This becomes particularly concerning in a shared kitchen where another person may not know a sharp knife has been placed underneath other utensils.

🔪 Problem #2: Edge Damage

The knife edge can strike:

Metal utensils → other knives → scissors → hard drawer components.

Those repeated contacts are completely unnecessary.

Victorinox explicitly warns that loose drawer storage allows unprotected blades to rub against one another and can damage their cutting edges. Shun likewise advises that knives should not be stored unsheathed in a drawer.

If drawer storage is your only practical option, that’s fine.

Protect the blade first.

Use an organizer, sheath or blade guard.


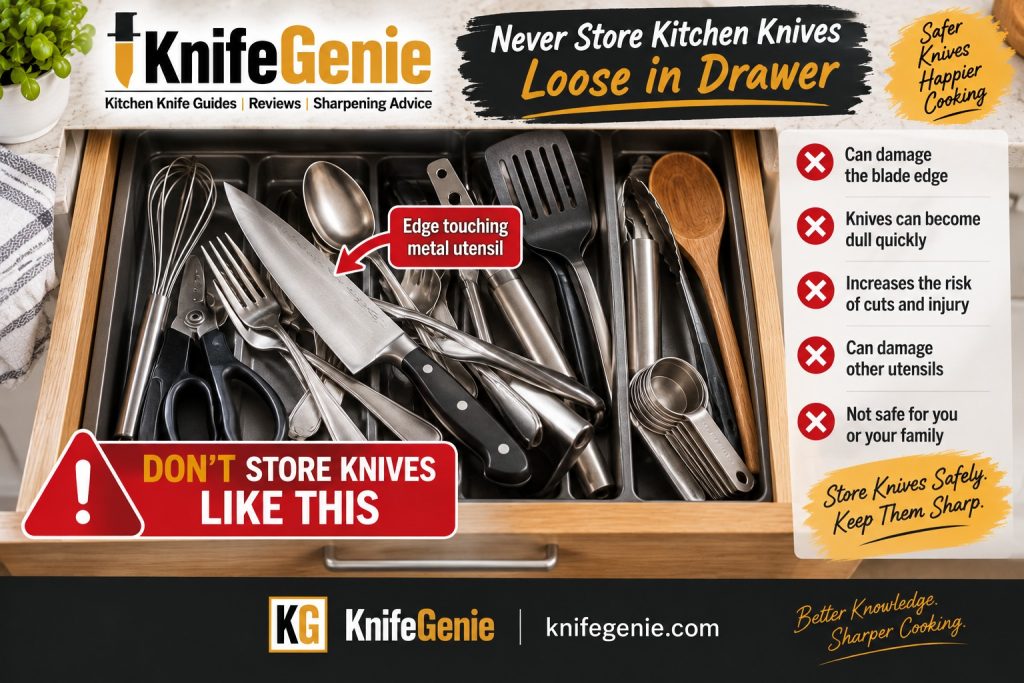
UNSAFE STORAGE

Chef knife stored loose in a drawer with its cutting edge touching metal kitchen utensils
Storing kitchen knives loose among metal utensils can damage the cutting edge and increase the risk of accidental cuts.


⚔️ Does Knife Storage Affect Sharpness?

Yes—but indirectly.

Simply placing a knife in a block or drawer organizer doesn’t make it sharper.

Good storage instead helps prevent avoidable damage to an already sharpened edge.

Think of edge retention as a chain:

Sharpen properly → use a knife-friendly cutting board → avoid abusive cutting → clean carefully → dry completely → store safely.

Break enough links in that chain and even a very good knife can seem to become dull surprisingly quickly.

Poor storage can introduce unnecessary metal-to-metal or edge-to-hard-surface contact between cooking sessions.

Good storage minimizes that contact.

That means your sharpening work isn’t being undermined while the knife isn’t even being used.

👉 KnifeGenie related guide: How Often Should You Sharpen Kitchen Knives?

👉 Also see: Honing vs Sharpening: What’s the Difference?


EDGE RETENTION

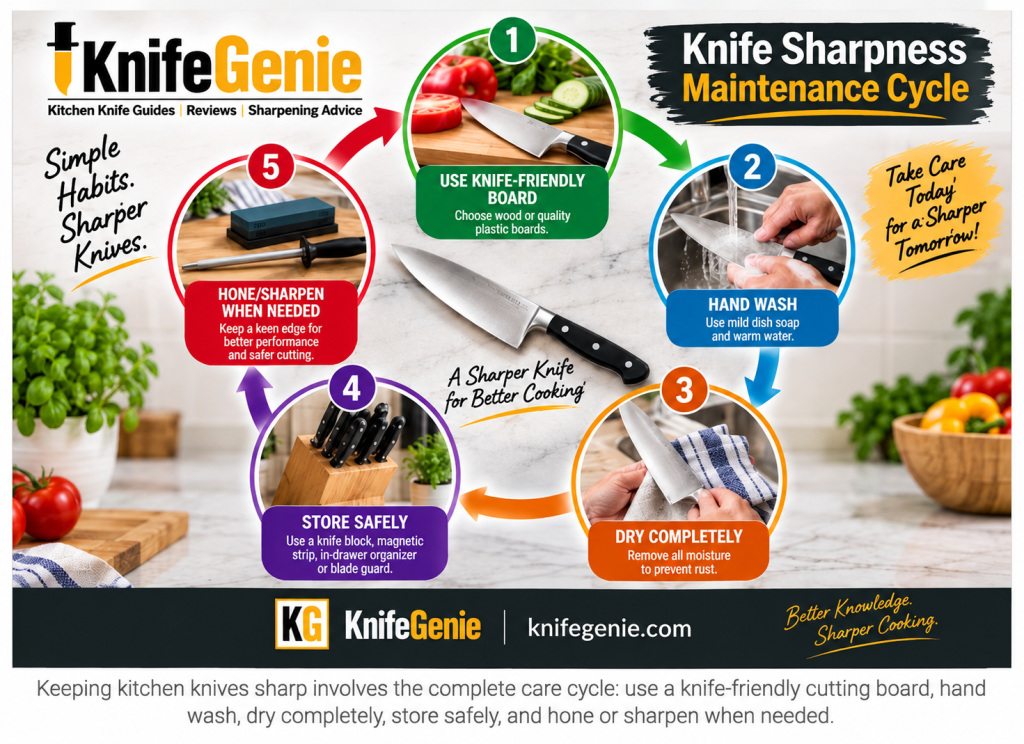
Five-step kitchen knife maintenance cycle covering cutting boards, hand washing, drying, safe storage and sharpening


💧 Moisture & Knife Storage: Dry First, Store Second

Storage isn’t only about physical contact.

Moisture matters too.

Even stainless steel is better described as stain resistant, not completely immune to corrosion under every condition.

Carbon-steel knives require even more attention.

After washing:

  1. Rinse the knife.
  2. Dry the blade thoroughly.
  3. Dry around the handle and bolster.
  4. Check that no water remains on the edge.
  5. Only then return it to storage.

Shun’s current care guidance similarly recommends towel-drying knives immediately and removing moisture completely before storage.

This is especially important with:

🪵 Enclosed wooden blocks
🛡️ Blade guards
🗡️ Wooden sayas
🧳 Knife cases and rolls

Don’t deliberately trap moisture against the blade.

And if you’re already taking care to dry your knives properly, don’t undo that work by storing them in a damp or dirty holder.

👉 Read next: Can Kitchen Knives Go in the Dishwasher?


Knife Safety & Accessibility

There’s a useful balance to find here.

You want a knife to be easy to retrieve when cooking.

But you don’t want the blade exposed where someone can accidentally touch it.

Ask yourself:

Who uses this kitchen?

A magnetic strip might provide superb access for an experienced adult cook.

A drawer organizer might make more sense in another household because the knives are less visually exposed.

Likewise, a countertop block near your prep area may be extremely convenient—but it shouldn’t sit somewhere it can easily be knocked over or reached by a small child.

A good storage position should be:

✔ Stable
✔ Dry
✔ Away from accidental bumps
✔ Convenient for the cook
✔ Appropriate for other household members
✔ Positioned so you can grip the handle without touching the blade

Safety isn’t just about what stores the knife.

It’s also about where you put it.


🛒 Which Knife Storage Method Should You Choose?

Here’s a simple way to decide.

Your Situation Storage Method to Consider
Small kitchen with little counter space 🧲 Magnetic strip
Want knives hidden from view 🗄️ In-drawer organizer
Traditional kitchen setup 🪵 Knife block
Only own 1–3 quality knives 🛡️ Blade guards
Mixed collection of unusual knife sizes 🧲 Magnetic strip
Can’t drill into the wall 🪵 Block or 🗄️ drawer organizer
Need to transport knives 🛡️ Guards + suitable knife case/roll
Family/shared kitchen 🗄️ Protected in-drawer storage can be particularly practical
Knives currently loose in a drawer 🛡️ Add guards or an organizer

🧙 KnifeGenie Recommendation

For many home cooks, an in-drawer organizer is an excellent all-around solution because it keeps blades separated, protected and off the countertop.

If easy visibility and quick access are priorities, a properly installed magnetic strip is equally compelling.

A knife block remains a perfectly good traditional choice when it fits your collection and is kept clean and dry.

And if you only own a few quality knives?

Individual blade guards may be all you need.


STORAGE DECISION — Best Knife Storage Method Decision Guide

Guide comparing magnetic strips, in-drawer organizers, knife blocks and blade guards for kitchen knife storage
The best kitchen knife storage method depends on your space, knife collection and household. Keep blades separated and avoid loose, unprotected drawer storage.


🧙 KnifeGenie Pro Tips

🔪 Never store good knives loose. Separate the cutting edge from other utensils.

💧 Dry before storing. Don’t place a damp knife into a block, sheath, organizer or case.

🧲 Use magnetic strips carefully. Secure mounting and controlled knife removal matter.

🪵 Clean knife blocks periodically. Storage equipment needs maintenance too.

🛡️ Match blade guards to the knife. The entire cutting edge should be properly protected.

🗄️ Measure drawers before buying organizers. Check width, depth and height.

⚔️ Don’t confuse storage with sharpening. Proper storage protects an edge; it doesn’t restore a dull one.

🧼 Store only clean knives. Food residue and enclosed storage are a poor combination.

👨‍👩‍👧 Consider the household. The most convenient storage system isn’t necessarily the most appropriate if young children can reach it.

🔪 Build a complete maintenance routine. Cutting surface, washing, drying, storage, honing and sharpening all contribute to long-term knife performance.


Frequently Asked Questions

What is the safest way to store kitchen knives?

A knife block, securely installed magnetic strip, in-drawer knife organizer or correctly fitted blade guard can all provide safe storage when used properly.

The important principle is that the sharp cutting edge should be protected from accidental contact and from other utensils.

Is it bad to store kitchen knives in a drawer?

Not if they’re properly protected.

An in-drawer knife organizer or individual blade guards can make drawer storage very practical.

The problem is storing uncovered knives loose among other utensils.

Do knife blocks dull knives?

A properly used knife block shouldn’t automatically dull a knife. However, repeatedly dragging the cutting edge against a hard slot can contribute to unnecessary contact.

Insert and remove knives carefully and keep the block clean and dry.

Are magnetic knife strips bad for knives?

A suitable magnetic strip can be an excellent storage system.

The important considerations are secure mounting, sufficient holding strength and careful removal so you aren’t repeatedly striking or dragging the cutting edge against the holder.

Should knives be stored blade up or blade down in a block?

Follow the design of your particular block.

With horizontal slots, positioning the cutting edge so it isn’t bearing against the slot can reduce unnecessary edge contact. With conventional vertical blocks, simply insert and remove the knife carefully rather than dragging the edge heavily against the slot.

Can I put a wet knife into a knife block?

You shouldn’t.

Dry the knife completely before storage. Moisture trapped inside a block or against a blade can encourage staining, corrosion or unwanted moisture inside the holder.

Are blade guards good for kitchen knives?

Yes. A correctly sized blade guard is a simple way to protect the cutting edge and make drawer storage safer.

The knife should be clean and completely dry before the guard is fitted.

What is the best knife storage method for a small kitchen?

A wall-mounted magnetic strip can be particularly space-efficient because it uses neither countertop nor drawer space.

If wall mounting isn’t possible, an in-drawer organizer is another excellent space-saving solution.

How should expensive Japanese knives be stored?

The same core principles apply: keep the blade clean, dry, separated and protected.

A suitable block, magnetic holder, in-drawer organizer, sheath or traditional wooden saya can work depending on the particular knife.

Hard, thin Japanese edges especially benefit from avoiding unnecessary impacts with other objects.

👉 See KnifeGenie’s German vs Japanese Kitchen Knives guide for more about differences in edge geometry and maintenance.

Does proper storage keep knives sharp longer?

Proper storage can help preserve an edge by preventing unnecessary contact with other knives, utensils and hard surfaces.

It doesn’t replace sharpening, but it helps ensure you’re not damaging the edge between uses.

Read: How Often Should You Sharpen Kitchen Knives?


🏆 Overall Recommendation: Store the Edge, Not Just the Knife

The best kitchen knife storage system isn’t necessarily the most expensive or attractive one.

It’s the one you’ll use correctly every day.

For most home kitchens, KnifeGenie recommends choosing among:

🗄️ In-drawer organizer — excellent all-around protected storage

🧲 Magnetic strip — excellent for space efficiency and accessibility

🪵 Knife block — excellent traditional countertop storage

🛡️ Blade guard/sheath — excellent simple protection for individual knives

The one method we would avoid is:

Loose, uncovered knives mixed with other utensils in a drawer.

Your knife spends far more time stored than it does cutting food.

Protecting the blade during those hours is one of the simplest habits you can adopt to support safety and preserve the cutting edge.

A good knife-care routine is straightforward:

Use it properly → wash it carefully → dry it completely → store it safely → maintain the edge when needed.

Do those things consistently and you’re giving your kitchen knives a much better chance of performing properly for years.


SAFE KNIFE STORAGE — How to Store Kitchen Knives Safely: Final Recommendation

Home cook drying a chef knife with magnetic strip, knife block and in-drawer organizer for safe storage
Clean, dry, separate and protect your kitchen knives to support safe storage and help preserve the cutting edge.


Can Kitchen Knives Go in the Dishwasher?

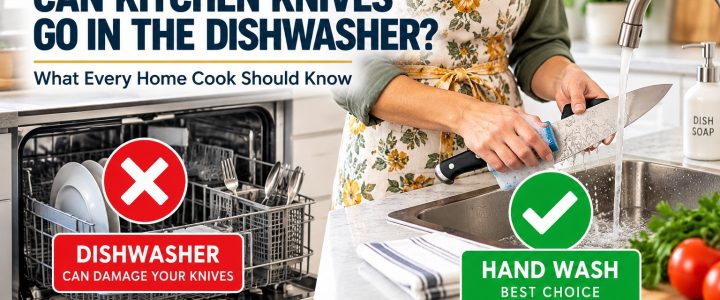
Can kitchen knives go in the dishwasher
Hand washing is the best choice for protecting quality kitchen knives from unnecessary edge, blade and handle damage.

Putting a dirty kitchen knife straight into the dishwasher is tempting. After all, if the machine can clean greasy pans, plates and forks, surely it can handle a chef’s knife.

But can kitchen knives go in the dishwasher without being damaged?

For most quality kitchen knives, the safest answer is no.

Even when a manufacturer describes a knife as dishwasher-safe, regularly washing it in a dishwasher can expose the blade and handle to high temperatures, strong detergents, prolonged moisture and contact with other utensils.

That doesn’t necessarily mean your knife will be ruined after one accidental dishwasher cycle. The bigger concern is what repeated cycles can do over time.

This guide explains why dishwashers can be hard on kitchen knives, which knives are most vulnerable, what “dishwasher-safe” really means, and the simple hand-washing routine that can help your knives stay sharp and attractive for longer.


👉 Quick Answer

Most good kitchen knives should be washed by hand rather than in the dishwasher.

Dishwasher cycles can expose a knife to:

  • 🔥 Heat
  • 💦 Prolonged moisture
  • 🧪 Strong detergents
  • ⚔️ Contact with other metal utensils
  • 🪵 Conditions that can damage some handles

The cutting edge is particularly vulnerable because it is the thinnest and most delicate part of the blade.

Best practice: Wash your knife shortly after use with warm water, mild dish soap and a soft sponge or cloth. Rinse it and dry it immediately before returning it to safe storage.

A knife marked dishwasher-safe may survive machine washing, but that does not automatically make the dishwasher the best way to care for it.

🧞 KNIFEGENIE TIP: Think of “dishwasher-safe” as permission rather than a recommendation. If you want a quality knife to stay in its best condition, hand washing is usually the better habit.


📌 In This Guide

👉 Quick Answer
👉 Why Dishwashers Can Damage Kitchen Knives
👉 Does the Dishwasher Make Knives Dull?
👉 Can Dishwasher Detergent Damage a Knife?
👉 Can Kitchen Knives Rust in the Dishwasher?
👉 What Happens to Knife Handles?
👉 Are Any Kitchen Knives Dishwasher-Safe?
👉 Which Knives Should Never Go in the Dishwasher?
👉 What If You Accidentally Put a Knife in the Dishwasher?
👉 How to Wash Kitchen Knives Properly
👉 Common Knife-Cleaning Mistakes
👉 Frequently Asked Questions
👉 Overall Recommendation


Why Dishwashers Can Damage Kitchen Knives

A dishwasher isn’t necessarily dangerous to a knife because of one single factor. The problem is the combination of conditions inside the machine.

During a typical cycle, a knife may spend a long time exposed to hot water, detergent, moisture and movement.

If it is sitting beside forks, spoons or other metal utensils, the blade can also knock or rub against them.

A dinner fork probably won’t suffer much from that treatment.

A finely sharpened kitchen knife is different.

Its cutting edge is extremely thin, and maintaining that thin edge is exactly what allows the knife to cut efficiently.

The five main concerns are:

1. Edge damage
Contact with other hard objects can nick, roll or otherwise damage the fine cutting edge.

2. Detergent exposure
Dishwasher detergents can be considerably more aggressive than ordinary mild hand-washing soap.

3. Heat
Repeated exposure to hot wash and drying cycles can be hard on certain handle materials and adhesives.

4. Moisture
Leaving steel wet for extended periods can encourage staining or corrosion under the wrong conditions.

5. Handle deterioration
Wood and some composite or bonded handle materials are particularly poorly suited to repeated dishwasher cycles.

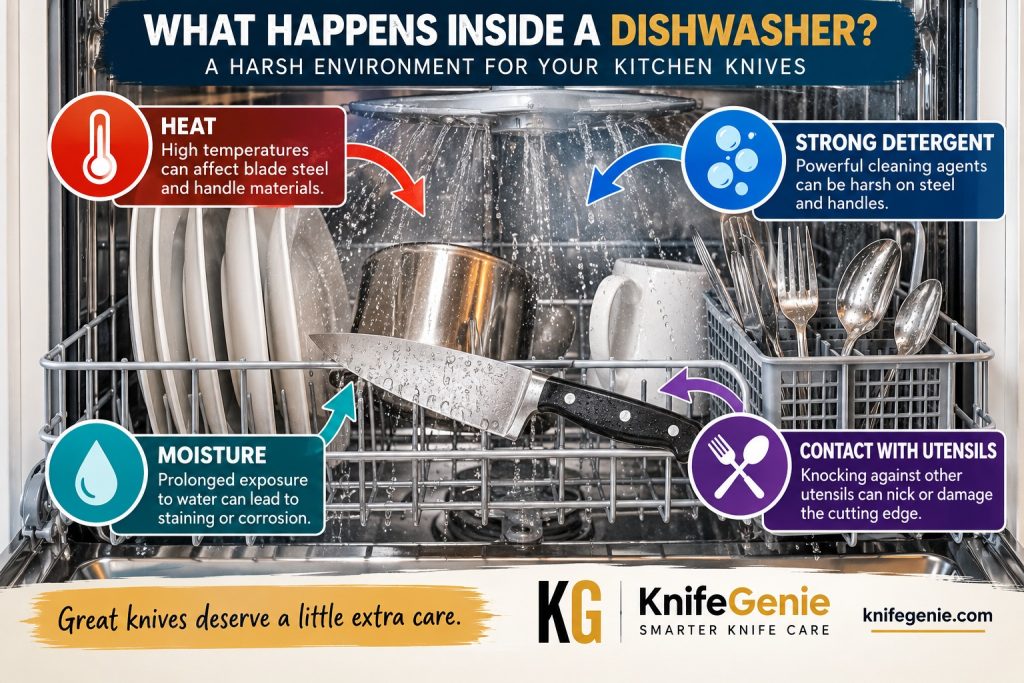
WHAT HAPPENS INSIDE A DISHWASHER

Dishwasher conditions that can damage kitchen knives
Heat, strong detergent, prolonged moisture and contact with other utensils can make a dishwasher a harsh environment for quality kitchen knives.


Does the Dishwasher Make Knives Dull?

It can contribute to a knife losing its sharp cutting performance, but the explanation is more complicated than simply saying that hot water “removes” sharpness.

One of the bigger practical problems is physical contact.

If the cutting edge knocks against forks, spoons, another knife, a rack or other hard objects during repeated wash cycles, the very fine edge can suffer microscopic damage.

You may not see that damage with your eyes.

Instead, you notice the result when the knife that once slipped easily through a tomato begins crushing the skin before cutting it.

This is one reason a knife can feel dull even though the blade still looks perfectly normal. Read what would make kitchen knives dull faster.

SHARP EDGE VS DAMAGED EDGE

Clean kitchen knife edge compared with a damaged knife edge
A kitchen knife’s fine cutting edge can be damaged by repeated contact with hard utensils and dishwasher components.

If your knife has already lost its edge, see our guide to How Often Should You Sharpen Kitchen Knives? and our Best Knife Sharpeners for Beginners guide.

Also remember that honing and sharpening aren’t the same thing. Our Honing vs Sharpening guide explains when each is appropriate.


Can Dishwasher Detergent Damage a Knife?

Another important difference between hand washing and machine washing is the detergent.

When you wash a knife by hand, you normally use a small amount of mild liquid dish soap and rinse it away quickly.

Dishwasher detergents are formulated for a much tougher job.

They need to remove dried-on food and grease from an entire load without somebody scrubbing each item individually.

That can make the dishwasher a considerably harsher chemical environment for a knife.

ZWILLING, for example, warns that dishwasher tablets can contain aggressive chemicals capable of damaging steel and plastic surfaces and recommends hand cleaning to help prevent premature wear.

The practical lesson is simple:

You don’t need aggressive cleaning to keep an everyday kitchen knife hygienically clean.

For routine home use, prompt hand washing with mild soap is normally the gentler approach.


Can Kitchen Knives Rust in the Dishwasher?

Yes — even a stainless-steel kitchen knife can develop rust spots, staining or corrosion.

The word stainless sometimes causes confusion.

Stainless steel is designed to be highly resistant to corrosion. It isn’t necessarily completely immune to it.

A number of factors can increase the chance of corrosion, including:

  • Prolonged moisture
  • Salt
  • Acidic food residue
  • Aggressive cleaning products
  • Contact with other metals
  • Failure to dry the blade properly

This is particularly important after cutting foods such as tomatoes, citrus fruit and other acidic ingredients.

Rather than leaving the dirty knife sitting around, wash it reasonably soon after use and dry it.

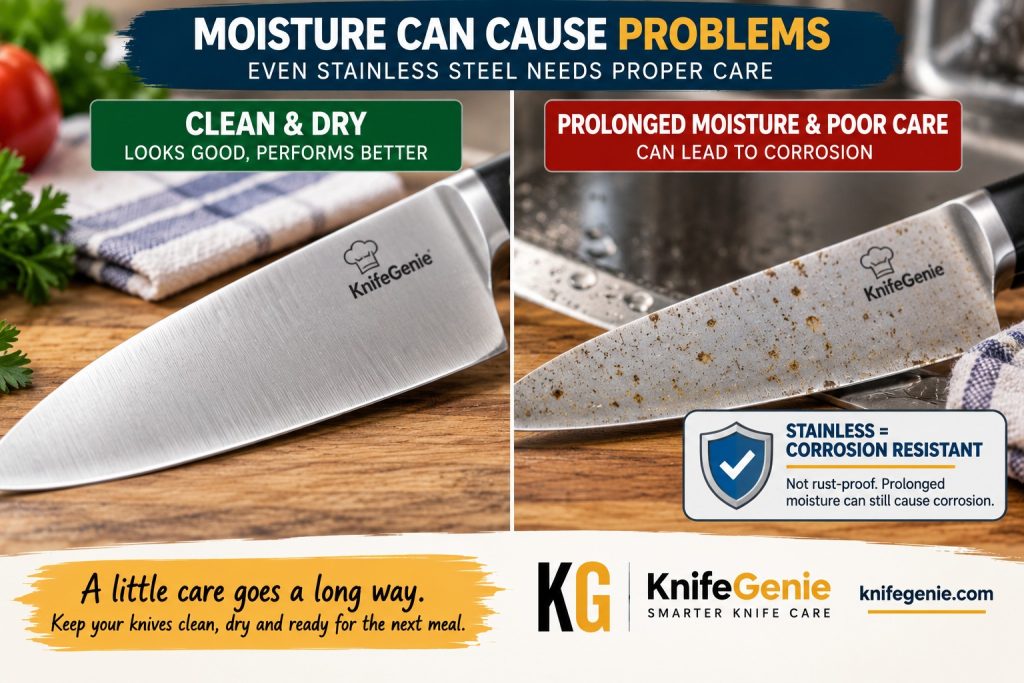
STAINLESS DOES NOT MEAN RUST-PROOF

Stainless kitchen knife showing possible rust and corrosion
Stainless steel is corrosion resistant, not rust-proof. Prolonged moisture and poor care can still cause staining and corrosion.

That simple routine is one of the easiest forms of knife maintenance.


What Happens to Knife Handles in the Dishwasher?

The blade isn’t the only part you need to protect.

🪵 Wooden handles

Wooden-handled knives are among the clearest examples of knives that should stay out of the dishwasher.

Repeated exposure to water, heat and drying can cause wood to swell, shrink, dry out, fade or eventually crack.

Water can also affect areas around rivets and joints.

A quality wooden handle should instead be cleaned carefully by hand and dried promptly.

🧱 Synthetic handles

Synthetic materials are generally more water resistant.

Some manufacturers specifically rate certain synthetic-handled knives as dishwasher-safe.

That still doesn’t mean every synthetic handle should automatically go into the machine. Follow the manufacturer’s instructions for your particular knife.

🔩 Riveted and bonded handles

Repeated heat and moisture can also be undesirable around handle scales, rivets, adhesives and joints.

A knife may continue functioning perfectly well for a long time while small signs of deterioration gradually appear.

Hand washing avoids most of these concerns.

HANDLE MATERIALS

Wood synthetic and riveted kitchen knife handles dishwasher care
Wooden knife handles should be hand washed, while dishwasher guidance for synthetic and composite handles depends on the manufacturer.


Are Any Kitchen Knives Dishwasher-Safe?

Yes.

This is where a blanket statement such as “no kitchen knife can ever go in a dishwasher” becomes misleading.

Some manufacturers specifically describe particular knives as dishwasher-safe.

For example, Victorinox states that its household knives with synthetic handles are dishwasher-safe. However, it still recommends hand washing large knives and notes that gentler hand cleaning can help keep blades sharper longer.

ZWILLING similarly notes that some of its knives are technically dishwasher-safe under specified temperature conditions, while recommending hand washing as the better care method.

So there are really two separate questions:

Question Answer
Can this knife physically be washed in a dishwasher? Sometimes, if the manufacturer says so.
Is dishwashing the best way to preserve the knife? Usually not.

That’s an important distinction.

What does “dishwasher-safe” mean?

It generally tells you that the manufacturer considers the materials capable of tolerating dishwasher cleaning under its stated conditions.

It doesn’t necessarily promise that repeated dishwasher use is the best possible treatment for edge retention, appearance or maximum service life.

When in doubt, check the care instructions supplied with your particular knife.


Which Knives Should Never Go in the Dishwasher?

Some knives deserve an especially firm hand-wash-only rule.

❌ Wooden-handled knives

Water and repeated temperature changes are poor partners for natural wood.

❌ High-quality chef’s knives

Even when the blade itself is highly corrosion-resistant, protecting the cutting edge makes hand washing worthwhile.

❌ Carbon-steel knives

Carbon steel generally demands more attention to moisture and corrosion than stainless steel. Wash it promptly and dry it thoroughly.

❌ Many Japanese kitchen knives

Premium Japanese knives can combine very hard, thin cutting edges with natural wooden handles or steels requiring careful maintenance.

If you use Japanese knives, our German vs Japanese Kitchen Knives comparison explains some of the differences in steel, edge geometry, and general care expectations.

❌ Knives specifically marked “hand wash only”

This one should be obvious, but the manufacturer’s care instructions take priority.

If the manufacturer says hand wash only, don’t put the knife in the dishwasher.

DISHWASHER DECISION GUIDE

Dishwasher care guide for different types of kitchen knives
Wooden-handled and carbon-steel knives should stay out of the dishwasher, while manufacturer instructions should be checked for dishwasher-safe synthetic knives.


What If You Accidentally Put a Knife in the Dishwasher?

Don’t panic.

One trip through the dishwasher does not automatically mean you’ve destroyed your knife.

Remove it carefully and inspect it.

Check the blade

Look for:

  • Rust spots
  • Staining
  • Discoloration
  • Small chips
  • An obviously damaged cutting edge

Check the handle

Look for:

  • Cracks
  • Swelling
  • Gaps
  • Loose rivets
  • Warping
  • Changes around the blade-to-handle joint

Dry it thoroughly

If the knife is still damp, carefully dry the blade and handle.

Then test its cutting performance safely on an appropriate food item.

If the knife simply seems less sharp, it may need honing or sharpening rather than replacement.

🧞 KNIFEGENIE TIP: An accidental dishwasher cycle is usually a reason to inspect the knife, not throw it away.


How to Wash Kitchen Knives Properly

Hand washing a knife doesn’t need to become a major kitchen chore.

In fact, it often takes less than a minute.

Step 1 — Don’t leave it dirty for hours

After you’ve finished using the knife, clean it reasonably soon — particularly after cutting salty or acidic foods.

Step 2 — Use warm water and mild soap

You don’t need harsh cleaners for normal kitchen use.

Step 3 — Clean with a soft sponge or cloth

Keep the sharp edge visible and facing safely away from your fingers.

Never blindly reach into cloudy or soapy sink water for a knife.

Step 4 — Rinse thoroughly

Remove the soap and food residue.

Step 5 — Dry immediately

Use a clean, soft towel and carefully dry both the blade and handle.

Step 6 — Store safely

Put the knife into appropriate storage rather than tossing it loose into a utensil drawer.

A knife block, magnetic storage system, suitable drawer organizer or blade guard can prevent the edge from repeatedly hitting other utensils.

Read: How to Store Kitchen Knives Safely guide.

HOW TO HAND WASH A KNIFE

How to wash a kitchen knife safely by hand
Wash kitchen knives with mild soap and warm water, rinse thoroughly, and dry immediately to help protect the blade, edge and handle.


7 Common Knife-Cleaning Mistakes

Even cooks who avoid the dishwasher can accidentally shorten the life of their knives.

1. Leaving the knife soaking in the sink

This increases moisture exposure and creates a serious safety hazard for anyone reaching into the water.

2. Using abrasive scrubbers

A harsh scouring pad can scratch blade finishes.

3. Leaving food on the blade

Acidic and salty residues shouldn’t sit on the steel unnecessarily.

4. Air-drying the knife

Drying the knife immediately gives you greater control over moisture and helps prevent water spots.

5. Throwing the knife into a drawer

The edge can hit other metal objects and become damaged.

6. Using the dishwasher just because the knife is stainless

Stainless steel is corrosion resistant, not indestructible.

7. Ignoring the manufacturer’s instructions

Different knives use different steels, handle materials and construction methods.

The care instructions for your specific knife should always win.


🧼 Hand Washing vs Dishwasher

Factor Hand Washing Dishwasher
Edge protection ⭐⭐⭐⭐⭐ ⭐⭐
Control over cleaning ⭐⭐⭐⭐⭐ ⭐⭐⭐
Wooden handles ✅ Suitable with careful washing ❌ Avoid
Exposure to strong detergent Low Higher
Prolonged moisture Low when dried promptly Possible
Convenience ⭐⭐⭐ ⭐⭐⭐⭐⭐
Best choice for quality knives Yes Usually no

If you want an inexpensive utility knife specifically approved for dishwasher cleaning, convenience may matter more.

For a quality chef’s knife that you want to use for many years, the extra minute spent hand washing is a very small investment.


Frequently Asked Questions

Can stainless-steel kitchen knives go in the dishwasher?

Some stainless-steel knives are rated dishwasher-safe, particularly certain models with synthetic handles. However, stainless steel can still stain or corrode under unfavorable conditions, and the edge can be damaged by contact with other objects. Check the manufacturer’s instructions and hand wash quality knives when possible.

Does putting knives in the dishwasher make them blunt?

Dishwasher use can contribute to reduced edge performance, particularly when the cutting edge repeatedly contacts utensils, racks or other hard objects. Harsh dishwasher conditions can also be less favorable for long-term knife care than gentle hand washing.

Can wooden-handled knives go in the dishwasher?

No. Wooden-handled kitchen knives should normally be hand washed. Repeated moisture and temperature changes can cause wood to swell, shrink, dry out or crack.

Why do my knives get rust spots after the dishwasher?

Prolonged moisture, food residue, salt, detergent chemistry and contact with other metals can contribute to staining or corrosion. Stainless steel resists corrosion but is not completely rust-proof.

What should I do if my knife accidentally went through the dishwasher?

Inspect the blade and handle for rust, staining, cracks, loose parts or edge damage. Dry it thoroughly. A single accidental cycle does not automatically mean the knife has been ruined.

Should knives point up or down in the dishwasher?

For a quality kitchen knife, the better solution is to avoid putting it in the dishwasher altogether. This also removes the unloading hazard created by an exposed sharp blade.

Are cheap kitchen knives okay in the dishwasher?

Possibly. Some inexpensive synthetic-handled stainless knives are specifically manufactured and labeled for dishwasher use. Follow the manufacturer’s instructions. Even then, hand washing may help preserve the cutting edge.

Is it safe to put Japanese knives in the dishwasher?

As a general care rule, quality Japanese kitchen knives should be washed by hand and dried promptly. This is particularly important for knives with wooden handles, carbon-steel components or very thin, hard cutting edges.


Overall Recommendation

Can kitchen knives go in the dishwasher?

Some can.

But for a good kitchen knife, hand washing is the better default.

The dishwasher saves you a small amount of effort, while exposing the knife to conditions that may be unnecessarily harsh on its edge, blade finish and handle.

Instead:

Wash it. Rinse it. Dry it. Store it.

That’s usually all the maintenance required after everyday food preparation.

If the manufacturer specifically labels an inexpensive synthetic-handled knife dishwasher-safe, occasional machine washing may be perfectly acceptable within those instructions.

But the better the knife — especially a quality chef’s knife, Japanese knife, carbon-steel blade or wooden-handled knife — the stronger the case for washing it by hand.

OVERALL RECOMMENDATION

Hand washing a kitchen knife compared with using a dishwasher
Hand washing is the best everyday choice for quality kitchen knives. Use a dishwasher only when the knife manufacturer specifically approves it.


Honing vs Sharpening: What’s the Difference?

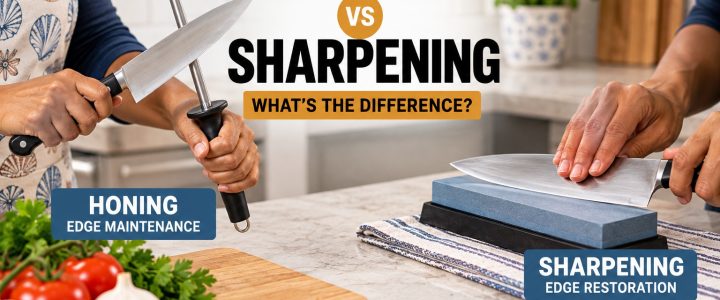
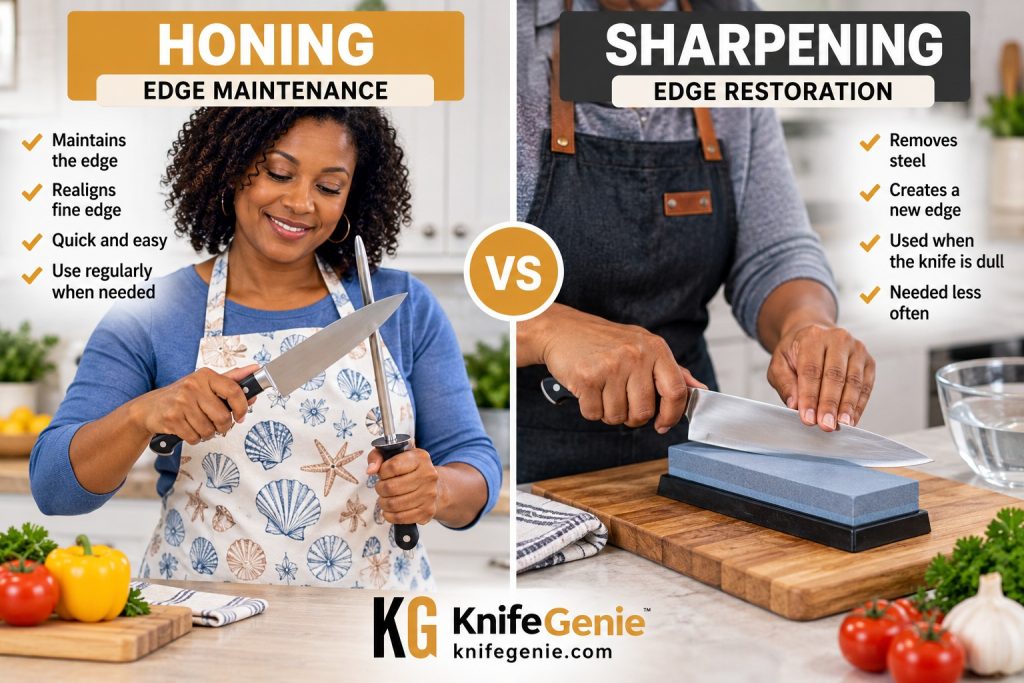
Honing vs sharpening kitchen knives showing edge maintenance and edge restoration

Honing vs sharpening kitchen knives showing the difference

If your kitchen knife isn’t cutting as cleanly as it used to, you might assume it needs sharpening.

But not necessarily.

Sometimes the edge simply needs honing.

Although the words honing and sharpening are often used interchangeably, they describe two different types of knife maintenance.

Honing primarily maintains or corrects an existing edge. Sharpening restores a worn edge by removing blade material to form a new cutting edge.

Knowing the difference between honing and sharpening can help you decide when to hone a knife and when to sharpen a knife, while avoiding unnecessary steel removal.


🔽 In This Honing vs Sharpening Guide

👉 Quick Answer
👉 Honing vs Sharpening at a Glance
👉 What Is Honing?
👉 What Is Sharpening?
👉 What Actually Happens to a Knife Edge?
👉 How to Tell Whether You Should Hone or Sharpen
👉 How Often Should You Hone?
👉 How Often Should You Sharpen?
👉 Types of Honing Rods
👉 Common Knife Sharpening Methods
👉 Can Honing Damage a Knife?
👉 Can You Sharpen Too Often?
👉 What About Japanese Knives?
👉 Common Honing and Sharpening Mistakes
👉 Simple Knife Maintenance Routine
👉 Frequently Asked Questions
👉 Overall Recommendation


🏆 Honing vs Sharpening: The Quick Answer

Here’s the simplest way to remember the difference:

🔧 Honing = Edge Maintenance

Honing helps maintain an existing cutting edge and can correct slight deformation or misalignment at the very edge.

🪨 Sharpening = Edge Restoration

Sharpening uses an abrasive to remove steel and create a fresh cutting edge.

Think of it this way:

Knife still reasonably sharp but doesn’t feel quite as crisp?

👉 Try honing.

Honing restores the cutting performance?

👉 Keep using the knife.

Knife remains dull after appropriate honing?

👉 It probably needs sharpening.

See our Why kitchen knives become dull guide.

🧙 KnifeGenie Rule

Hone to maintain. Sharpen to restore.

That’s the basic difference.

There are some important exceptions, however—particularly when ceramic and diamond honing rods enter the discussion.


HONING VS SHARPENING – Best knife sharpeners for beginners


📊 Honing vs Sharpening at a Glance

Feature 🔧 Honing 🪨 Sharpening
Main purpose Maintain the edge Restore the edge
Removes steel? Minimal or none with many traditional steels* Yes
Creates a new edge? Generally no Yes
Used for Slight loss of cutting performance A genuinely dull or damaged edge
Typical tools Honing steel, ceramic rod Whetstone, guided sharpener, abrasive system
Frequency Relatively often when appropriate Much less frequently
Skill required Low to moderate Depends heavily on method
Best description Maintenance Restoration

*Important: Not every tool called a “honing rod” behaves the same way. Ceramic and especially diamond-coated rods are abrasive and can remove some steel.

That distinction is important because the common claim that “honing never removes metal” is too absolute.


🔧 What Is Honing?

Honing is primarily a maintenance process.

As a knife is used, the extremely thin area at its cutting edge experiences repeated contact with food and the cutting board.

The knife may gradually feel less crisp even though the edge isn’t completely worn away.

A suitable honing rod can help maintain or improve that edge before full sharpening becomes necessary.

Traditional honing steels are particularly associated with maintaining Western-style kitchen knives.

What Honing Can Do

Depending on the knife and honing tool, honing can:

✔ Maintain cutting performance
✔ Correct minor edge deformation
✔ Help an edge feel crisp again
✔ Extend the useful interval between full sharpenings
✔ Reduce unnecessary sharpening

But honing has limits.

It cannot indefinitely restore an edge that has become genuinely blunt, rounded, chipped, or badly damaged.

At that point, you need to remove material and recreate the cutting edge.

That’s sharpening.

Read: Serrated vs plain edge kitchen knives


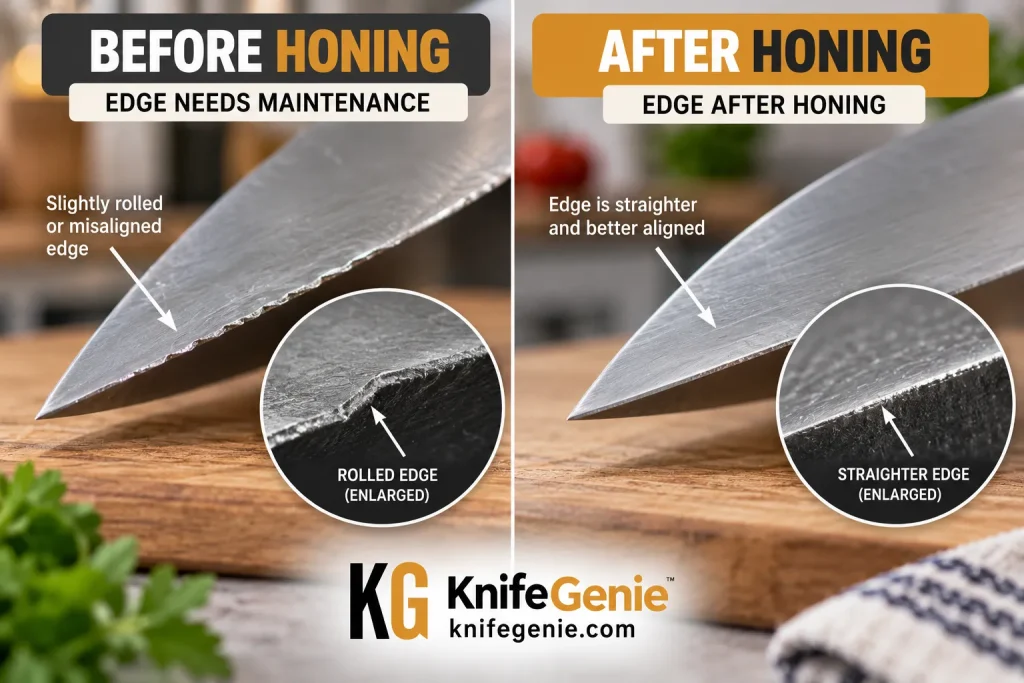
WHAT HONING DOES

What honing does to a kitchen knife edge
Honing can help maintain or correct a slightly deformed cutting edge without performing a full sharpening.

For many home cooks, knife honing is one of the simplest forms of routine kitchen knife maintenance, particularly when using a traditional Western chef’s knife.


🪨 What Is Sharpening?

Sharpening goes further.

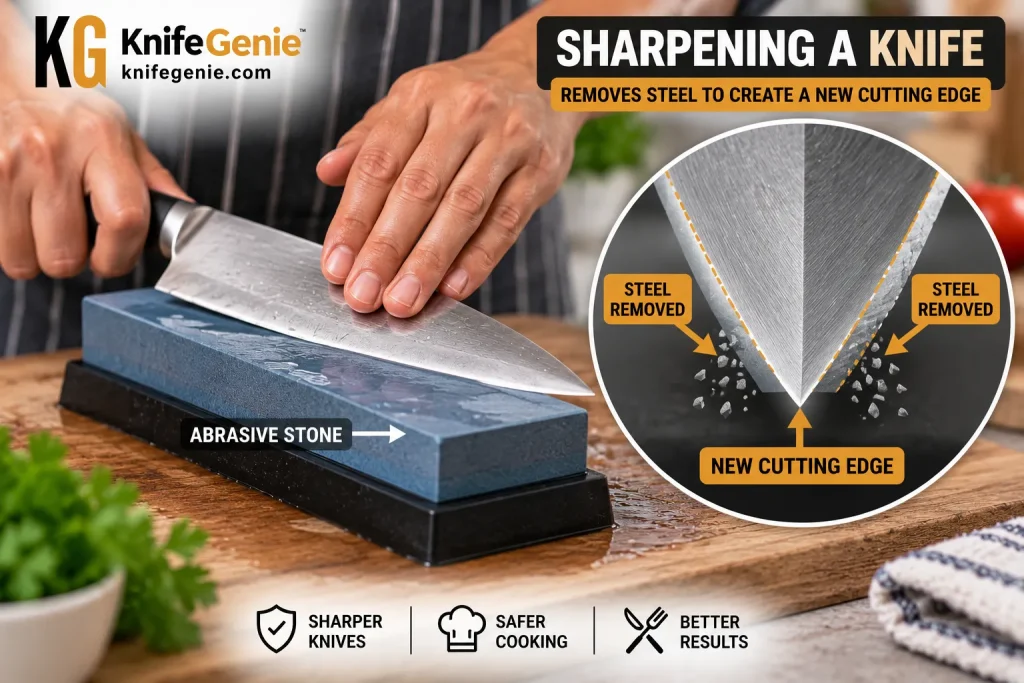
Instead of simply maintaining the existing edge, sharpening uses an abrasive surface to remove a controlled amount of steel.

Material is removed from the bevels until they meet to form a fresh cutting edge.

Depending on the method, sharpening may be performed using:

🪨 Whetstones
🔧 Guided sharpening systems
⚙️ Manual pull-through sharpeners
⚡ Electric sharpeners
👨‍🔧 Professional sharpening equipment

The principle remains essentially the same:

Steel is removed to restore the cutting geometry.

That’s why sharpening works when honing no longer does.

It is also why you shouldn’t sharpen a knife unnecessarily.


HOW SHARPENING WORKS

How sharpening restores a dull kitchen knife edge
Sharpening removes a controlled amount of blade material to recreate a sharp cutting edge.


🔬 What Actually Happens to a Knife Edge?

A knife edge looks substantial to the naked eye.

At its very apex, however, it becomes extremely thin.

Every time you slice an onion, chop a carrot or portion boneless meat, that fine edge experiences stress.

Over time, several things can happen.

The edge may:

🔹 Become slightly deformed
🔹 Develop microscopic wear
🔹 Gradually round over
🔹 Develop small chips
🔹 Lose its original geometry

This explains why “my knife is dull” doesn’t always describe exactly the same problem.

A knife experiencing relatively minor edge deterioration may respond well to honing.

A heavily worn edge needs sharpening.

A badly chipped or damaged blade may require more substantial sharpening or professional repair.

Think Maintenance Before Restoration

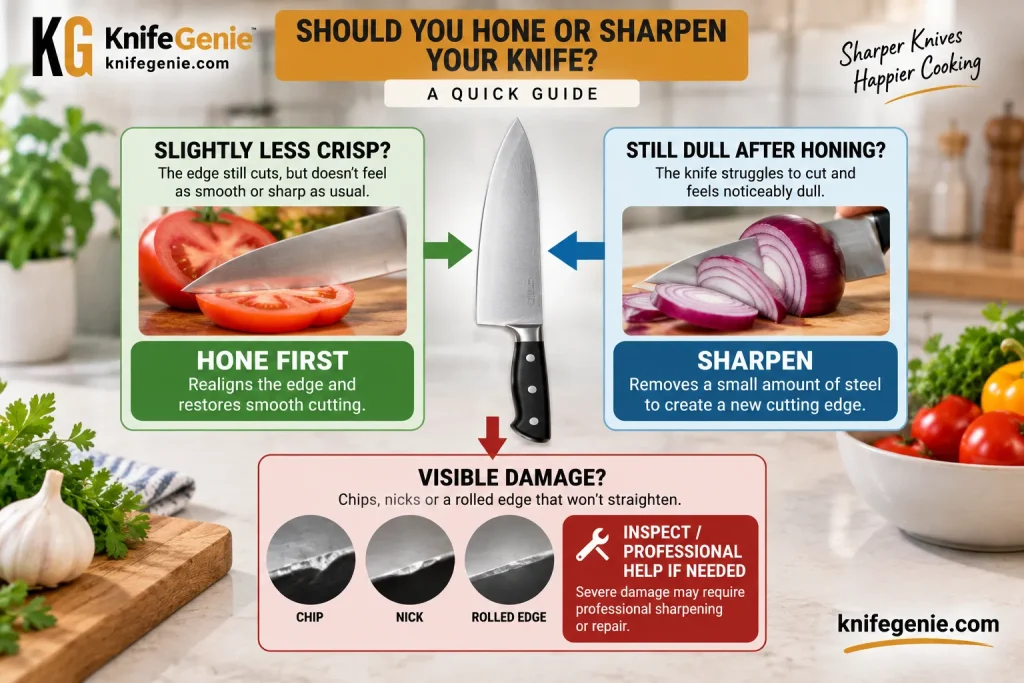
If your knife is still reasonably sharp but has lost some of its crisp cutting feel, appropriate honing is often the logical first step.

If honing makes little or no difference, sharpening becomes the next step.


🧐 How to Tell Whether You Should Hone or Sharpen

You don’t need a microscope.

Pay attention to how the knife cuts.

🔧 Try Honing First If:

✔ The knife was sharp fairly recently
✔ Cutting performance has only declined slightly
✔ The edge isn’t visibly damaged
✔ The knife feels less crisp rather than completely blunt
✔ You use a knife designed to respond well to honing

After honing, carefully test the knife on normal food.

A ripe tomato is particularly revealing.

If the knife can start the cut cleanly without excessive pressure, the edge may simply have needed maintenance.

🪨 Sharpen If:

✘ Honing doesn’t restore satisfactory performance
✘ The knife slides over tomato skin rather than biting into it
✘ Onions require noticeably more pressure
✘ The edge has become rounded or genuinely dull
✘ Minor edge damage needs to be removed
✘ It has been a long time since the knife received proper sharpening

⚠️ Don’t Use Your Finger as a Sharpness Test

Avoid dragging a fingertip along the cutting edge.

Use food or another safe testing method instead.


HONE OR SHARPEN?

When to hone vs sharpen a kitchen knife

If a knife has only lost a little cutting performance, try honing first. If honing doesn’t restore the edge, it may be time to sharpen.


🔁 How Often Should You Hone?

There isn’t one schedule that works for every kitchen knife.

How frequently a knife benefits from honing depends on:

🔪 Blade steel
📐 Edge geometry
🍳 How frequently you cook
🥕 What you cut
🪵 Your cutting-board material
✋ Cutting technique
🔧 Type of honing tool

For a conventional Western chef’s knife that responds well to a honing steel, honing can be performed relatively regularly as cutting performance begins to decline.

But don’t turn honing into a ritual you perform automatically every time you pick up a knife.

Better Rule

Hone when the knife needs edge maintenance.

If the knife is already performing beautifully, there is little reason to keep running it over a rod.


🗓️ How Often Should You Sharpen?

Sharpening should generally happen much less frequently than routine edge maintenance.

For many home cooks, sharpening roughly once or twice a year can be a reasonable starting point, but that is not a rule.

Some knives may need it sooner.

Others may go considerably longer.

A cook preparing meals several times every day will wear an edge differently from someone using a chef’s knife twice a week.

Instead of sharpening according to a rigid calendar:

See: How Often Should You Sharpen guide.

Ask These Questions

Has cutting performance declined?

Does appropriate honing restore it?

YES → Keep using the knife.

NO → Consider sharpening.

This avoids grinding away steel simply because six months have passed since the last sharpening.


🪄 Types of Honing Rods

This is where the honing-versus-sharpening discussion gets more interesting.

Not every rod works the same way.

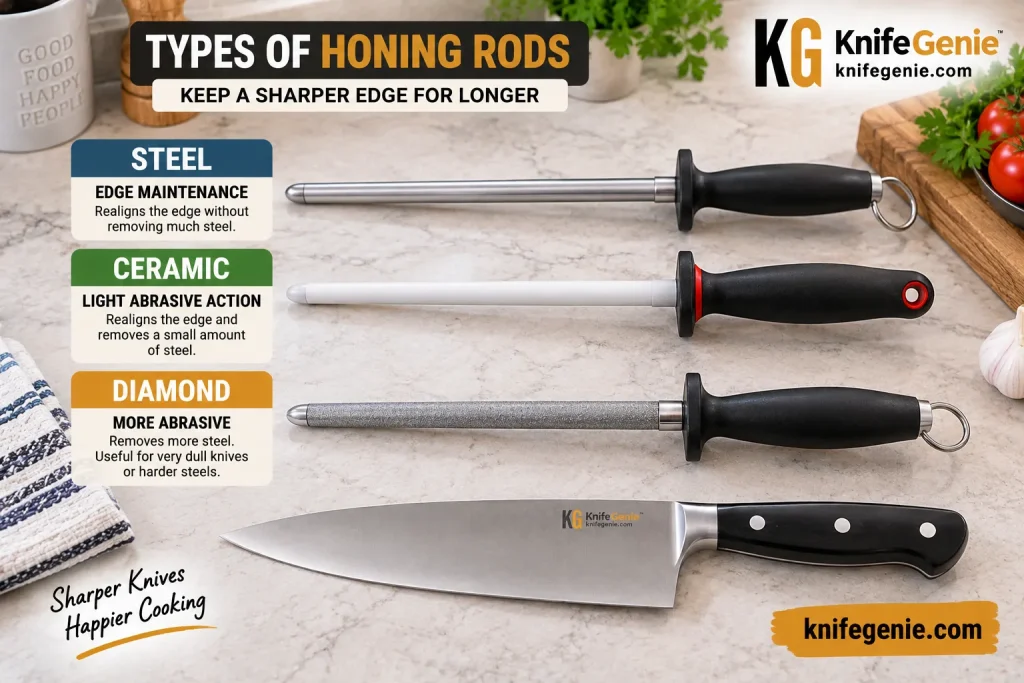
🔩 Traditional Steel Honing Rod

A conventional steel rod is primarily an edge-maintenance tool.

It is particularly familiar to owners of traditional Western kitchen knives.

⚪ Ceramic Honing Rod

Ceramic rods are abrasive.

They can provide relatively gentle edge refinement while removing a small amount of material.

That means the boundary between honing and sharpening starts becoming less clear.

💎 Diamond-Coated Rod

Diamond-coated rods are considerably more abrasive.

They can remove steel rather than merely maintaining or realigning an edge.

Consequently, don’t assume every rod-shaped tool should be used as frequently as a traditional honing steel.

🧙 KnifeGenie Tip

Choose the maintenance tool for the knife—not simply the tool that came with your old knife block.


HONING ROD TYPES

Steel ceramic and diamond honing rods compared
Steel, ceramic and diamond rods do not affect a knife edge in exactly the same way.


🪨 Common Knife Sharpening Methods

Once your knife genuinely needs sharpening, you have several choices.

🪨 Whetstone

A whetstone gives the user substantial control over the sharpening process.

Advantages

✔ Excellent control
✔ Works with many knives
✔ Different grits allow sharpening and refinement
✔ Can produce excellent results

Challenges

✘ Requires technique
✘ Maintaining a consistent angle takes practice
✘ Slower for beginners

A whetstone—also commonly called a sharpening stone—removes steel gradually as you work along the knife’s edge.

🎯 Guided Sharpener

Guided systems help control the sharpening angle.

Maintaining the correct knife sharpening angle is important because changing the angle too much can alter the original edge geometry.

Advantages

✔ Easier angle consistency
✔ Beginner friendly
✔ Repeatable results

Challenges

✘ Compatibility varies
✘ Some systems are relatively expensive
✘ Not every knife geometry fits every system

⚙️ Pull-Through Sharpener

Pull-through sharpeners prioritize convenience.

Advantages

✔ Fast
✔ Easy to understand
✔ Convenient

Challenges

✘ Less control
✘ Fixed angles may not suit every knife
✘ Aggressive models can remove more steel than necessary

👨‍🔧 Professional Sharpening

Professional sharpening makes sense when:

✔ You own an expensive knife and aren’t confident sharpening it
✔ The edge is chipped or damaged
✔ The knife has unusual geometry
✔ You simply don’t want to learn sharpening

But choose the sharpener carefully.

“Professional” describes a service—not automatically the quality of the work.

Work Sharp — Honing vs Sharpening guidance (Professional knife sharpeners)


⚠️ Can Honing Damage a Knife?

Yes, particularly when technique or equipment is inappropriate.

Common problems include:

❌ Using excessive pressure
❌ Holding the knife at an unsuitable angle
❌ Striking the blade rapidly against the rod
❌ Using an aggressive rod unnecessarily
❌ Honing a knife the manufacturer doesn’t recommend honing this way

You don’t need to imitate the lightning-fast honing technique sometimes seen on television.

For a home cook, slow and controlled beats fast and dramatic.


⚠️ Can You Sharpen a Knife Too Often?

Yes.

See our guide on how often should you sharpen kitchen knives.

Sharpening works by removing steel.

A tiny amount of material must disappear for a new edge to be created.

That’s perfectly normal.

But sharpening unnecessarily means removing steel that didn’t need to be removed.

The Goal Isn’t to Avoid Sharpening

Kitchen knives are tools.

Eventually, an actively used knife will need sharpening.

The goal is simply to sharpen when necessary rather than excessively.

🧙 KnifeGenie Rule

Don’t sharpen because the calendar says so. Sharpen because the edge says so. 

Read: Sharpening a boning knife…


🇯🇵 What About Japanese Kitchen Knives?

This deserves special attention.

Don’t assume the honing routine you use for a traditional German chef’s knife automatically applies to every Japanese knife.

Japanese kitchen knives can differ considerably in:

🧱 Steel hardness
📐 Edge angle
🔪 Blade geometry
⚖️ Blade thickness
↔️ Bevel configuration

Some harder, thinner edges may not respond to a traditional grooved honing steel in the same way as a tougher Western chef’s knife.

Single-bevel knives require additional consideration.

Before Honing or Sharpening an Expensive Knife

Check the knife manufacturer’s maintenance recommendations.

You don’t want to spend hundreds of dollars on a precision kitchen knife and then force its carefully designed edge through an inappropriate sharpener.

Japanese knife honing deserves extra care because harder steels and thinner edge geometries may not be suitable for the same honing technique used on softer Western knives.


GERMAN VS JAPANESE EDGE MAINTENANCE

German and Japanese knife honing and sharpening comparison
Different steels and edge geometries can require different maintenance approaches, so check the manufacturer’s recommendations.

See our German and Japanese kitchen knives guide.


Common Honing and Sharpening Mistakes

❌ Mistake #1: Assuming Honing and Sharpening Are the Same

They aren’t.

Knowing the difference prevents unnecessary sharpening.

❌ Mistake #2: Sharpening Every Time the Knife Feels Slightly Dull

Try appropriate honing first when the edge only seems slightly less crisp.

❌ Mistake #3: Assuming Honing Never Removes Steel

Traditional honing steels may remove very little material, but ceramic and diamond rods can be abrasive.

❌ Mistake #4: Using Too Much Pressure

More pressure doesn’t automatically produce a better edge.

Control matters more.

❌ Mistake #5: Guessing the Sharpening Angle

Don’t automatically use the same angle for every knife.

❌ Mistake #6: Using One Sharpener for Every Knife

An inexpensive Western chef’s knife, hard Japanese gyuto and serrated bread knife should not automatically receive identical treatment.

❌ Mistake #7: Ignoring Your Cutting Board

A freshly sharpened knife can lose performance faster when repeatedly used on unsuitable hard surfaces.

❌ Mistake #8: Expecting Honing to Repair Damage

A honing rod isn’t a magic wand.

Chips and heavily worn edges require sharpening or repair.


🔄 A Simple Knife Maintenance Routine

For most home cooks, knife maintenance doesn’t need to be complicated.

Step 1 — Use the Knife Normally

Pay attention to cutting performance.

Step 2 — Notice the Change

Does an onion require more pressure?

Does tomato skin resist the edge?

Does the knife simply feel less crisp?

Step 3 — Inspect the Edge

Look for obvious chips or damage.

Step 4 — Hone When Appropriate

If the knife and manufacturer support honing, use the appropriate tool and controlled technique.

Step 5 — Test Again

Has normal cutting performance returned?

Yes?

👉 Keep cooking.

No?

👉 The knife may need sharpening.

Step 6 — Sharpen Appropriately

Use a method suited to the knife and maintain its intended edge geometry.

Step 7 — Protect the Restored Edge

Use a knife-friendly cutting board, appropriate storage and sensible cutting technique.

That simple routine can prevent a lot of unnecessary sharpening.

See our How to Store Kitchen Knives Safely guide.


KNIFE MAINTENANCE ROUTINE

Kitchen knife honing and sharpening maintenance routine
A simple maintenance routine helps determine whether your knife needs honing or actual sharpening.


🧠 Research & Editorial Note

KnifeGenie’s guidance in this article is based on research into knife-edge maintenance principles, manufacturer guidance, and established sharpening practices rather than personal hands-on testing of every honing or sharpening product or method mentioned.

No specific honing rod, whetstone or sharpening system is being presented here as having been personally tested unless that is explicitly stated.

The purpose of this guide is to explain how honing and sharpening differ, when each process is appropriate, and what home cooks should consider before choosing a maintenance method.

Individual knives can require different care depending on their steel, hardness, bevel geometry, and manufacturer’s recommendations.


Frequently Asked Questions

Is honing the same as sharpening?

No.

Honing primarily maintains an existing edge, while sharpening uses an abrasive to remove material and restore the cutting edge.

However, abrasive ceramic and diamond rods blur the distinction because they can remove some steel while refining the edge.

Should I hone or sharpen my knife first?

If your knife has simply lost some of its crisp cutting performance and is suitable for honing, try honing first.

If performance isn’t restored, the edge may need sharpening.

Does a honing steel actually sharpen a knife?

A traditional honing steel is primarily an edge-maintenance tool rather than a replacement for actual sharpening.

The terminology becomes confusing because some rods marketed for honing are abrasive. Ceramic and diamond-coated rods can remove material.

How often should I hone my kitchen knife?

There is no universal schedule.

Hone when an appropriate knife begins showing a modest decline in cutting performance rather than automatically honing before every use.

How often should I sharpen my kitchen knives?

For many home cooks, once or twice a year can be a useful starting point, but usage matters more than the calendar.

If honing no longer restores satisfactory performance, it’s probably time to sharpen.

Can honing replace sharpening?

No.

Honing can help maintain an edge and potentially extend the interval between sharpenings, but eventually normal wear changes the edge enough that sharpening becomes necessary.

Can you hone a Japanese knife?

Sometimes, but don’t assume every Japanese knife should be maintained using a conventional grooved steel.

Steel hardness, edge geometry and manufacturer recommendations matter. Check the instructions for your particular knife.

Does sharpening remove metal?

Yes.

Sharpening uses abrasive material to remove a controlled amount of steel so the bevels meet at a fresh cutting edge.

Can you sharpen a knife too much?

Yes.

Because sharpening removes steel, unnecessary sharpening gradually removes more blade material than required.

Is a ceramic rod for honing or sharpening?

It can perform aspects of both.

Ceramic is abrasive, so a ceramic rod can refine an edge while also removing a small amount of material. That makes it different from a conventional smooth or lightly grooved honing steel.


🏆 Overall Recommendation

The difference between honing and sharpening becomes much easier once you stop thinking of both processes as ways to “make a knife sharp.”

Think instead:

🔧 HONING = MAINTAIN

Use appropriate honing to help maintain an edge that still has useful sharpness.

🪨 SHARPENING = RESTORE

Sharpen when the cutting edge has genuinely worn enough that maintenance no longer restores satisfactory performance.

For the average home cook, the simplest sequence is:

Use → Notice declining performance → Hone if appropriate → Test → Sharpen when honing no longer works.

You don’t need to sharpen a good kitchen knife every time it feels slightly different.

And you don’t need to endlessly hone an edge that has genuinely become dull.

Learn to recognize what the knife is telling you.

🧙 KnifeGenie Final Verdict

If honing restores the edge, keep cooking.

If honing doesn’t restore the edge, it’s time to sharpen.

Knowing that difference is one of the simplest ways to take better care of your kitchen knives.


OVERALL RECOMMENDATION

Honing vs sharpening overall kitchen knife recommendation
Hone to maintain a suitable knife’s edge; sharpen when the edge is genuinely dull and honing no longer restores performance.

Best Knife Sharpeners for Beginners: 5 Easy Options for Home Cooks

Best knife sharpeners for beginners comparing easy sharpening methods

Best knife sharpeners for beginners comparing easy sharpening methods

The best beginner knife sharpener combines ease of use, consistent angles, and enough control to sharpen without unnecessarily removing steel.

The best knife sharpeners for beginners make it easier to restore a dull kitchen knife without requiring years of sharpening experience. See what causes a knife edge to become dull.

A good kitchen knife doesn’t stay sharp forever. Eventually, even a quality chef’s knife will start sliding across tomato skins, crushing herbs, or requiring more pressure to cut vegetables.

That’s when many beginners run into the same problem:

What knife sharpener should I actually buy?

Walk into a kitchen store or search online and you’ll find whetstones, electric sharpeners, pull-through sharpeners, guided systems, ceramic rods and more.

They all promise sharp knives—but they don’t all work the same way.

For most beginners, the best knife sharpener isn’t necessarily the one capable of producing the absolute sharpest edge. It’s the one that gives you a good combination of ease of use, angle consistency, control and compatibility with the knives you actually own.

It’s the sharpener that gives you a good combination of:

✔ Ease of use
✔ Angle consistency
✔ Reasonable control
✔ Suitable abrasives
✔ Compatibility with your knives
✔ Low risk of unnecessary steel removal

Let’s make the choice much easier.


🏆 Best Knife Sharpener for Beginners: Quick Answer

If you’re completely new to sharpening, our overall recommendation for most beginners is a guided sharpening system because it removes one of the hardest parts of learning to sharpen a knife: holding a consistent angle.

🥇 Best Overall for Beginners — Guided Sharpening System

A guided system holds or controls the sharpening angle while you move the abrasive across the edge.

Best for: Beginners who want control and repeatable results.

⚡ Easiest — Quality Electric Sharpener

Insert the blade into the appropriate sharpening stage and follow the manufacturer’s instructions.

Best for: Home cooks who prioritize speed and simplicity.

👍 Simplest Budget Choice — Manual Pull-Through Sharpener

Compact, inexpensive and extremely easy to understand.

Best for: Ordinary inexpensive kitchen knives and occasional sharpening.

🪨 Best for Learning the Skill — Combination Whetstone

Takes considerably more practice but gives you excellent control once you learn the technique.

Best for: Beginners willing to learn proper freehand sharpening.

👨‍🔧 Best for Expensive or Difficult Knives — Professional Sharpening

Sometimes the smartest sharpener is no sharpener at all.

Best for: Premium knives, damaged edges, unusual grinds and anyone uncomfortable sharpening an expensive blade.

🧙 KnifeGenie Recommendation

For most beginners who want to learn to maintain their own knives, start with a guided sharpening system.

It provides a useful middle ground between the simplicity of a pull-through sharpener and the control of a whetstone.


🔽 In This Beginner Knife Sharpener Guide

👉 Quick Comparison
👉 What Does a Knife Sharpener Actually Do?
👉 Sharpening vs Honing
👉 1. Guided Sharpening Systems
👉 2. Electric Knife Sharpeners
👉 3. Manual Pull-Through Sharpeners
👉 4. Whetstones
👉 5. Professional Sharpening
👉 Which Sharpener Is Easiest for Beginners?
👉 What Sharpening Angle Should You Use?
👉 What to Look for Before Buying
👉 Sharpeners to Be Careful With
👉 Common Beginner Mistakes
👉 Frequently Asked Questions
👉 Overall Recommendation


📊 Beginner Knife Sharpeners: Quick Comparison

Sharpener Type Ease of Use Control Learning Curve Speed Best For
🥇 Guided system ⭐⭐⭐⭐ ⭐⭐⭐⭐⭐ Low–Medium Medium Best overall balance
⚡ Electric ⭐⭐⭐⭐⭐ ⭐⭐ Very Low Very Fast Maximum convenience
👍 Pull-through ⭐⭐⭐⭐⭐ ⭐⭐ Very Low Fast Budget/simple knives
🪨 Whetstone ⭐⭐ ⭐⭐⭐⭐⭐ High Slow Learning + maximum control
👨‍🔧 Professional ⭐⭐⭐⭐⭐ N/A None N/A Premium/damaged knives

🧙 KnifeGenie Tip

Don’t choose solely on which sharpener promises the sharpest possible knife.

For a beginner, repeatability and control are often more valuable than theoretical maximum sharpness.


🔍 How We Evaluated These Beginner Sharpening Methods

This guide is based on research into the main sharpening methods available to home cooks, including manufacturer specifications, sharpening principles, and the practical advantages and limitations of each method.

We evaluated each approach based on ease of use, angle control, learning curve, speed, knife compatibility, and the risk of removing unnecessary steel.

Our recommendations focus on helping home cooks compare the best knife sharpeners for beginners based on ease of use, angle control, learning curve, knife compatibility, and the risk of removing unnecessary steel.

We also explain which sharpening method likely makes the most sense for a beginner—not that we personally tested every sharpener mentioned in this guide.


🔪 What Does a Knife Sharpener Actually Do?

A knife becomes dull as its very thin cutting edge wears, deforms or suffers microscopic damage through normal use.

Actual sharpening uses an abrasive to remove a small amount of metal and recreate the cutting edge.

Different sharpeners control this process differently.

A whetstone gives your hands almost complete control.

A guided system helps control the angle mechanically.

A pull-through sharpener largely determines the angle for you.

An electric sharpener uses powered abrasive wheels or discs and guides to make the process faster.

That distinction matters because you don’t want to remove more steel than necessary.

Your goal isn’t to grind the knife aggressively.

Your goal is to restore an effective cutting edge while preserving as much of the blade as practical.


HOW KNIFE SHARPENING WORKS

How a knife sharpener restores a dull kitchen knife edge
Sharpening removes a small amount of metal to restore the knife’s cutting edge.


🔄 Sharpening vs Honing: Don’t Confuse Them

Before buying anything, understand this distinction.

🔪 Sharpening

Sharpening uses abrasive material to remove metal and restore the cutting edge.

🔁 Honing

Honing is primarily an edge-maintenance process. It can help keep a usable edge performing well between actual sharpenings.

That means you shouldn’t automatically sharpen your chef’s knife every time it feels slightly less sharp.

👉  How Often Should You Sharpen Kitchen Knives?

🧙 KnifeGenie Rule

Maintain the edge when appropriate. Sharpen when the knife actually needs sharpening.


🥇 1. Guided Sharpening Systems — Best Overall for Beginners

A guided sharpener solves one of the biggest problems beginners face:

Maintaining a consistent sharpening angle.

Instead of trying to hold the knife at exactly the same angle during dozens of freehand strokes, the system uses a guide, clamp, rod or similar mechanism to make the process more repeatable.

For example, the Work Sharp Precision Adjust uses a clamp and an adjustable 15°–30° sharpening chassis together with diamond and ceramic abrasives.

The Work Sharp Precision Adjust is designed to make angle control easier by securing the knife and guiding the abrasive at a selected angle.

That type of design makes guided systems particularly attractive to people who want to understand sharpening without immediately learning freehand stone technique.

✅ Pros

✔ Consistent sharpening angles
✔ More control than most pull-through systems
✔ Easier learning curve than freehand stones
✔ Multiple abrasives may be included
✔ Repeatable results
✔ Good way to understand sharpening progression

❌ Cons

✘ Slower than an electric sharpener
✘ More setup required
✘ Some systems struggle with very long, very small or unusually shaped blades
✘ More expensive than basic pull-through sharpeners
✘ You still need to understand which angle is appropriate

⭐ Best For

Beginners who want good results now while learning more about sharpening along the way.

🧙 KnifeGenie Verdict

BEST OVERALL SHARPENER TYPE FOR BEGINNERS

If you want more control than a pull-through sharpener without jumping directly into freehand whetstones, this is the category we’d look at first.


GUIDED KNIFE SHARPENER

Beginner using guided knife sharpener on kitchen chef knife
Guided systems make it easier for beginners to maintain a consistent sharpening angle.


2. Electric Knife Sharpeners — Easiest for Convenience

Electric sharpeners are difficult to beat for simplicity.

Most use guides to position the knife while powered abrasives do the sharpening.

Higher-quality models may provide separate stages for shaping, sharpening and polishing.

The Chef’sChoice 15XV, for example, uses a three-stage system with diamond abrasives and angle guides.

✅ Pros

✔ Extremely easy to learn
✔ Very fast
✔ Guided sharpening
✔ Consistent process
✔ Little manual technique required
✔ Convenient for households with several knives

❌ Cons

✘ Less control than careful manual sharpening
✘ Quality models can be relatively expensive
✘ Powered abrasives can remove steel quickly
✘ Preset geometry may not suit every knife
✘ Not our first choice for every premium Japanese knife

⚠️ Important

Read the manufacturer’s instructions before putting a knife into an electric sharpener.

Don’t assume every kitchen knife should be converted to whatever angle the machine produces.

⭐ Best For

Home cooks who care more about speed, simplicity and convenience than learning sharpening technique.

🧙 KnifeGenie Verdict

EASIEST BEGINNER OPTION

A good electric sharpener can take much of the guesswork out of routine sharpening—but compatibility matters.


ELECTRIC SHARPENER

Beginner using electric knife sharpener for kitchen knife
Electric sharpeners are fast and convenient, but make sure the machine’s sharpening geometry is appropriate for your knife.


👍 3. Manual Pull-Through Sharpeners — Best Simple Budget Option

You’ve probably seen these in kitchen stores.

A manual pull-through sharpener typically has one or more V-shaped sharpening slots.

Place it securely on the counter, insert the knife as directed and draw the blade through the appropriate slot.

Simple.

And that simplicity is exactly why they’re popular.

✅ Pros

✔ Very easy to use
✔ Affordable
✔ Compact
✔ Fast
✔ Little technique required
✔ Useful for ordinary household knives

❌ Cons

✘ Limited angle control
✘ Fixed geometry may not suit your knife
✘ Cheap carbide models can be aggressive
✘ Less precise than guided systems or stones
✘ Not ideal for every premium blade

⚠️ Don’t Buy Solely on Price

There’s a significant difference between a well-designed guided manual sharpener and an extremely aggressive bargain sharpener.

For a good kitchen knife, we’d rather see a beginner sharpen conservatively than repeatedly strip away unnecessary steel.

⭐ Best For

Budget-conscious home cooks with ordinary Western-style kitchen knives who want something quick and uncomplicated.


PULL-THROUGH SHARPENER

How to use manual pull-through knife sharpener correctly
Pull-through sharpeners are simple and affordable, but the preset sharpening angle needs to suit your knife.


🪨 4. Whetstones — Best for Learning Proper Sharpening

Whetstones remain one of the most versatile ways to sharpen kitchen knives.

Instead of putting your knife into a preset guide, you move the blade across an abrasive stone while maintaining the desired angle yourself.

That’s both their greatest strength and their biggest weakness.

You control:

👉 Sharpening angle
👉 Pressure
👉 Abrasive grit
👉 Number of passes
👉 Edge progression
👉 How much material you remove

But you also have to develop the skill to control those things consistently.

✅ Pros

✔ Excellent control
✔ Works with many kitchen knives
✔ Wide range of grits available
✔ Can produce excellent edges
✔ Teaches you how sharpening actually works
✔ No powered mechanism

❌ Cons

✘ Steeper learning curve
✘ Angle consistency takes practice
✘ Slower for beginners
✘ Different stones require different care
✘ Easy to become obsessed with buying more stones than you need!

🧙 KnifeGenie Tip

Beginners don’t need a drawer full of sharpening stones.

A sensible combination stone or simple stone setup is enough to start learning.

Practice on an inexpensive kitchen knife before sharpening your most expensive blade.

⭐ Best For

People who enjoy learning practical skills and want maximum long-term sharpening control.


WHETSTONE SHARPENING

Beginner learning to sharpen kitchen knife with whetstone
Whetstones provide excellent control but require more practice than guided or electric sharpeners.


👨‍🔧 5. Professional Sharpening — Sometimes the Smartest Choice

You don’t have to sharpen every knife yourself.

Professional sharpening makes particular sense when you have:

💎 An expensive knife you’re afraid of damaging
🔨 A chipped or damaged edge
🇯🇵 A specialty Japanese blade
📐 An unusual grind or bevel
🔪 A knife requiring significant edge repair
😬 No interest in learning sharpening

A skilled professional can also evaluate problems that aren’t obvious to a beginner.

✅ Pros

✔ No learning curve
✔ Useful for edge repair
✔ Good option for valuable knives
✔ Appropriate for unusual blade geometries when the sharpener has the necessary expertise

❌ Cons

✘ Ongoing cost
✘ Quality varies
✘ You may need to leave or ship the knife
✘ Less convenient than sharpening at home

🧙 KnifeGenie Verdict

There’s nothing wrong with maintaining ordinary kitchen knives yourself while sending your expensive or difficult knives to a knowledgeable professional.


🏆 Which Knife Sharpener Is Easiest for Beginners?

If ease alone is the priority:

🥇 Electric Sharpener

The machine and guides do most of the work.

If you want ease plus better manual control:

🥇 Guided Sharpening System

This is our preferred compromise.

If you want cheap and simple:

👍 Manual Pull-Through

If you want to learn sharpening as a skill:

🪨 Whetstone

There isn’t one correct answer because these users have different priorities.


BEGINNER SHARPENER DECISION

Choosing the best knife sharpener for beginners by sharpening method


📐 What Sharpening Angle Should a Beginner Use?

This is where beginners should resist overly simple advice.

There is no single correct sharpening angle for every kitchen knife.

Different manufacturers and knife designs use different edge geometries.

A traditional Western-style chef’s knife may have a different edge from a thin Japanese gyuto.

Some specialty Japanese knives can even have asymmetrical or single-bevel edges.


🧙 KnifeGenie Recommendation

Preserve the manufacturer’s intended edge geometry unless you have a good reason and enough experience to change it.

If you don’t know the factory angle, check the manufacturer’s specifications or sharpening instructions before choosing a fixed-angle sharpener.


🛍️ 7 Things Beginners Should Check Before Buying a Knife Sharpener

1. 🔪 What Knives Do You Own?

Start with the knives—not the sharpener.

Ask:

👉 Western chef’s knives?
👉 Japanese kitchen knives?
👉 Serrated knives?
👉 Single-bevel knives?
👉 Pocket knives as well as kitchen knives?

A sharpener that works beautifully for one collection may be unsuitable for another.


2. 📐 Can You Control the Angle?

Angle control is one of the biggest advantages of guided systems.

If your sharpener uses a fixed angle, make sure that geometry makes sense for your knives.


3. 🪨 What Abrasives Does It Use?

Common sharpening abrasives include:

• Diamond
• Ceramic
• Aluminum oxide
• Silicon carbide
• Natural and synthetic stones

Don’t assume one material automatically makes a sharpener superior.

The abrasive, grit, pressure and sharpening technique all work together.


4. 🔄 Does It Have Multiple Stages or Grits?

A badly dulled knife may need more abrasive work than a knife receiving a routine touch-up.

Multiple abrasives or stages can allow you to move from sharpening toward refinement.

But don’t automatically start with the coarsest abrasive every time.

⚠️ Remember

Coarse abrasives remove metal faster.

Use them when they’re actually needed.


5. 🧲 Is the Knife Held Securely?

With guided systems, check how securely the knife can be clamped.

With pull-through and electric systems, check whether the base remains stable.

With whetstones, use a secure stone holder or non-slip base.

Stability improves both consistency and safety.


6. 🧼 Is It Easy to Maintain?

Sharpening creates metal and abrasive debris.

Look for equipment that’s straightforward to clean according to the manufacturer’s instructions.


7. 💰 Are You Paying for Features You’ll Actually Use?

A beginner doesn’t necessarily need the most sophisticated sharpening system available.

Start with your knives and your needs.

You can always upgrade later.


⚠️ Knife Sharpeners Beginners Should Be Careful With

Not every inexpensive sharpener is a bargain.

Be cautious with extremely aggressive carbide pull-through sharpeners, particularly on expensive knives.

They can remove material quickly.

That doesn’t mean every carbide sharpener is automatically bad.

It means beginners should understand that fast metal removal isn’t necessarily desirable.

Also avoid:

❌ Sharpeners with no clear angle information
❌ Poorly secured sharpening equipment
❌ Using damaged or contaminated stones
❌ Systems incompatible with your blade geometry
❌ Assuming one sharpener works properly on every knife


🚫 7 Common Knife Sharpening Mistakes Beginners Make

1. Sharpening a Knife That Only Needs Maintenance

Don’t grind away steel unnecessarily.

👉 Read: How Often Should You Sharpen Kitchen Knives?

2. Using the Wrong Angle

Check your knife manufacturer’s recommendation.

3. Starting Too Coarse

Use coarse abrasives for edges that actually require substantial correction.

4. Applying Excessive Pressure

More pressure doesn’t automatically create a better edge.

5. Changing Angles During Sharpening

Consistency matters.

This is one reason guided systems are so useful for beginners.

6. Practicing on Your Most Expensive Knife

Learn on an inexpensive knife first.

Your premium Japanese chef’s knife doesn’t need to become your sharpening experiment.

7. Expecting the Sharpener to Fix Bad Knife Habits

A freshly sharpened knife won’t stay sharp for long if you:

❌ Cut on glass
❌ Cut on granite
❌ Throw knives loose into drawers
❌ Abuse the edge on bones or frozen foods
❌ Use the knife for tasks it wasn’t designed to perform

Sharpening and knife care work together.


SHARPENING MISTAKES

Common knife sharpening mistakes beginners should avoid
Consistent angles, controlled pressure, and appropriate abrasives matter more than sharpening aggressively.


🔪 What About Japanese Kitchen Knives?

Be more cautious.

Many Japanese-style kitchen knives use relatively hard steels and thin edge geometries.

Some specialty Japanese knives also use single-bevel or asymmetrical edges.

That doesn’t mean beginners can’t sharpen Japanese knives.

It means you shouldn’t automatically put an expensive Japanese knife into an aggressive fixed-angle sharpener without checking compatibility.

German vs Japanese Kitchen Knives

For an expensive specialty knife, a suitable whetstone, compatible guided system or knowledgeable professional may make more sense.


🍞 What About Serrated Knives?

Serrations require a different approach because the cutting edge isn’t simply one continuous straight bevel.

Some sharpeners specifically support serrated edges, while others don’t.

Always check the manufacturer’s instructions.

Serrated vs Plain Edge Kitchen Knives

Don’t repeatedly force a serrated bread knife through an ordinary sharpener unless the sharpener is specifically designed for that blade.


🍖 What About Boning Knives?

Boning knives create another challenge because the blade can be narrow, curved and sometimes flexible. These differences are especially important when comparing a boning knife vs fillet knife.

That makes secure positioning and angle consistency especially important.

If you regularly butcher meat at home, choose a system capable of accommodating the shape of your boning knife.

How to Sharpen a Boning Knife

Best Boning Knife for Home Butchers


Frequently Asked Questions

What is the best knife sharpener for a complete beginner?

For someone who wants a balance between ease of use and control, we suggest a guided-angle sharpening system.

If maximum convenience matters more than learning the sharpening process, a quality electric sharpener may be easier.


Are pull-through knife sharpeners bad for knives?

Not automatically.

Quality varies considerably.

The main concerns are whether the preset geometry suits your knife and how aggressively the sharpener removes steel.

We would be more cautious using an inexpensive aggressive pull-through system on a premium kitchen knife.


Is a whetstone too difficult for a beginner?

No.

But expect a learning curve.

Maintaining a consistent freehand angle takes practice.

Start with an inexpensive knife rather than your best chef’s knife.


Are electric knife sharpeners good for beginners?

Yes, particularly when convenience is the priority.

Good models use guides to make angle control easier.

However, always check that the sharpener is appropriate for your knife’s edge geometry.


Do I need to sharpen a new knife?

Usually not.

A quality new kitchen knife should arrive with a usable factory edge.

Use it before deciding that it needs sharpening.


How often should beginners sharpen their kitchen knives?

Don’t sharpen solely according to the calendar.

For many home cooks, sharpening once or twice a year may be a reasonable starting point, but actual frequency depends on usage, knife steel, edge geometry, cutting surface and maintenance habits.


Can the same sharpener sharpen German and Japanese knives?

Sometimes—but don’t assume so.

Check the angles, edge geometry and the sharpener manufacturer’s compatibility information.

👉 Read: German vs Japanese Kitchen Knives


Should I buy a honing rod or a knife sharpener?

They perform different jobs.

A honing rod is primarily an edge-maintenance tool.

A sharpener uses abrasive material to recreate the cutting edge.

Many kitchens benefit from having an appropriate method for both maintenance and eventual sharpening.


How do I know when my knife is sharp enough?

A sharp kitchen knife should cut food cleanly without excessive pressure.

A ripe tomato is a useful practical test: the edge should bite into the skin rather than simply pushing or sliding across it.

You don’t need to chase a razor-like edge just to prepare dinner.


🏆 Overall Recommendation: Which Knife Sharpener Should a Beginner Buy?

For most beginners who want to sharpen their own kitchen knives, our first choice is:

🥇 A Good Guided Sharpening System

It gives you something extremely valuable when you’re learning:

consistency.

You still learn about angles, abrasives and edge progression, but the system helps remove much of the difficulty of maintaining the angle freehand.

Choose an electric sharpener if speed and convenience are your priorities.

Choose a manual pull-through sharpener if you have ordinary inexpensive kitchen knives and want something simple and affordable.

Choose a whetstone if you’re willing to practice and want maximum control over your sharpening.

And choose professional sharpening when the knife is expensive, damaged, unusually ground or simply beyond your comfort level.

🧙 KnifeGenie Final Verdict

BEST OVERALL FOR BEGINNERS: Guided sharpening system
EASIEST: Electric sharpener
BEST BUDGET OPTION: Manual pull-through
BEST FOR LEARNING: Whetstone
BEST FOR EXPENSIVE OR DAMAGED KNIVES: Professional sharpener

The best beginner sharpener isn’t necessarily the fastest or most expensive.

It’s the one that lets you restore your knife’s edge consistently without removing more steel than necessary.

Learn that principle first, and choosing—and using—a knife sharpener becomes much easier.


OVERALL RECOMMENDATION

Best knife sharpener for beginners overall buying recommendation
A guided sharpening system offers beginners an excellent combination of angle consistency, control and ease of learning.


How to Sharpen a Boning Knife

How to sharpen a boning knife in 10 easy steps
How to sharpen a boning knife on a whetstone
A whetstone gives you excellent control when restoring the narrow, curved edge of a boning knife.

A sharp boning knife can make trimming meat, removing silverskin and working around joints feel controlled and precise.

A dull one?

That is when a simple job can become frustrating.

The narrow blade may slide instead of biting cleanly, you may find yourself using more pressure, and delicate trimming becomes much harder than it needs to be.

Fortunately, learning how to sharpen a boning knife isn’t particularly complicated.

For most ordinary double-bevel boning knives, a whetstone gives you excellent control. The important part is maintaining the knife’s existing edge angle, using light pressure and paying extra attention to the curved tip.

And there’s one rule worth remembering before you begin:

🧙 KnifeGenie Tip: Don’t automatically sharpen every boning knife at the same angle. Preserve the existing bevel or use the sharpening angle recommended by the knife manufacturer.


🔽 Jump to What You Need

👉 Quick Answer
👉 What You Need
👉 Sharpening vs Honing
👉 Best Sharpening Method
👉 What Angle Should You Use?
👉 How to Sharpen a Boning Knife Step by Step
👉 How to Sharpen the Curved Tip
👉 How to Know When You’re Finished
👉 Whetstone vs Other Sharpeners
👉 Flexible vs Stiff Boning Knives
👉 Common Sharpening Mistakes
👉 How Often Should You Sharpen?
👉 Keeping a Boning Knife Sharp Longer
👉 When to Use a Professional
👉 Frequently Asked Questions
👉 Overall Recommendation


🏆 How to Sharpen a Boning Knife: The Quick Answer

For a conventional double-bevel boning knife, the basic process is:

  1. Check the manufacturer’s recommended sharpening angle or inspect the existing bevel.
  2. Prepare your whetstone according to its instructions.
  3. Place the knife against the stone at the correct angle.
  4. Sharpen from heel toward the tip using light, controlled strokes.
  5. Follow the curve of the blade as you approach the tip.
  6. Work until you form a small, consistent burr along the opposite side.
  7. Repeat on the other side.
  8. Move to a finer stone to refine the edge.
  9. Remove the remaining burr.
  10. Clean and dry the knife thoroughly.
  11. Test the edge carefully before returning the knife to use.

🧙 KnifeGenie Quick Verdict

Best method for control: 🪨 Whetstone

Easiest method for beginners: 🔧 Compatible guided sharpener

Best option for an expensive knife when you’re unsure: 👨‍🔧 Professional sharpening

Biggest mistake: 📐 Guessing the sharpening angle


🧰 What You Need to Sharpen a Boning Knife

You don’t need a workbench full of specialist equipment.

For the whetstone method, gather:

✔ Your boning knife
✔ A suitable sharpening stone
✔ Non-slip stone holder or damp towel
✔ Water or lubricant if required by the stone manufacturer
✔ Clean towel
✔ Good lighting
✔ Optional angle guide

A medium sharpening stone followed by a finer finishing stone is sufficient for routine sharpening in many home kitchens.

If the knife is extremely dull or has edge damage, a coarser abrasive may be required.

But don’t automatically reach for the coarsest stone you own.

Coarse abrasives remove steel quickly.

For routine maintenance, you generally want to remove only enough metal to restore the cutting edge.


🆚 Sharpening vs Honing: Know the Difference First

Before putting your boning knife on a whetstone, make sure it actually needs sharpening.

🔧 Honing

Honing maintains or realigns an existing edge.

It removes little material compared with actual sharpening.

Think:

Honing = edge maintenance

🪨 Sharpening

Sharpening uses an abrasive to remove steel and recreate or restore the cutting edge.

Think:

Sharpening = edge restoration

This distinction matters because repeatedly grinding away steel when the knife merely needs routine edge maintenance shortens the useful life of the blade unnecessarily.

If you’re wondering how often you should sharpen kitchen knives, cutting performance is usually a better guide than simply sharpening according to a fixed calendar.


HONING VS SHARPENING

Honing vs sharpening a boning knife
Honing maintains an existing edge, while sharpening removes metal to restore a worn cutting edge.

Victorinox sharpening guidance…


🪨 What’s the Best Way to Sharpen a Boning Knife?

For a home cook willing to learn the technique, a whetstone is one of the best choices.

Why?

Because a boning knife isn’t shaped like a chef’s knife.

Its blade is typically:

🔪 Narrow
↪ Curved toward the tip
📏 Relatively short
🪶 Sometimes flexible
🎯 Designed for controlled work around meat and joints

That shape makes control especially important.

A whetstone allows you to follow the entire cutting edge manually rather than forcing the blade through a fixed slot that may or may not suit its geometry.

Why I Prefer a Whetstone

✔ Excellent angle control
✔ Works with many blade shapes
✔ Lets you follow a curved tip
✔ Removes only as much steel as necessary when used correctly
✔ Can produce an excellent edge
✔ Suitable for many quality knives

The Catch

You have to learn to hold a reasonably consistent angle.

Fortunately, you don’t need robotic precision.

Consistency matters more than speed.

And whether a knife is forged or stamped doesn’t by itself determine how sharp it can become. Our forged vs stamped knives guide explains why steel, heat treatment and blade geometry matter just as much.


📐 What Angle Should You Sharpen a Boning Knife?

This is where overly simple sharpening advice can cause problems.

You may see recommendations online telling you that every boning knife should be sharpened at one particular angle.

Don’t assume that.

Different manufacturers use different edge geometries.

You can see the same principle when comparing German vs Japanese kitchen knives: blade geometry, steel, intended use and manufacturer specifications can all influence how an edge should be maintained.

Even different knife ranges from the same manufacturer can have different specifications.

For example, some Western kitchen knives use edges in the mid-teens per side, while some boning knives are designed with more robust edge geometry.

🧙 KnifeGenie Rule

Manufacturer specification → existing factory bevel → generic advice

Follow them in that order.

If the manufacturer specifies an angle, use it.

If you don’t know the angle, inspect the existing bevel and try to follow it rather than deliberately making the edge dramatically thinner or thicker.

Don’t confuse the knife’s primary blade grind with its small sharpening bevel, either. If your knife uses a hollow grind, routine sharpening normally maintains the cutting edge rather than trying to recreate the entire hollow-ground blade profile.

Why Not Make the Edge as Thin as Possible?

Because a boning knife often works close to:

🦴 Joints
🍖 Dense connective tissue
🥩 Meat
🔪 Cutting boards

A very acute edge may feel wonderfully sharp but can sacrifice durability.

The goal isn’t to create the thinnest imaginable edge.

The goal is to restore the edge the knife was designed to use.


BONING KNIFE SHARPENING ANGLE

Correct sharpening angle for a boning knife
There is no universal sharpening angle for every boning knife. Follow the manufacturer’s specification or preserve the existing bevel.


🔪 How to Sharpen a Boning Knife Step by Step

Now we can actually sharpen the knife.

1️⃣ Inspect the Blade

Start by looking carefully at the cutting edge under good lighting.

Look for:

🔍 Flat or reflective spots
🔍 Small rolls
🔍 Minor chips
🔍 Uneven bevels
🔍 Damage near the tip

If the knife has large chips, a bent tip, significant deformation or other serious damage, routine home sharpening may not be the right solution.

Consider professional repair.


2️⃣ Prepare Your Whetstone

Follow the instructions supplied with your particular stone.

Some water stones require soaking.

Others are splash-and-go.

Some sharpening stones use oil instead.

Don’t assume every stone should be soaked simply because you’ve seen somebody doing it in a video.

Place the stone on a stable, non-slip surface.

A stone that slides around while you’re holding a sharp knife is something you definitely don’t want.


3️⃣ Find the Existing Bevel

Place the edge gently against the stone.

You want the existing bevel to sit naturally against the abrasive surface.

If you’re unsure of the angle, a useful learning technique is to color the bevel lightly with a permanent marker.

Make a couple of gentle sharpening passes.

Then inspect it.

If you’re removing marker from the entire bevel reasonably evenly, you’re close to the existing angle.

If you’re removing material only at the shoulder or only at the very edge, adjust accordingly.

🧙 KnifeGenie Tip: The marker trick is especially useful when you don’t know the factory sharpening angle.


4️⃣ Start at the Heel

Hold the handle securely with your dominant hand.

Use your other hand to provide light, controlled pressure on the blade where appropriate, keeping fingers safely away from the cutting edge.

Start near the heel.

Move the edge across the stone in a controlled sharpening stroke.

Don’t race.

Your objective is:

Angle → contact → control → consistency

Not speed.


5️⃣ Follow the Blade Toward the Tip

Gradually work along the cutting edge.

Because a boning knife narrows and curves toward its tip, your hand position needs to change slightly as you progress.

Maintain contact with the edge while following the curvature.

This is one of the main differences between sharpening a narrow boning knife and sharpening a broad chef’s knife.


STEP-BY-STEP SHARPENING

How to sharpen a boning knife step by step
Work progressively from heel to tip while maintaining the existing bevel and following the curved cutting edge.

6️⃣ Feel for a Burr

As you sharpen one side, a tiny burr should eventually form along the opposite side of the cutting edge.

A burr is a very small ridge of metal created as you abrade the edge.

You don’t need a huge burr.

You’re looking for a small, reasonably consistent burr along the edge.

Be extremely careful when checking.

Move your fingertip across and away from the edge, never along the cutting edge.

If you’re uncomfortable checking manually, use visual inspection instead.


7️⃣ Sharpen the Other Side

Turn the knife over.

Repeat the process on the second bevel.

Again:

✔ Maintain the angle
✔ Use controlled pressure
✔ Work along the complete edge
✔ Follow the curve
✔ Don’t forget the tip

Try to keep your work reasonably balanced between both sides unless your knife is specifically designed with an asymmetric bevel.


8️⃣ Move to the Finer Stone

Once you’ve restored the basic edge, move to your finer abrasive.

Use lighter pressure.

At this stage, you’re refining the edge rather than aggressively removing steel.

Think:

Coarser abrasive = establish/repair

Finer abrasive = refine

Finish with increasingly light strokes.


9️⃣ Remove the Burr

A knife isn’t finished simply because you’ve created a burr.

You also need to remove it.

Use very light alternating strokes on the finer stone until the edge feels clean and consistent.

A remaining wire edge can make a knife initially seem extremely sharp but deteriorate quickly during use.


🔟 Clean and Dry the Knife

Sharpening creates abrasive and metal residue.

Wash or rinse the blade appropriately after sharpening and dry it thoroughly before using it for food preparation.

Never leave a carbon-steel blade wet.


How to Sharpen the Curved Tip of a Boning Knife

The tip is where beginners commonly struggle.

A boning knife’s cutting edge curves upward as it approaches the point.

If you keep your hands completely fixed while sharpening, part of that curve may lose contact with the stone.

The solution is a small, controlled adjustment.

As your sharpening stroke moves toward the tip:

  1. Follow the curvature of the edge.
  2. Slightly adjust or lift the handle as necessary to maintain bevel contact.
  3. Keep the movement smooth.
  4. Don’t dramatically increase the sharpening angle.
  5. Don’t grind the tip excessively.

Think of the stone as following the shape already built into the knife.

You aren’t trying to redesign it.


SHARPENING THE CURVED TIP

How to sharpen the curved tip of a boning knife
Follow the blade’s curvature as you approach the tip so the existing bevel remains in controlled contact with the stone.


🧪 How Do You Know When the Boning Knife Is Sharp?

Don’t test sharpness with your thumb.

There are much better methods.

📄 Paper Test

Carefully try slicing through ordinary paper.

A properly sharpened plain-edge boning knife should begin the cut readily and move through without repeatedly tearing or snagging.

🍅 Tomato Test

A ripe tomato is another useful kitchen test.

The knife should bite into the skin without requiring excessive downward force.

🥩 Real-World Test

Ultimately, a boning knife needs to work well on the foods it was designed for.

When trimming boneless meat, it should make controlled cuts without requiring excessive force.

The goal isn’t simply to make the knife “razor sharp.”

It’s to create a clean, stable and useful working edge.


BONING KNIFE SHARPNESS TEST

Boning knife sharpness test using paper and tomato
Paper and tomato tests can help reveal whether a freshly sharpened plain-edge boning knife is cutting cleanly.


⚔️ Whetstone vs Other Boning Knife Sharpeners

There isn’t only one way to sharpen a boning knife.

Here’s how the common options compare.

Method Control Learning Curve Curved Blade Steel Removal KnifeGenie Take
🪨 Whetstone ⭐⭐⭐⭐⭐ Moderate Excellent Controllable Best overall
🔧 Guided system ⭐⭐⭐⭐⭐ Low–moderate Usually good Controllable Excellent choice
🖐 Handheld sharpener ⭐⭐⭐ Easy Depends on design Can be higher Convenient
⚡ Electric sharpener ⭐⭐–⭐⭐⭐ Easy Model dependent Can remove more steel Use carefully
💎 Diamond/ceramic rod ⭐⭐⭐ Moderate Good Depends on rod Useful for touch-ups
👨‍🔧 Professional service ⭐⭐⭐⭐⭐ None Excellent Professional control Best for damage/uncertainty

🏆 KnifeGenie Choice

For the home cook who wants to learn:

Whetstone.

For somebody who struggles to maintain a consistent angle:

A compatible guided system can be an excellent alternative.

For an expensive knife with serious edge damage:

Professional sharpening.


↔️ Flexible vs Stiff Boning Knives: Does Sharpening Change?

Yes, slightly.

🪶 Flexible Boning Knife

A flexible blade can bend under pressure.

Flexibility is also important when comparing a boning knife vs fillet knife, since fillet knives generally emphasize flexibility for following the contours of fish.

That means you should be especially careful not to press excessively against the stone.

Let the abrasive do the work.

Too much pressure can make it harder to maintain consistent contact and geometry.

Best approach:

✔ Light pressure
✔ Controlled strokes
✔ Stable hand position
✔ Extra care near the tip

💪 Stiff Boning Knife

A stiff boning knife is generally easier to stabilize on the stone.

The basic sharpening process remains the same:

Maintain the bevel, work evenly along the edge and avoid unnecessary metal removal.

🧙 KnifeGenie Tip

Flexible doesn’t mean fragile — but it does mean you need to control pressure carefully while sharpening.


FLEXIBLE VS STIFF BONING KNIFE

Sharpening flexible vs stiff boning knives
Flexible boning knives require especially light, controlled pressure during sharpening.


9 Boning Knife Sharpening Mistakes to Avoid

1. Guessing the Angle

Don’t assume every boning knife has identical edge geometry.

Check the manufacturer or preserve the existing bevel.

2. Using Too Much Pressure

More pressure doesn’t automatically mean a sharper knife.

It can make angle control worse and remove unnecessary steel.

3. Forgetting the Curved Tip

If you sharpen only the flatter portion of the blade, you’ll eventually create an uneven edge.

Follow the entire cutting edge.

4. Over-Sharpening the Tip

The opposite problem is concentrating too much pressure at the point.

The tip contains very little metal compared with the broader sections of the blade.

Treat it carefully.

5. Using Only a Very Coarse Stone

Coarse abrasives have a purpose.

Routine sharpening usually doesn’t require aggressive metal removal.

6. Never Removing the Burr

Creating the burr is only part of the process.

Finish by refining and deburring the edge.

7. Using an Incompatible Pull-Through Sharpener

A fixed-angle sharpener is useful only if its geometry is suitable for your knife.

Don’t force a valuable boning knife into a system that isn’t designed for it.

8. Sharpening When the Knife Only Needs Honing

Sharpening removes steel.

Don’t do it unnecessarily.

9. Trying to Repair Serious Damage Yourself

A badly chipped, bent or severely worn knife may need professional attention.

Knowing when not to keep grinding is part of good knife maintenance.


SHARPENING MISTAKES

Common boning knife sharpening mistakes
Poor angle control, excessive pressure and uneven sharpening around the curved tip are common mistakes.

Wüsthof knife-sharpening guide


⏱️ How Often Should You Sharpen a Boning Knife?

Don’t sharpen it simply because a certain number of weeks have passed.

Sharpen according to performance.

Your boning knife may need sharpening when:

❌ It struggles to begin a clean cut
❌ It slides rather than bites
❌ Trimming requires noticeably more force
❌ The edge catches or tears
❌ Paper testing reveals obvious snagging
❌ Appropriate honing no longer restores performance

Someone breaking down and trimming meat every day will wear an edge faster than somebody using a boning knife twice a month.

Steel, cutting technique, cutting surfaces and storage also affect edge life.

👉 How Often Should You Sharpen Kitchen Knives?

🧙 KnifeGenie Rule

Hone when the edge needs maintenance.

Sharpen when the edge actually needs restoration.


🛡️ How to Keep a Boning Knife Sharp Longer

Sharpening technique matters.

But what you do between sharpenings matters just as much.

Sharpening also can’t compensate for a knife that doesn’t suit the job. If you’re choosing one for meat preparation, see our guide to finding the right boning knife for home butchers.

🪵 Use a Knife-Friendly Cutting Board

Use an appropriate wood or plastic cutting board.

Avoid routinely cutting on:

❌ Glass
❌ Stone
❌ Granite
❌ Ceramic plates
❌ Metal surfaces

Hard surfaces can accelerate edge wear.

🦴 Don’t Treat a Boning Knife Like a Cleaver

The name can be misleading.

A boning knife is designed primarily for controlled cutting around bones, joints and connective tissue.

That doesn’t automatically mean it is designed to chop directly through heavy bones.

Use the appropriate cleaver, saw or other suitable tool when the job requires one.

🧼 Hand Wash and Dry

Clean the knife promptly after use and dry it thoroughly.

Don’t leave it sitting wet in a sink.

🗄️ Protect the Edge During Storage

Good options include:

Knife block
✔ Blade guard
✔ Appropriate magnetic strip
✔ Dedicated knife storage

Avoid allowing the edge to bang against other metal utensils in a drawer.

🔧 Maintain the Edge

Appropriate honing or touch-ups can help maintain cutting performance between full sharpenings.


👨‍🔧 When Should You Have a Boning Knife Professionally Sharpened?

Home sharpening makes sense for routine edge maintenance.

Professional help makes more sense when:

⚠️ The edge has large chips
⚠️ The tip is damaged
⚠️ The bevel has become badly uneven
⚠️ The blade needs substantial thinning or reprofiling
⚠️ You’re unsure about an unusual edge geometry
⚠️ The knife is valuable and you aren’t comfortable sharpening it
⚠️ Previous sharpening has significantly altered the edge

There’s no shame in handing a good knife to an experienced sharpener.

Sometimes that is the smarter decision.


DIY VS PROFESSIONAL SHARPENING

DIY vs professional boning knife sharpening
Routine dullness can often be handled at home, while serious chips, damage or reprofiling are better left to an experienced sharpener.


How to Sharpen a Boning Knife — Frequently Asked Questions

What Is the Best Way to Sharpen a Boning Knife?

A whetstone is an excellent option because it provides direct control over the sharpening angle and lets you follow the curved edge of the blade.

A compatible guided sharpening system is another good option if maintaining a freehand angle is difficult.

What Angle Should I Sharpen My Boning Knife?

There is no single correct angle for every boning knife.

Check the knife manufacturer’s recommendation first. If no specification is available, preserving the existing bevel is generally preferable to arbitrarily changing the edge geometry.

Can I Use a Pull-Through Sharpener on a Boning Knife?

Possibly, provided the sharpener is designed for your knife’s edge geometry and blade style.

The disadvantage is that many pull-through systems give you less control over angle and metal removal than a whetstone.

Can I Sharpen a Flexible Boning Knife?

Yes.

Use particularly light pressure because the blade can flex against the sharpening surface.

Is a Boning Knife Supposed to Be Razor Sharp?

A boning knife should certainly be sharp enough to make clean, controlled cuts.

But the thinnest possible razor-like edge isn’t automatically the best edge for every boning knife.

Durability and the manufacturer’s intended geometry also matter.

Should I Hone a Boning Knife?

Many conventional double-bevel Western boning knives can benefit from appropriate honing between sharpenings.

However, the honing tool must be suitable for the knife’s steel and edge.

How Often Should I Sharpen a Boning Knife?

Sharpen according to cutting performance rather than a fixed calendar.

If appropriate honing no longer restores a clean working edge, it is probably time to sharpen.

How Do I Sharpen the Curved Tip?

Follow the upward curvature of the cutting edge as the knife moves across the stone. Slightly adjust the handle so the bevel remains in contact without dramatically increasing the angle.

Can I Use a Chef’s Knife Sharpener for a Boning Knife?

Sometimes.

The important question is whether the sharpener is compatible with the boning knife’s edge geometry, blade thickness and sharpening angle.

Don’t assume compatibility simply because both are kitchen knives.

Should I Use a Coarse or Fine Whetstone?

A moderately dull knife usually doesn’t require the most aggressive stone available.

Use a coarser abrasive when substantial edge restoration is necessary and a finer stone for refinement and finishing.


🏁 Overall Recommendation: How to Sharpen a Boning Knife

Sharpening a boning knife isn’t about grinding away as much steel as possible.

It’s about restoring the edge without unnecessarily changing the knife.

For most home cooks, KnifeGenie’s preferred approach is straightforward:

🏆 KnifeGenie Verdict

🪨 Use a whetstone if you’re comfortable learning freehand sharpening.

📐 Preserve the existing bevel or follow the manufacturer’s specified angle.

🪶 Use light pressure, especially with flexible boning knives.

Follow the curved edge carefully all the way to the tip.

🔬 Create and then remove the burr rather than stopping halfway through the sharpening process.

🔧 Hone appropriately between sharpenings rather than constantly removing steel.

👨‍🔧 Use a professional when you’re dealing with serious chips, damage or an edge geometry you don’t understand.

Most importantly, don’t obsess over hitting some supposedly universal boning-knife angle.

Different knives are designed differently.

Learn the knife you actually own.

Preserve its geometry.

Use controlled strokes.

Remove as little steel as necessary.

Then get back to what a good boning knife does best:

clean, controlled work around meat, joints and connective tissue.

Sharp knives. Smart choices.

KnifeGenie

German vs Japanese Kitchen Knives: Which Is Better for Your Kitchen?

German vs Japanese kitchen knives side by side comparison
German knives generally emphasize toughness and versatility, while Japanese knives often prioritize thin geometry, sharpness and precision.

Choosing between German vs Japanese kitchen knives isn’t really about deciding which country makes the “better” knife.

It’s about deciding which knife-making philosophy fits the way you cook.

Traditional German-style kitchen knives tend to be sturdy, substantial and forgiving. They’re excellent all-purpose workhorses for home cooks who want a knife capable of handling a wide variety of everyday prep.

Japanese-style knives generally take a different approach. They’re often thinner, lighter and made from harder steel, allowing them to take very keen edges and make exceptionally clean, precise cuts.

So which should you buy?

For most home cooks who prioritize durability and versatility, KnifeGenie gives the advantage to a good German chef’s knife.

For cooks who prioritize sharpness, lightweight handling and precision, a Japanese knife may be the more satisfying choice.

And if you’re serious about cooking?

There is a strong argument for eventually owning both.


🔽 Jump to What You Need

👉 Quick Answer
👉 German vs Japanese Comparison
👉 What Is a German Kitchen Knife?
👉 What Is a Japanese Kitchen Knife?
👉 Steel & Hardness
👉 Sharpness & Edge Retention
👉 Weight & Balance
👉 Cutting Style
👉 Durability
👉 Sharpening & Maintenance
👉 German Knife Pros & Cons
👉 Japanese Knife Pros & Cons
👉 Which Should You Buy?
👉 Recommended Brands
👉 KnifeGenie Pro Tips
👉 Frequently Asked Questions
👉 Final Verdict


🏆 German vs Japanese Kitchen Knives: The Quick Answer

If you simply want to know which style suits you:

🇩🇪 Choose a German Knife If You Want:

✔ A durable everyday workhorse
✔ A substantial, balanced feel
✔ A curved blade suited to rocking cuts
✔ A somewhat more forgiving edge
✔ Straightforward maintenance
✔ One general-purpose knife for lots of different kitchen jobs

🇯🇵 Choose a Japanese Knife If You Want:

✔ Exceptional sharpness
✔ A thinner blade
✔ Lightweight, agile handling
✔ Precise slicing and chopping
✔ Excellent edge retention
✔ A knife optimized for controlled, accurate cuts

🧙 KnifeGenie Quick Verdict

Best for most first-time premium-knife buyers: 🇩🇪 German

Best for precision and sharpness: 🇯🇵 Japanese

Best solution for serious home cooks: 🔪 Own one of each.


KNIVES COMPARISON

Female home cook comparing German and Japanese kitchen knives
German knives typically emphasize durability and versatility, while Japanese knives often prioritize thin blades, sharpness and precision.


⚔️ German vs Japanese Kitchen Knives — Comparison

Feature 🇩🇪 German-Style Knife 🇯🇵 Japanese-Style Knife
Typical feel Substantial and sturdy Light and agile
Blade Generally thicker Generally thinner
Steel Usually somewhat softer/tougher Often harder
Typical hardness Around 55–58 HRC Often around 60–66+ HRC
Edge geometry Generally less acute Generally more acute
Edge retention Good Often excellent
Chipping resistance Generally higher Greater care often required
Cutting motion Excellent for rocking Excellent for slicing/push cutting
Maintenance Generally easier Can require more care
Best for Versatile everyday use Precision cutting
Beginner friendly? ⭐⭐⭐⭐⭐ ⭐⭐⭐⭐
KnifeGenie choice Best all-purpose workhorse Best precision cutter

🧙 KnifeGenie Tip: These are general characteristics—not absolute rules. Modern German and Japanese manufacturers increasingly borrow ideas from each other.

German and Japanese knives aren’t your only choices. Home cooks who prefer domestic manufacturing can also explore our guide to American-made kitchen knives.


🇩🇪 What Is a German-Style Kitchen Knife?

Think of the traditional German chef’s knife as the pickup truck of the kitchen-knife world.

It isn’t designed solely to make the thinnest possible cut.

It’s designed to do lots of jobs reliably.

Classic German chef’s knives typically have relatively substantial blades, curved cutting edges and enough weight to make repetitive chopping feel controlled.

The curved belly is particularly useful if you like the familiar rock-chopping motion used for onions, herbs and vegetables.

Many traditional forged German chef’s knives also feature a bolster where the blade meets the handle and a full-tang construction extending through the handle.

Well-known examples come from manufacturers such as Wüsthof and ZWILLING.

💪 What German Knives Do Well

✔ Everyday chopping
✔ Rocking cuts
✔ Meat preparation
✔ Larger vegetables
✔ General-purpose kitchen work
✔ Busy family kitchens
✔ Cooks who prefer a substantial knife

German knives are particularly attractive when you want one dependable chef’s knife rather than a highly specialized cutting tool.


GERMAN CHEF’S KNIFE

German chef knife showing curved blade bolster and robust construction
Traditional German chef’s knives combine a curved cutting profile with sturdy construction suited to everyday kitchen work.


🇯🇵 What Is a Japanese-Style Kitchen Knife?

Japanese kitchen knives cover an enormous range of designs.

You’ll find gyutos, Santokus, nakiris, petty knives, yanagibas, deba knives and many other specialized patterns.

So it would be misleading to describe every Japanese knife as though it were constructed the same way.

For Western home cooks comparing alternatives to an ordinary German chef’s knife, however, the gyuto is probably the most useful comparison. Also, you can have a look at these American-made kitchen knives from popular manufacturers.

A gyuto performs many of the same everyday jobs as a Western chef’s knife but commonly uses thinner blade geometry, harder steel and a lighter overall construction.

That can make cutting feel almost effortless.

Instead of forcing your way through a carrot or onion, a good Japanese blade can feel as though it simply passes through it.

Premium Japanese manufacturers such as Shun Cutlery and Miyabi offer modern examples designed for cooks who want Japanese cutting characteristics without moving completely into traditional specialist knives.

🎯 What Japanese Knives Do Well

✔ Fine vegetable preparation
✔ Thin slicing
✔ Precise cuts
✔ Boneless proteins
✔ Herbs
✔ Fish preparation
✔ Long prep sessions where low weight helps


JAPANESE GYUTO

Japanese gyuto showing thin blade and precision cutting design
Japanese-style chef’s knives often use thin blade geometry and harder steels to deliver precise, low-resistance cutting.


🧱 German vs Japanese Knife Steel & Hardness

This is one of the biggest differences between the two traditions.

German-style kitchen knives commonly use stainless steels hardened to roughly the mid-to-upper 50s on the Rockwell C scale.

Japanese knives frequently push hardness considerably higher.

Some premium Japanese knives reach approximately 60–63 HRC or beyond, depending on the steel and heat treatment.

Why does that matter?

🇩🇪 Softer Doesn’t Mean Worse

A slightly softer German blade can be:

✔ Tough
✔ Forgiving
✔ Relatively easy to sharpen
✔ Less susceptible to edge chipping

The trade-off is that the edge may roll or dull sooner and require more frequent maintenance.

🇯🇵 Harder Doesn’t Automatically Mean Better

Harder Japanese steel can support:

✔ Thinner geometry
✔ Very fine edges
✔ Excellent edge retention
✔ Extremely precise cutting

But there is a trade-off.

Very hard, thin edges can be less tolerant of lateral stress, twisting, bones, frozen food and rough technique.

That’s why comparing knives purely by HRC is a mistake.

🧙 KnifeGenie Tip: Don’t buy the knife with the highest Rockwell number simply because the specification looks impressive. Heat treatment, blade geometry, steel composition and intended use matter just as much.

Read our guide on how a kitchen knife loses its edge.


🔬 Sharpness: Japanese Knives Take the Advantage

If you’re looking for the category where Japanese knives have their clearest traditional advantage, this is it.

Japanese manufacturers can combine harder steel with thin blade geometry and relatively acute edge angles.

The result can be exceptionally low cutting resistance.

For example, Miyabi describes many of its Japanese knives as using approximately 9.5°–12° edges, while ZWILLING gives approximately 15° per side as typical for its German knives.

But be careful with universal claims about exact angles.

Different manufacturers—and even different knife lines from the same manufacturer—use different geometry.

🏆 Sharpness Winner: 🇯🇵 Japanese

Not because every Japanese knife is sharper than every German knife, but because the Japanese tradition generally places greater emphasis on thin geometry and acute cutting edges.


CUTTING PERFORMANCE

German and Japanese kitchen knives compared for cutting performance
Both styles can be extremely sharp, but thinner Japanese geometry often excels when making fine, precise slices.


⚖️ Weight & Balance: Completely Different Personalities

Pick up a traditional German chef’s knife and then a lightweight Japanese gyuto.

The difference can be immediate.

🇩🇪 German

A traditional German knife often feels:

Solid → substantial → balanced → powerful

That additional mass can help when working through dense ingredients.

Some cooks love that reassuring weight.

Others find it tiring.

🇯🇵 Japanese

A Japanese knife often feels:

Light → quick → nimble → precise

Instead of relying on mass, it relies more heavily on sharpness and blade geometry.

That makes Japanese knives particularly enjoyable during extended vegetable preparation.

🏆 Weight Winner?

Neither.

This comes entirely down to preference.

If possible, hold both before buying.


🥕 Cutting Style: Rocking vs Push Cutting

Your cutting technique can tell you which knife you’ll probably prefer.

🇩🇪 Rock Choppers

German chef’s knives commonly have a pronounced curved belly.

That makes them excellent for rocking the blade repeatedly through:

🥕 Vegetables
🌿 Herbs
🧅 Onions
🧄 Garlic

If you learned to cook using a traditional Western chef’s knife, the motion will probably feel natural.

🇯🇵 Push Cutters

Many Japanese-style knives have flatter sections along their cutting edge.

They work beautifully with controlled:

⬇ Push cuts
↘ Forward slicing
⬇ Straight chopping

A Japanese knife rewards clean technique rather than aggressive rocking and twisting.


🛡️ Durability: German Knives Fight Back

This is where German-style knives regain the advantage.

Hardness and toughness aren’t the same thing.

A relatively tough German blade is generally better suited to cooks who occasionally treat their knives less delicately than they should.

That doesn’t mean you can abuse one.

Neither style should be used to cut bones, pry things open or hack through frozen food unless the particular knife is designed for that task.

But German chef’s knives are generally more forgiving of everyday mistakes.

🏆 Durability Winner: 🇩🇪 German

For a busy household, shared kitchen or beginner cook, that extra forgiveness can be genuinely useful.


🪨 Sharpening & Maintenance

This category deserves more attention than it usually gets.

Buying a knife is easy.

Keeping it performing properly for ten years is the real test.

🇩🇪 German Knives

German knives generally respond well to routine honing and conventional sharpening.

Because the steel tends to be somewhat softer than many premium Japanese steels, restoring an edge is usually relatively straightforward.

🇯🇵 Japanese Knives

Hard Japanese steels can retain a fine edge for a long time, but sharpening them properly may require more care.

A whetstone is an excellent option if you’re willing to learn the technique.

Also remember that traditional high-carbon Japanese knives can require considerably more attention to moisture and corrosion than modern stainless Japanese knives.

🧙 KnifeGenie Tip

Whatever you buy:

Hand wash it. Dry it promptly. Store it properly. Use a knife-friendly cutting board.

Those four habits will do more for the life of your knife than obsessing over tiny differences in specifications.


🇩🇪 German Kitchen Knives — Pros & Cons

✅ Strengths

✔ Durable and forgiving
✔ Excellent all-purpose performance
✔ Comfortable for rocking cuts
✔ Relatively easy edge maintenance
✔ Familiar Western handle designs
✔ Good choice for beginners
✔ Excellent for shared kitchens
✔ Substantial feel many cooks enjoy

❌ Weak Points

✘ Usually heavier
✘ Generally thicker behind the edge
✘ May require more frequent honing
✘ Less nimble for very fine cutting
✘ Full bolsters on some traditional designs can complicate sharpening

🧙 KnifeGenie Verdict

BEST FOR DURABILITY & EVERYDAY VERSATILITY

If you want one dependable chef’s knife and don’t want to worry excessively about delicate edge geometry, German is difficult to beat.


🇯🇵 Japanese Kitchen Knives — Pros & Cons

✅ Strengths

✔ Exceptional cutting performance
✔ Thin blade geometry
✔ Excellent edge retention with many steels
✔ Lightweight and agile
✔ Excellent for precision preparation
✔ Huge range of specialized knife shapes
✔ Often beautiful craftsmanship
✔ Premium steels widely available

❌ Weak Points

✘ Hard thin edges can chip if abused
✘ Some knives require more careful sharpening
✘ Carbon-steel versions require additional maintenance
✘ Premium handmade models can become extremely expensive
✘ Specialized Japanese profiles aren’t always beginner friendly

🧙 KnifeGenie Verdict

BEST FOR SHARPNESS & PRECISION

If cutting feel matters more to you than ruggedness, Japanese knives are extremely compelling.


🛒 Which Should You Buy?

Here’s the easiest way to decide.

Your Priority KnifeGenie Recommendation
First premium chef’s knife 🇩🇪 German
Maximum durability 🇩🇪 German
Shared family kitchen 🇩🇪 German
Rock chopping 🇩🇪 German
Prefer heavier knives 🇩🇪 German
Maximum precision 🇯🇵 Japanese
Lightweight handling 🇯🇵 Japanese
Thin vegetable slicing 🇯🇵 Japanese
Edge retention 🇯🇵 Japanese
Knife enthusiast 🇯🇵 Japanese
Want maximum versatility 🔪 Consider owning both

BUYING DECISION

Home cook choosing between German and Japanese kitchen knives
Choose German for a sturdy all-purpose workhorse or Japanese for lighter handling and precision cutting.

Before buying either knife checkout this guide…


🏭 German & Japanese Knife Brands Worth Knowing

You don’t have to buy the most expensive knife available.

But established manufacturers give you useful reference points when comparing construction, steel and design.

🇩🇪 German

Wüsthof — A benchmark traditional German knife manufacturer from Solingen.

ZWILLING J.A. Henckels — One of Germany’s best-known knife makers, with everything from mainstream Western knives to premium collections.

🇯🇵 Japanese

Shun — Premium Japanese knives combining traditional influences with designs accessible to Western home cooks.

Miyabi — Japanese-made premium knives combining Japanese manufacturing with ZWILLING’s international distribution.

MAC — Particularly interesting if you want Japanese cutting performance in a familiar Western-style chef’s knife format.

GLOBAL — Known for lightweight, distinctive all-stainless Japanese knives.

👉 KnifeGenie related guide: See our 5 Best Imported Kitchen Knives of 2026 for specific Japanese and German models worth considering.


🧙 KnifeGenie Pro Tips

🔪 Don’t obsess over country of origin. Buy according to geometry, steel, construction and how the knife feels in your hand.

🪨 Think about sharpening before buying. A spectacular knife isn’t much use if you can’t maintain its edge.

🪵 Use a knife-friendly board. Avoid glass, stone and other extremely hard cutting surfaces.

🧼 Keep good knives out of the dishwasher. Hand washing takes seconds and is kinder to the blade and handle.

🦴 Don’t use your chef’s knife as a cleaver. Bones and frozen foods require the appropriate tool.

Try the grip. Weight and handle geometry can matter more than impressive specifications.

💰 Spend for performance—not decoration. Damascus patterns and exotic handles can be beautiful, but they don’t automatically make a knife cut better.


Frequently Asked Questions

Are Japanese knives better than German knives?

Not universally.

Japanese knives generally have an advantage in thinness, precision and edge retention, while German knives traditionally offer greater toughness, weight and forgiveness.

The better knife depends on your cooking style.

Are Japanese knives sharper?

Japanese knives are often designed with harder steel, thinner blades and more acute edges, which can produce exceptional cutting performance.

However, a properly sharpened high-quality German knife is also extremely sharp.

Do Japanese knives chip easily?

Some hard, thin Japanese edges are more susceptible to chipping than tougher German-style blades if they’re twisted, dropped or used against bones, frozen food or very hard surfaces.

Used correctly, a quality Japanese knife should not simply chip during normal food preparation.

Do German knives get dull faster?

Their relatively softer steel can mean more frequent edge maintenance compared with many hard Japanese steels.

The upside is toughness and generally straightforward sharpening.

Which knife is better for beginners?

For many beginners, German.

The additional toughness and familiar curved chef’s-knife profile make a quality German knife very forgiving.

A Japanese knife is still perfectly suitable for a beginner who’s willing to use careful technique.

Which is better for vegetables?

For thin, precise vegetable preparation, Japanese knives are excellent.

A gyuto or Santoku makes a superb general-purpose choice, while a nakiri is specifically designed around vegetable preparation.

Can I use a honing steel on a Japanese knife?

Don’t automatically treat every Japanese knife the way you would a softer Western blade.

Follow the manufacturer’s maintenance recommendations for your specific steel and knife.

Should I own both?

If you cook frequently, yes—that can be an excellent combination.

A robust German chef’s knife can handle general everyday work while a Japanese gyuto or Santoku provides lightweight precision when you want exceptionally clean cuts.


🏆 Final Verdict: German or Japanese?

There’s no universal winner in German vs Japanese kitchen knives.

They solve slightly different problems.

🇩🇪 German Wins For:

💪 Toughness
🔄 Everyday versatility
🥕 Rock chopping
👨‍🍳 Beginner friendliness
🛡️ Forgiveness

🇯🇵 Japanese Wins For:

⚔️ Precision
🔪 Thin cutting geometry
🪶 Lightweight handling
🎯 Fine slicing
⏳ Edge retention

🧙 KnifeGenie Overall Recommendation

Choose German if you want a dependable workhorse.

Choose Japanese if you want a precision cutting instrument.

German vs Japanese kitchen knives overall recommendation for home cooks
Choose a German knife for dependable everyday versatility or a Japanese knife for precision—but steel, geometry, weight, handle, edge and fit matter more than country of origin.

But don’t let the flag on the blade make the final decision.

A knife’s steel, heat treatment, geometry, weight, handle, edge and fit in your hand ultimately matter more than whether its design originated in Germany or Japan.

For many serious home cooks, the best answer isn’t German or Japanese.

It’s German and Japanese.

See our Best Imported Kitchen Knives recommendations…

Full Tang vs Partial Tang Knives: Which Is Better?

Full tang vs partial tang kitchen knives compared
Full tang vs partial tang chef knives showing different handle construction
Full-tang construction extends the steel through the length of the handle, while a partial tang stops inside the handle.

If you have spent any time shopping for a good kitchen knife, you would’ve compared full tang vs partial tang knives. Also you’ve probably seen manufacturers proudly advertise “full tang construction.”

It sounds impressive.

But what does it actually mean—and should you refuse to buy a kitchen knife that doesn’t have a full tang?

The tang is the portion of the knife’s metal structure that extends from the blade into the handle. With a traditional full-tang knife, that metal extends essentially the full length of the handle. A partial tang extends only partway into the handle.

For a substantial chef’s knife intended for years of everyday use, KnifeGenie generally prefers a well-made full-tang construction because it provides excellent handle strength, stability, and a reassuringly solid feel.

But here’s the part that often gets lost in knife-buying advice:

Full tang does not automatically mean a better knife.

A poorly designed full-tang knife can still have mediocre steel, uncomfortable ergonomics and poor blade geometry. And a properly engineered knife using another tang or handle construction can be an excellent kitchen tool.

So let’s look beyond the marketing.


🔽 Jump to What You Need

👉 Quick Answer
👉 What Is a Knife Tang?
👉 What Is a Full Tang Knife?
👉 What Is a Partial Tang Knife?
👉 Full Tang vs Partial Tang Comparison
👉 Strength & Durability
👉 Weight & Balance
👉 Does Full Tang Mean Better Quality?
👉 How to Identify a Full Tang
👉 Which Should You Buy?
👉 KnifeGenie Pro Tips
👉 Frequently Asked Questions
👉 Final Verdict


🏆 Full Tang vs Partial Tang: The Quick Answer

If you’re choosing a traditional Western-style chef’s knife for frequent home cooking, KnifeGenie generally recommends:

Male home cook using a traditional Western-style chef's knife
A traditional Western-style chef’s knife offers a substantial feel and is well suited to frequent everyday food preparation.

🥇 Full Tang — Best for a Traditional Heavy-Duty Chef’s Knife

A properly designed full tang can provide:

✔ Excellent structural strength
✔ Secure handle construction
✔ Substantial feel
✔ Good durability
✔ Potentially excellent balance
✔ Confidence during demanding everyday prep

That’s one reason full-tang construction appears on premium Western chef’s knives.

⚡ Partial Tang — Can Be Excellent for Lighter or Specialized Knives

Partial-tang and other enclosed-tang constructions can offer:

✔ Lower weight
✔ Different balance characteristics
✔ Simpler handle construction
✔ Lower manufacturing cost in some designs
✔ Excellent performance when properly engineered

The important phrase is properly engineered.

🧙 KnifeGenie Verdict

For a conventional, substantial chef’s knife, we’d usually choose a well-made full tang—but we would never buy a knife solely because the box says “full tang.”

Steel, heat treatment, blade geometry, edge quality, ergonomics and overall construction matter just as much—and sometimes more.


🧠 What Is a Knife Tang?

The easiest way to understand a tang is to imagine removing the handle material from a conventional kitchen knife.

The blade doesn’t necessarily stop where the handle begins.

A section of metal continues backward into the handle.

That extension is the tang.

The tang helps connect the blade to the handle and forms part of the knife’s structural system.

Depending on the knife’s design, it might be:

🔪 Full tang
🔪 Partial tang
🔪 Hidden tang
🔪 Rat-tail tang
🔪 Stick tang
🔪 Encapsulated within a molded handle

These terms describe construction—not cutting performance.

That’s an important distinction.

The tang doesn’t slice your onion.

The blade and edge do.

But tang and handle construction can influence how strong, comfortable, heavy and balanced the entire knife feels.


🔨 What Is a Full Tang Knife?

A full tang generally extends from the blade through essentially the full length of the handle.

On a traditional Western chef’s knife, you can often see a strip of steel running between the two handle scales.

The scales are attached to either side, commonly using rivets.

Think of the construction roughly like this:

BLADE ➜ BOLSTER ➜ ================== ➜ HANDLE END

That continuous metal structure is one of the reasons traditional full-tang knives often feel substantial.

For example, WÜSTHOF describes its Classic chef’s knife as having forged German steel, a full tang and a riveted handle, while ZWILLING’s Pro line uses forged construction with a classic three-rivet full-tang design.

💪 Advantages of Full Tang Knives

✔ Strong handle structure
✔ Excellent durability when properly constructed
✔ Can produce reassuring balance
✔ Well suited to larger chef’s knives
✔ Common on premium traditional Western knives
✔ Less dependent on a small section of metal supporting the handle
✔ Traditional riveted construction can be visually inspected

❌ Disadvantages of Full Tang Knives

✘ Additional metal can increase weight
✘ More material and manufacturing can increase cost
✘ “Full tang” is sometimes used as a marketing shortcut for quality
✘ Poorly fitted handle scales can still create problems
✘ Not necessary for every type of kitchen knife


FULL TANG ANATOMY

Full tang chef knife showing blade tang handle scales and rivets
In a traditional full-tang chef’s knife, the metal structure continues through essentially the entire handle.


🔪 What Is a Partial Tang Knife?

A partial tang extends into the handle but stops before reaching the full length of it.

There are several variations.

Some partial tangs are relatively wide and extend a considerable distance into the handle.

Others are narrower.

Some knives use a thin stick tang or rat-tail tang running through part or much of the handle.

That means the simple label “partial tang” doesn’t tell you everything about the knife’s strength.

A substantial, well-secured partial tang is very different from a tiny piece of metal inserted only a short distance into a cheap plastic handle.

⚡ Advantages of Partial Tang Construction

✔ Can reduce overall knife weight
✔ Can shift the balance toward the blade
✔ May reduce manufacturing costs
✔ Works well for many light-duty knives
✔ Allows manufacturers greater freedom in handle design
✔ Can be perfectly durable when properly engineered for the task

❌ Potential Disadvantages

✘ Cheap designs may have weaker blade-to-handle connections
✘ Construction may be difficult to inspect because the tang is hidden
✘ Poor designs may loosen after prolonged hard use
✘ Usually less reassuring for a heavy-duty traditional chef’s knife
✘ “Partial tang” covers many different construction methods

The last point is especially important.

Not all partial tangs are equal.


TANG TYPES

Full tang partial tang and rat tail knife construction compared
Tang construction varies considerably, so “partial tang” can describe several different handle structures.


⚔️ Full Tang vs Partial Tang Knives — Comparison

Feature 🔨 Full Tang ⚡ Partial Tang
Tang length Essentially full handle length Stops within handle
Typical strength Excellent when properly built Varies by design
Weight Often heavier Often lighter
Balance Can feel handle-neutral Can feel more blade-forward
Durability Generally excellent Highly construction-dependent
Manufacturing cost Often higher Can be lower
Traditional riveted handle Common Less common
Best suited to Everyday chef’s knives, substantial knives Lightweight and specialized designs
Visible tang Often Usually not
Automatically better? ❌ No ❌ No

🧙 KnifeGenie Tip

Don’t compare two knives by tang alone.

A knife is a complete cutting system.

The steel, heat treatment, edge geometry, blade thickness, handle ergonomics, weight, balance and manufacturing quality all influence whether the knife is actually good.


💪 Which Is Stronger?

All else being reasonably equal, a substantial full tang provides an excellent structural foundation.

Instead of the blade transitioning into a small piece of metal buried inside the handle, the tang extends through essentially the entire grip.

That gives manufacturers plenty of surface area for securely attaching handle scales and distributes the structure along the handle.

For a large knife receiving regular use, that’s reassuring.

But don’t turn this into:

Full tang = unbreakable.

It doesn’t.

A knife can fail at the blade, edge, handle scales, rivets or other points regardless of its tang design.

And kitchen knives shouldn’t be used for prying, twisting, opening cans or other jobs they weren’t designed to perform.


⚖️ Weight & Balance: Where Things Get Interesting

More steel inside the handle generally means more mass.

That’s not automatically good or bad.

It changes how the knife feels.

🔨 A Traditional Full-Tang Chef’s Knife May Feel:

✔ Substantial
✔ Stable
✔ Solid in the hand
✔ More evenly weighted
✔ Comfortable for rocking cuts

⚡ A Lighter Construction May Feel:

✔ Nimble
✔ Fast
✔ Less tiring
✔ More blade-forward
✔ Better suited to cooks who dislike heavy handles

This is where personal preference becomes extremely important.

A 9-ounce knife isn’t automatically better than a 6-ounce knife.

Some cooks love the reassuring weight of a traditional German chef’s knife.

Others immediately prefer something lighter.

Neither cook is wrong.


BALANCE TEST

Comparing full tang and partial tang kitchen knife balance
Tang construction can influence weight and balance, but the best feel ultimately depends on the cook and the knife’s overall design.


🤔 Does Full Tang Mean a Better Knife?

No.

This may be the most important section of this guide.

Full-tang construction is a legitimate feature.

But it is not a universal quality certificate.

Imagine two chef’s knives.

Knife A

🔨 Full tang
❌ Mediocre steel
❌ Thick blade geometry
❌ Uncomfortable handle
❌ Poor heat treatment
❌ Uneven grind
❌ Poor factory edge

Knife B

⚡ Different/hidden tang construction
✔ Excellent steel
✔ Excellent heat treatment
✔ Thin cutting geometry
✔ Comfortable handle
✔ Excellent edge
✔ Proven manufacturing quality

Would you automatically choose Knife A?

We wouldn’t.

This is why KnifeGenie recommends treating full tang as one useful specification rather than the specification that determines quality.


🏭 Real-World Example: WÜSTHOF Classic

Traditional German knives provide one of the clearest examples of why full-tang construction has such a strong reputation.

The WÜSTHOF Classic 8-inch Chef’s Knife uses forged construction, a full tang and riveted synthetic handle.

That combination contributes to the solid, substantial character associated with the Classic.

But its reputation isn’t built on the tang alone.

Its blade steel, forging, heat treatment, edge, bolster, ergonomics and manufacturing quality all contribute to the finished knife.

🧙 KnifeGenie Verdict

Full tang is part of what makes a WÜSTHOF Classic a WÜSTHOF Classic—but it isn’t the only reason the knife works.


🔨 Real-World Example: ZWILLING Pro

ZWILLING takes a similar approach with its Pro collection.

The company describes the knives as forged from a single piece of its special-formula steel and uses a three-rivet full-tang handle design.

Again, the tang works as part of a larger system.

The forged blade, curved bolster, handle, edge geometry and balance all contribute to how the knife performs.

That’s exactly how buyers should think about tang construction:

as one component of overall knife design.


⚡ What About Lightweight Professional Knives?

This is where the “every good knife must be full tang” argument becomes much less convincing.

There are highly respected professional-style kitchen knives that prioritize low weight, molded handles and practical ergonomics rather than traditional exposed full-tang construction.

Victorinox’s Fibrox chef’s knives, for example, are non-forged, lightweight knives with non-slip thermoplastic handles and are marketed for professional performance.

That doesn’t make them equivalent in construction or feel to a forged WÜSTHOF Classic.

They’re deliberately different.

And that’s the point.

A knife can achieve durability and useful cutting performance through more than one construction philosophy.


👀 How Can You Tell If a Knife Is Full Tang?

Sometimes it’s easy.

Sometimes it isn’t.

🔍 Look Along the Handle

Traditional full-tang knives commonly show a strip of steel running along the top and bottom edges between the handle scales.

🔩 Look for Rivets

Three rivets plus visible steel around the handle often indicate traditional full-tang construction.

But rivets alone don’t prove anything.

Decorative rivets exist.

🏷️ Read the Manufacturer’s Specifications

This is the most reliable method when shopping online.

Look for wording such as:

“Full tang”
“Full-tang construction”
“Forged full tang”

⚠️ Don’t Assume Forged Means Full Tang

Forging and tang construction describe different things.

A knife can be forged and have various handle/tang designs.

Likewise, a stamped knife isn’t automatically a partial-tang knife.

Treat these as separate specifications.


HOW TO IDENTIFY FULL TANG

How to identify a full tang kitchen knife
Traditional full-tang knives often reveal a continuous strip of steel between the two handle scales.

Have a look at some American-made full-tang knives and see examples.


🛒 Which Tang Should YOU Buy?

Let’s make the decision practical.

“I want one premium chef’s knife to keep for years.”

👉 Choose a well-made full-tang knife if you like its weight and handling.

It’s a proven construction for substantial everyday chef’s knives.

“I’m hard on my kitchen equipment.”

👉 Full tang gets our preference.

But proper knife use still matters.

“I hate heavy knives.”

👉 Don’t automatically choose full tang.

Try lighter knives too.

“I’m buying an inexpensive paring or utility knife.”

👉 Tang construction shouldn’t dominate your decision.

Cutting performance, comfort, safety and overall build quality matter more.

“The advertisement says FULL TANG, so it must be premium.”

👉 Absolutely not.

Investigate the steel, manufacturer, construction, blade geometry and reviews too.

“I’m choosing between two equally good chef’s knives.”

👉 Then full tang can be a useful tie-breaker—provided you prefer the resulting balance and weight.


🧱 Tang vs Steel: Which Matters More?

This isn’t really an either/or question because they perform completely different jobs.

The tang primarily concerns the handle structure.

The blade steel influences characteristics such as:

⚔️ Edge retention
🪨 Sharpening behavior
💪 Toughness
💧 Corrosion resistance
🔪 Potential cutting-edge characteristics

If you’re buying a chef’s knife, we’d rather see you choose a reputable, comfortable, properly heat-treated knife with excellent blade geometry than chase the words FULL TANG on a product listing.

Ideally, of course, you get both:

excellent blade construction + excellent handle construction.


🔨 Full Tang vs Forged: Are They the Same Thing?

No.

This causes a surprising amount of confusion.

Forged describes how the knife blank or blade is manufactured.

Full tang describes how the knife’s metal extends through the handle.

They are related in many traditional Western knives, but they’re not synonyms.

A WÜSTHOF Classic, for example, combines forged construction with a full tang.

But you shouldn’t assume that every forged knife has exactly the same tang design—or that every stamped/non-forged knife has an inferior handle structure.

👉 Recommended KnifeGenie reading: Forged vs Stamped Knives: What’s the Difference?


🧙 KnifeGenie Pro Tips

🔪 Buy the complete knife, not one specification. Full tang is useful, but it can’t compensate for poor steel, bad ergonomics or terrible blade geometry.

Hold the knife when possible. Weight and balance are extremely personal.

⚖️ Don’t assume heavier means stronger or better. A heavy knife may feel reassuring—or exhausting.

🔨 Choose construction appropriate to the job. A substantial chef’s knife and a tiny paring knife don’t need identical engineering.

🔩 Inspect handle fit and finish. On traditional scale-handled knives, look for gaps, loose rivets, rough transitions or poorly fitted scales.

🧼 Hand wash quality knives. Even when a manufacturer permits dishwasher cleaning, hand washing is generally the gentler treatment for edges and handle materials.

🪨 Don’t forget sharpening. Tang construction won’t help you slice a tomato with a dull edge.

💰 Ignore exaggerated marketing. Terms such as “professional,” “premium,” “high carbon” and “full tang” should be supported by meaningful specifications and good manufacturing.


Frequently Asked Questions

Is full tang better than partial tang?

For a traditional heavy-duty chef’s knife, KnifeGenie generally prefers a properly constructed full tang because it provides an excellent structural foundation and can contribute to a substantial, balanced feel.

But full tang isn’t automatically better for every knife or every cook.


Are partial tang knives bad?

No.

Partial tang describes a broad family of constructions.

Some inexpensive knives use poor partial-tang designs, which helped give the term a negative reputation.

But tang design should be evaluated as part of the knife’s overall engineering rather than used as an automatic quality test.


Can a partial tang knife break?

Yes—but so can a full-tang knife.

Construction quality, steel, intended use and how the knife is treated all affect durability.

Never use a kitchen knife for prying, twisting, opening cans or other inappropriate jobs.


Does a full tang make a knife stronger?

A substantial full tang can provide a very strong blade-to-handle structure because the metal extends through essentially the entire handle.

However, actual durability depends on the complete construction.


Does full tang make a knife heavier?

It can.

Extending more steel through the handle adds material and can contribute to the substantial feel of traditional Western chef’s knives.

The actual finished weight depends on the entire knife.


Are Japanese knives full tang?

Some are, some aren’t.

Japanese kitchen knives use many handle and tang constructions. Traditional Japanese wa-handled knives commonly use hidden tang arrangements, while Western-handled Japanese knives may use full-tang or other constructions.

Don’t judge Japanese knife quality using Western handle design as the only benchmark.


Is a hidden tang the same as a partial tang?

Not necessarily.

“Hidden tang” means the tang isn’t visible around the outside of the handle. It describes how the tang is enclosed.

A hidden tang can extend a considerable distance through the handle.


Does a full tang stay sharp longer?

No.

Tang length does not determine edge retention.

Steel composition, heat treatment, edge geometry, sharpening, cutting technique and cutting-board material are much more relevant to how the edge behaves.


Is full tang necessary for a chef’s knife?

No.

There are excellent kitchen knives using different construction methods.

However, full-tang construction remains an excellent and proven choice for traditional Western-style chef’s knives.


🏆 Full Tang vs Partial Tang — Final Verdict

So, which wins?

Well-made full-tang chef's knife showing steel through the handle
A well-made full-tang design extends the knife’s steel through the full length of the handle, providing a strong foundation for a traditional chef’s knife.

🥇 KNIFEGENIE WINNER FOR TRADITIONAL CHEF’S KNIVES: FULL TANG

For a substantial Western-style chef’s knife intended for regular home cooking, we’d generally choose a well-made full-tang design.

Why?

✔ Excellent structural foundation
✔ Proven durability
✔ Secure traditional handle construction
✔ Substantial feel
✔ Excellent potential balance
✔ Long history in premium Western chef’s knives

But there is a very important qualifier:

We would choose an excellent non-full-tang knife over a bad full-tang knife every time.

Tang construction is one chapter in the story—not the entire book.

When you’re actually buying a kitchen knife, consider:

Boning Knife vs Fillet Knife: Which One Do You Need?

🔪 Blade geometry
🧱 Steel and heat treatment
⚖️ Weight and balance
✋ Handle comfort
⚔️ Edge quality
🔨 Manufacturing quality
💰 Price and value
🪨 Sharpening requirements
🏭 Manufacturer reputation
🔩 Tang and handle construction

Get those things right and you’re far more likely to end up with a knife you’ll enjoy using for years.

Sharp knives. Smart choices.

— KnifeGenie
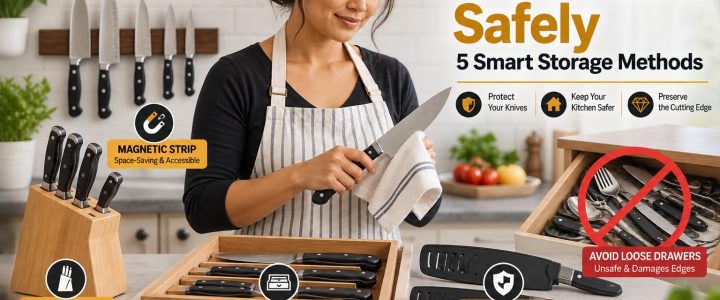
Chef Knife vs Santoku: Which Is Better for Everyday Cooking?

Chef knife vs Santoku comparison for everyday cooking
Chef knives and Santokus are both excellent everyday kitchen knives, but their blade shapes favor different cutting styles.

Walk into almost any serious kitchen and you’ll probably find one—or both—of these knives: a chef knife and a Santoku.

At first glance, they seem to do essentially the same job.

Both can chop onions, slice meat, mince herbs, cut vegetables and handle most of the food preparation an ordinary home cook does.

So why choose one over the other?

The difference becomes much clearer once you actually start cutting.

A traditional Western chef knife generally gives you a longer blade, curved cutting edge and more weight, making it particularly good for rocking cuts and larger ingredients.

A Santoku is usually shorter, lighter and flatter through the cutting edge, which makes it exceptionally nimble for chopping vegetables, making precise cuts and using an up-and-down or forward slicing technique.

For this KnifeGenie comparison, we’re looking beyond which knife looks better.
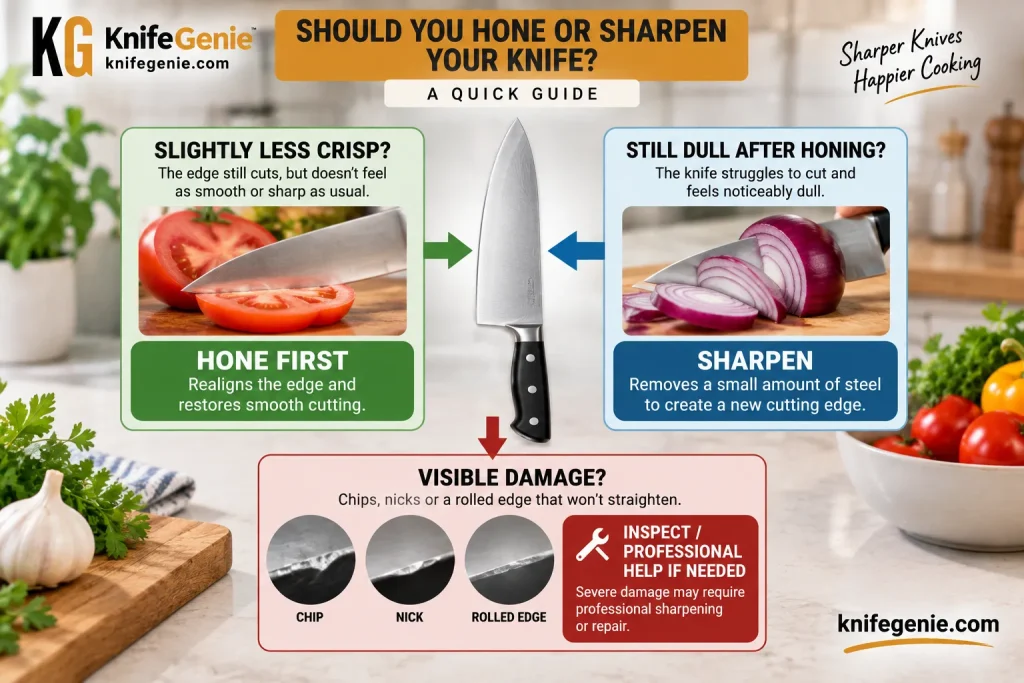
Chef knife vs Santoku blade shape comparison

We’re comparing the two based on what actually matters in an everyday kitchen:

🔪 Versatility
🥕 Vegetable prep
🥩 Meat preparation
🌿 Herb chopping
✋ Control
⚖️ Weight
📏 Blade size
🔄 Cutting technique
🧼 Everyday practicality
👨‍🍳 Ease of use

And although this is a close contest, KnifeGenie’s overall recommendation for most home cooks is the 8-inch chef knife.

But there’s an important exception.

If you prefer a lighter knife and do a lot of vegetable preparation, you may actually be happier with a Santoku.


🔽 Jump to What You Need

👉 Quick Answer
👉 Chef Knife vs Santoku Comparison
👉 What Is a Chef Knife?
👉 What Is a Santoku?
👉 Blade Shape
👉 Size & Weight
👉 Vegetables
👉 Meat & Fish
👉 Herbs & Garlic
👉 Which Is Easier to Use?
👉 Which Should Beginners Buy?
👉 Which Should You Buy?
👉 KnifeGenie Final Verdict & Scorecard

👉 Frequently Asked Questions


🏆 Chef Knife vs Santoku: The Quick Answer

If you simply want our recommendation:

🥇 Best Overall for Everyday Cooking — Chef Knife

For most home cooks who want one primary kitchen knife, KnifeGenie gives the chef knife the advantage.

Why?

Versatility.

A good 8-inch chef knife gives you enough blade for large vegetables and substantial cuts of meat while remaining manageable enough for onions, carrots, herbs, fruit and everyday chopping.

Its curved belly also supports the rocking technique many Western cooks naturally learn.

🥕 Best for Vegetables & Precision — Santoku

The Santoku fights back with lighter handling, a flatter cutting edge and excellent control.

A typical 7-inch Santoku feels extremely agile when you’re slicing carrots, dicing onions, preparing peppers, chopping cabbage or making thin, consistent vegetable cuts.

✋ Best for Smaller Hands — Santoku

Its shorter blade and typically lighter construction can make a Santoku less intimidating and easier to maneuver.

🌿 Best for Rocking Herbs — Chef Knife

If your preferred technique involves keeping the knife tip near the board and rocking the blade through parsley, cilantro and other herbs, the curved belly of a Western chef knife is particularly well suited to the job.

🧙 KnifeGenie Verdict

If you’re buying only one: start with an 8-inch chef knife.

Choose the Santoku instead if you know you prefer a shorter, lighter knife and a chopping/push-cutting technique.


⚔️ Chef Knife vs Santoku — Side-by-Side Comparison

Feature 🔪 Chef Knife 🇯🇵 Santoku
Typical blade Around 8 inches Around 5.5–7 inches
Blade profile More curved Flatter
Tip Pointed Lower/sheepsfoot-style profile common
Weight Usually heavier Usually lighter
Cutting style Rock, chop, slice Chop, push-cut, slice
Large ingredients ⭐⭐⭐⭐⭐ ⭐⭐⭐
Vegetables ⭐⭐⭐⭐½ ⭐⭐⭐⭐⭐
Herbs ⭐⭐⭐⭐⭐ ⭐⭐⭐⭐½
Boneless meat ⭐⭐⭐⭐⭐ ⭐⭐⭐⭐½
Precision cuts ⭐⭐⭐⭐ ⭐⭐⭐⭐⭐
Maneuverability ⭐⭐⭐⭐ ⭐⭐⭐⭐⭐
Rock chopping ⭐⭐⭐⭐⭐ ⭐⭐⭐
Small cutting boards ⭐⭐⭐½ ⭐⭐⭐⭐⭐
Best all-rounder 🏆 Winner Excellent
Best for lighter handling Very good 🏆 Winner

🧙 KnifeGenie Tip
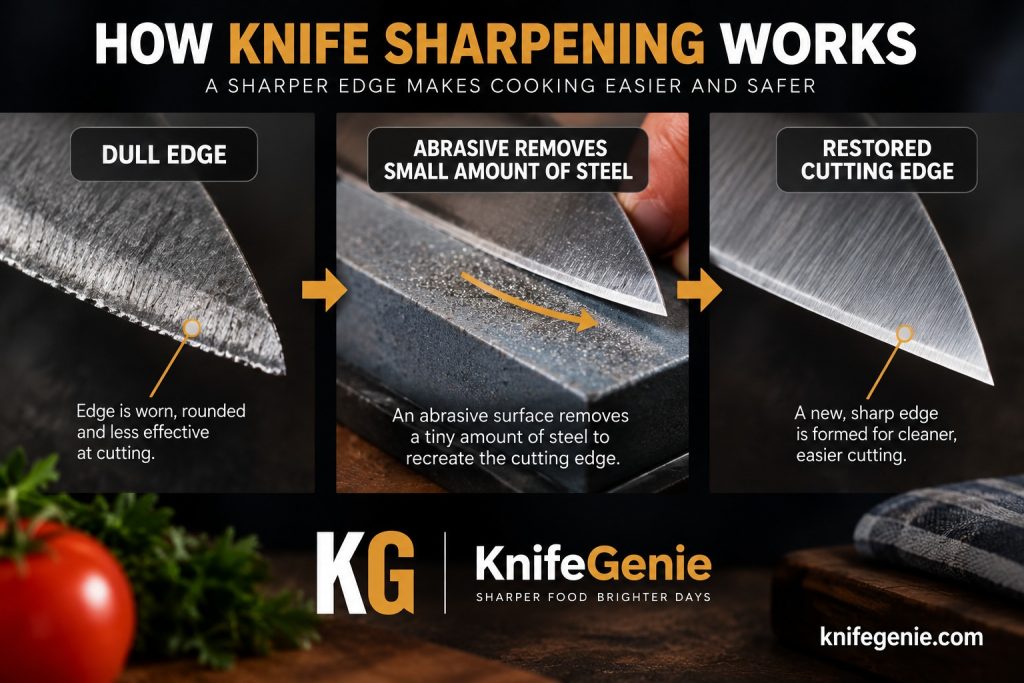
Don’t assume that “Japanese” automatically means better—or that a heavier Western knife is automatically more durable.

Modern chef knives and Santokus are made using an enormous variety of steels, edge angles, blade thicknesses and manufacturing methods.

Compare the actual knife, not just the category name.


🔪 What Is a Chef Knife?

The chef knife is the classic multipurpose workhorse of Western kitchens.

While sizes vary considerably, 8 inches is the sweet spot for most home cooks.

A Western-style chef knife normally has a pointed tip and noticeable curve toward the front of the cutting edge.

That curve isn’t cosmetic.

It allows you to rock the knife smoothly across your cutting board.

Think about chopping parsley.

The tip can remain close to the board while your cutting hand raises and lowers the heel of the knife.

That familiar rocking action is one of the defining characteristics of a Western chef knife.

⚙️ Typical Chef Knife Characteristics

🔪 Blade: Usually around 8–10 inches
📐 Edge: Curved toward the tip
⚖️ Weight: Medium to relatively heavy
✋ Handling: Substantial and balanced
🔄 Technique: Excellent for rocking cuts
🥩 Foods: Meat, vegetables, herbs, fruit and general prep
🏠 Best for: Cooks wanting maximum versatility

✅ Chef Knife Strengths

✔ Extremely versatile
✔ Excellent for large ingredients
✔ Superb rocking action
✔ Long blade handles substantial produce efficiently
✔ Pointed tip is useful for detailed work
✔ Excellent for chopping herbs
✔ Effective for slicing boneless meat
✔ Huge selection available
✔ Familiar to many Western cooks

❌ Chef Knife Weak Points

✘ Can feel heavy compared with a Santoku
✘ 8–10 inch blades require more cutting-board space
✘ May feel intimidating to cooks accustomed to small knives
✘ More blade than necessary for some precision jobs

🧙 KnifeGenie Verdict
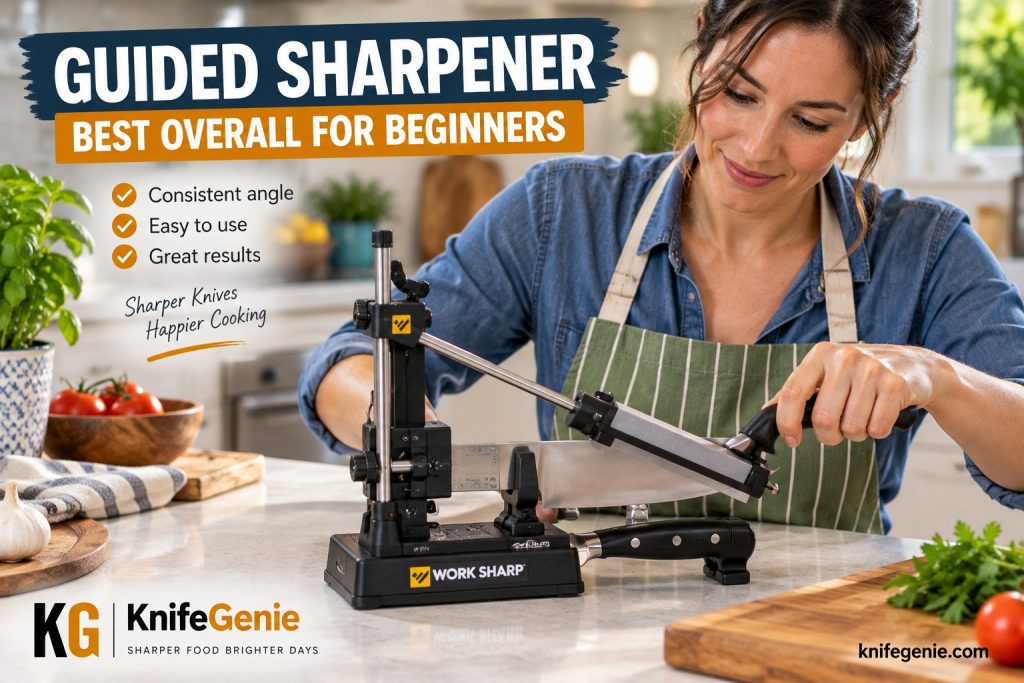
BEST OVERALL EVERYDAY KNIFE

If you’re building a kitchen knife collection from scratch, the chef knife remains the safest starting point.


CHEF KNIFE ANATOMY

Chef knife blade shape showing curved cutting edge
The curved belly of a Western chef knife makes rocking cuts comfortable and efficient.


🇯🇵 What Is a Santoku Knife?

Santoku is a Japanese-style multipurpose kitchen knife.

The name is commonly translated as “three virtues” or “three strengths.”

Exactly what those three virtues represent is sometimes described differently, but the essential idea is straightforward:

The Santoku is designed as a versatile all-purpose kitchen knife.

It is particularly associated with preparing meat, fish and vegetables.

A Santoku usually has a wider blade, relatively flat cutting edge and a spine that curves downward toward the tip.

Many are approximately 7 inches long, although smaller versions are common.

That shorter length changes how the knife feels.

Compared with a substantial 8-inch Western chef knife, a Santoku can feel remarkably quick and controllable.

⚙️ Typical Santoku Characteristics

🔪 Blade: Commonly 5.5–7 inches
📐 Edge: Relatively straight
⚖️ Weight: Usually light
✋ Handling: Nimble and controlled
⬆️ Technique: Chopping, push-cutting and slicing
🥕 Foods: Vegetables, fish, boneless meat and herbs
🏠 Best for: Precision-oriented everyday preparation

✅ Santoku Strengths

✔ Lightweight
✔ Highly maneuverable
✔ Excellent vegetable knife
✔ Superb for precise cuts
✔ Good knuckle clearance
✔ Wide blade can help transfer chopped food
✔ Comfortable on smaller cutting boards
✔ Excellent for cooks who dislike heavy knives
✔ Hollow-edge versions may help reduce sticking with some foods

❌ Santoku Weak Points

✘ Shorter blade is less efficient on very large ingredients
✘ Flatter edge isn’t ideal for pronounced rocking cuts
✘ Less reach when slicing large cuts of meat
✘ Some cooks miss the pointed tip of a chef knife

🧙 KnifeGenie Verdict
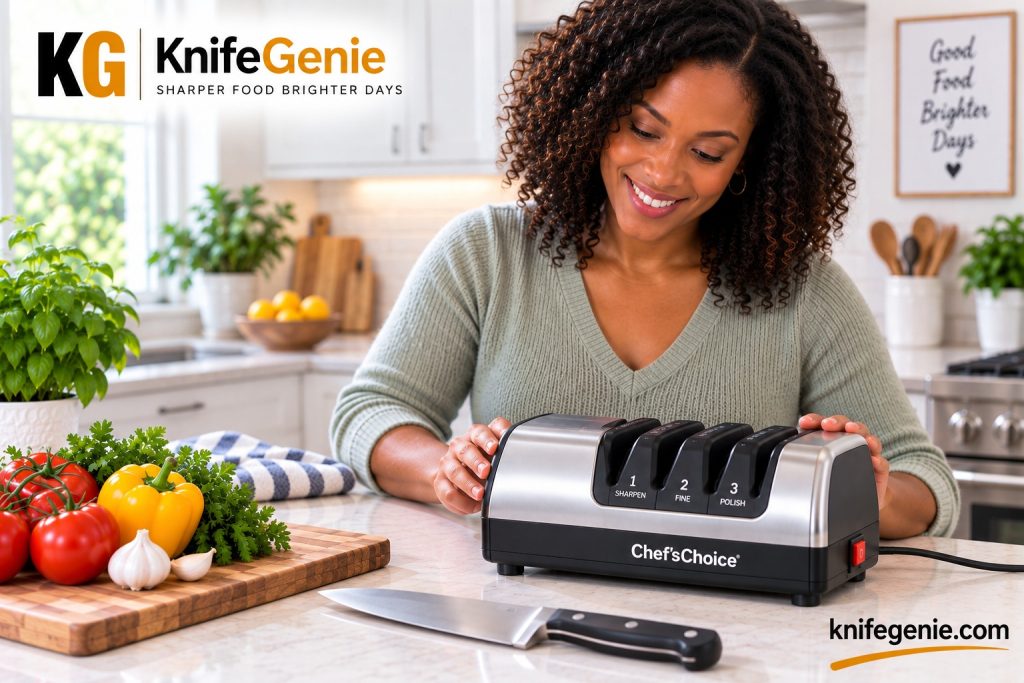
BEST LIGHTWEIGHT EVERYDAY KNIFE

The Santoku isn’t merely an alternative to a chef knife.

For vegetable-heavy cooking and cooks who value agility, it may actually be the better tool.


SANTOKU ANATOMY

Santoku knife showing flat edge and wide blade
A Santoku’s shorter length and flatter edge encourage controlled chopping, push cuts and slicing.

  • Zwilling Santoku Knives — useful reference for the shorter, lighter, flatter characteristics of Santoku knives.

📐 Chef Knife vs Santoku: Blade Shape Matters

This is where the comparison gets interesting.

Put both knives on a cutting board and look at the cutting edges.

The chef knife generally has more curve.

The Santoku generally has more usable flat edge contacting the board at once.

That affects how you cut.

🔪 Chef Knife

The curved belly makes this motion natural:

Forward → down → rock → lift → repeat

🇯🇵 Santoku

The flatter edge favors something closer to:

Forward/down → lift → reposition → repeat

Neither technique is inherently superior.

They’re simply different.

🏆 Winner for Rocking — Chef Knife

🏆 Winner for Straight Chopping & Push Cuts — Santoku


BLADE PROFILE COMPARISON

Chef knife vs Santoku blade shape comparison
Chef knives generally have more belly for rocking, while Santokus favor a flatter cutting profile.


📏 Size & Weight: Which Feels Better?

There’s a noticeable difference here.

A traditional 8-inch chef knife puts more blade in front of your hand.

Move up to a 10-inch model and that difference becomes even more pronounced.

A typical 7-inch Santoku feels considerably more compact.

That can be useful if you have:

🏠 A small kitchen
🪵 A compact cutting board
✋ Smaller hands
🥕 Mostly small-to-medium ingredients
🔪 A preference for nimble knives

But longer blades have advantages too.

Try halving a large cabbage with a 5.5-inch Santoku and you’ll immediately understand why blade length matters.

The longer chef knife simply gives you more reach.

🏆 Maneuverability — Santoku

🏆 Large Ingredients — Chef Knife

🏆 Small Cutting Boards — Santoku

🏆 Overall Versatility — Chef Knife


🥕 Which Is Better for Vegetables?

Santoku wins—but narrowly.

Vegetables are where the Santoku really starts making sense.

Its relatively flat edge and broad blade are extremely comfortable for:

🧅 Dicing onions
🥕 Chopping carrots
🫑 Slicing peppers
🥒 Cutting cucumbers
🥔 Preparing potatoes
🍄 Slicing mushrooms
🧄 Mincing garlic
🥬 Chopping greens

The broad blade is also convenient for scooping chopped ingredients from the board.

A chef knife is still an outstanding vegetable knife.

In fact, if you’re chopping a large cabbage, butternut squash or other substantial produce, its additional length can make it more useful.

🏆 Winner: Santoku

Santoku: 9.6/10
Chef Knife: 9.3/10


VEGETABLE TEST

Chef knife vs Santoku cutting vegetables
Santokus excel at controlled vegetable prep, while chef knives provide extra reach for larger produce.


🥩 Which Is Better for Meat?

This one goes to the chef knife.

For ordinary boneless chicken, beef, pork and similar ingredients, both knives perform extremely well.

But the longer chef knife provides more slicing length.

That’s especially useful when you’re cutting larger pieces of meat and want to complete a slice using fewer strokes.

The pointed tip can also be helpful when working around joints and making smaller detail cuts.

🏆 Winner: Chef Knife

Chef Knife: 9.5/10
Santoku: 8.9/10

⚠️ Important

Neither knife should be treated like a meat cleaver.

Avoid chopping through bones, frozen food or other extremely hard materials with a fine-edged chef knife or Santoku.

Use the appropriate heavy-duty tool instead.


🐟 What About Fish?

Now the Santoku closes the gap again.

Its thin, nimble construction can be excellent for portioning boneless fish and making clean slices.

However, neither replaces a proper fillet knife when you need to flex around bones, skin a fillet or perform delicate fish preparation.

🧙 KnifeGenie Tip
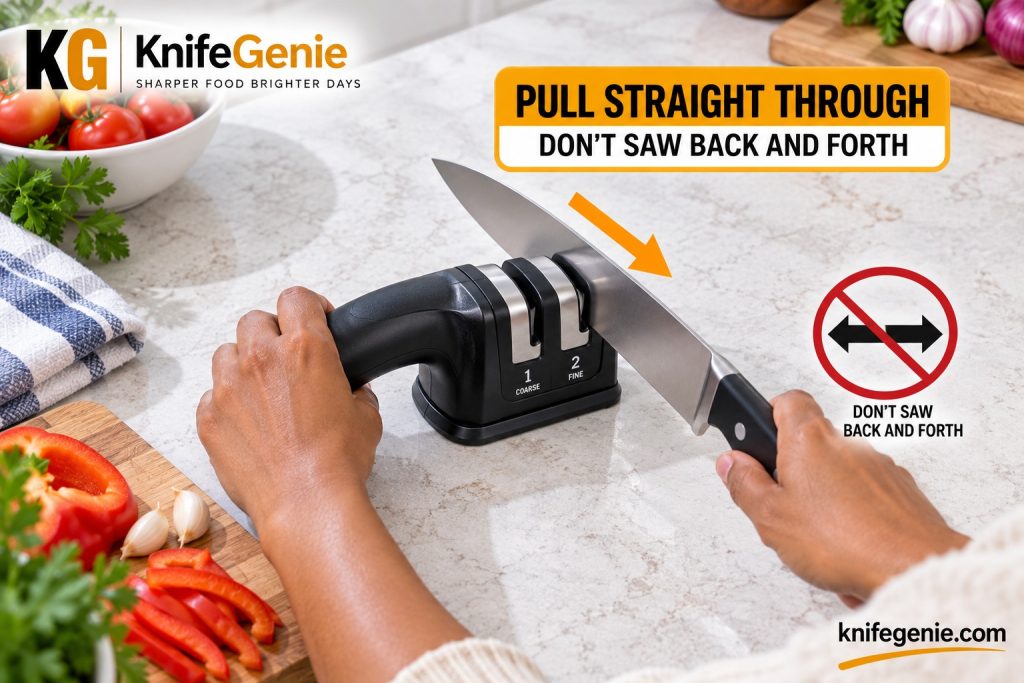
Think of chef knives and Santokus as general-purpose knives.

Specialized knives still exist for a reason.

Boning Knife vs Fillet Knife: Which One Do You Need?


🌿 Which Is Better for Herbs & Garlic?

It depends on your technique.

If you place parsley on your board and instinctively rock the knife backward and forward, you’ll probably prefer the chef knife.

If you prefer controlled chopping or push cuts, the Santoku feels excellent.

For garlic, shallots and similar small ingredients, either works beautifully.

🏆 Rock-Mincing Herbs — Chef Knife

🏆 Controlled Chopping — Santoku

🏆 Garlic & Shallots — Tie


Which Knife Gives You More Control?

For many home cooks:

Santoku.

A shorter, lighter blade simply has less mass and length to control.

That doesn’t automatically make it safer.

Safe knife handling still depends on good technique, a stable cutting board, a secure grip and paying attention to what you’re doing.

But the compact dimensions of a Santoku can feel more approachable.

This is particularly noticeable for someone moving up from a small utility knife.

An 8-inch chef knife may initially feel huge.

A 7-inch Santoku often doesn’t.

🏆 Winner: Santoku


👨‍🍳 Which Is Better for Beginners?

This one is almost a tie.

A Santoku can feel easier because it is shorter and lighter.

But KnifeGenie still gives the overall beginner recommendation to the 8-inch chef knife.
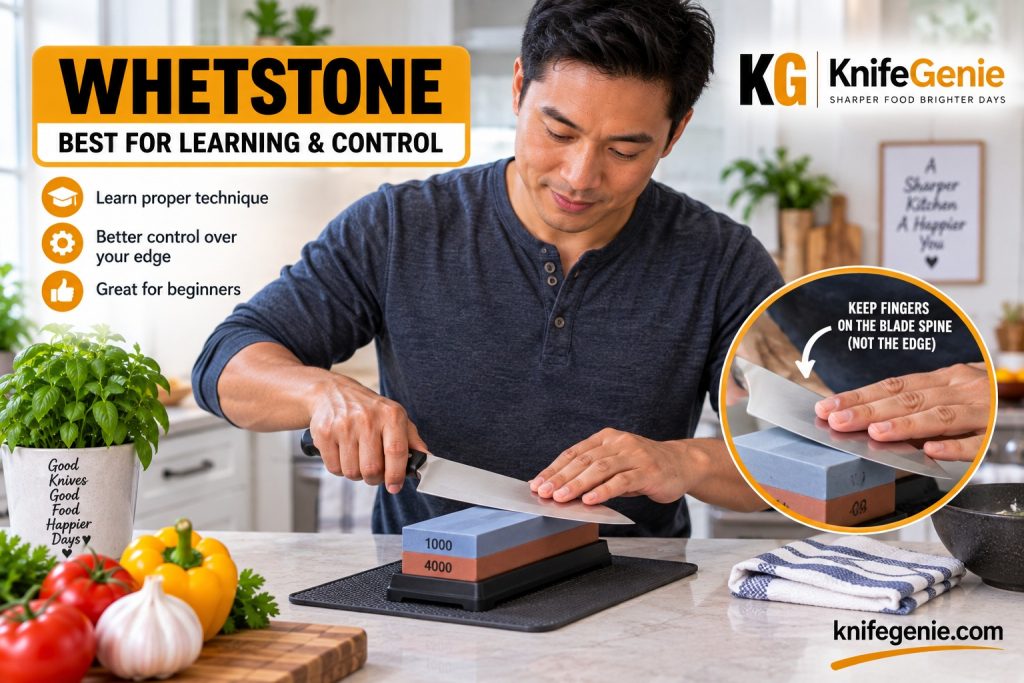
Why?

Learning with a chef knife gives you an exceptionally versatile foundation.

You can develop:

✔ Pinch grip
✔ Claw grip
✔ Rock chopping
✔ Push cutting
✔ Slicing
✔ Dicing
✔ Mincing
✔ Tip work

And you’ll be learning on a blade style you’re likely to encounter repeatedly.

🏆 KnifeGenie Beginner Pick — 8-Inch Chef Knife
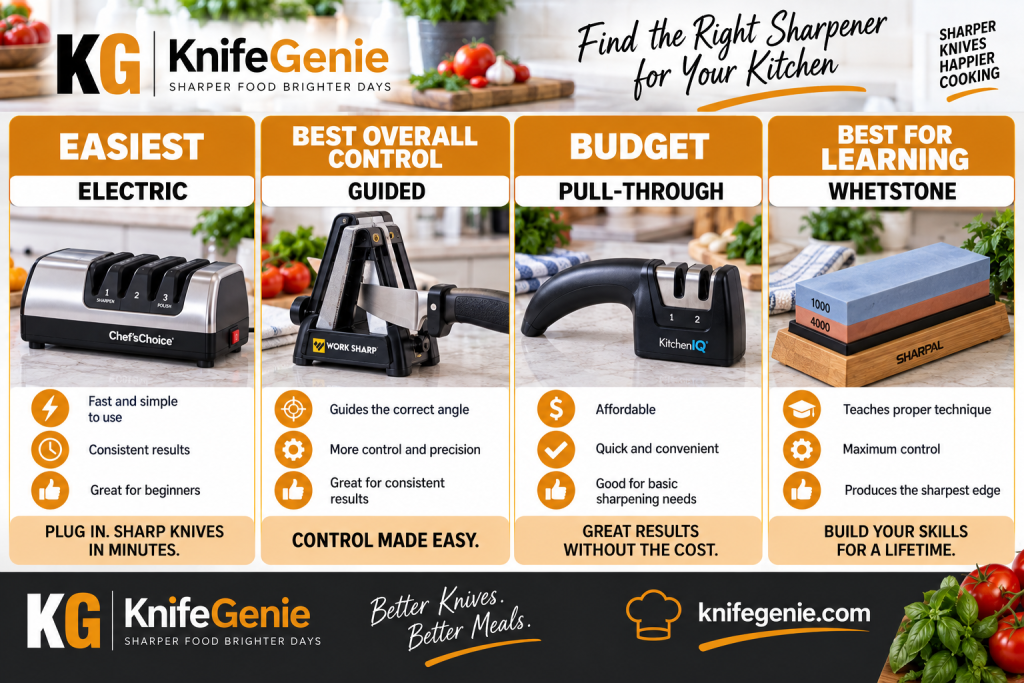
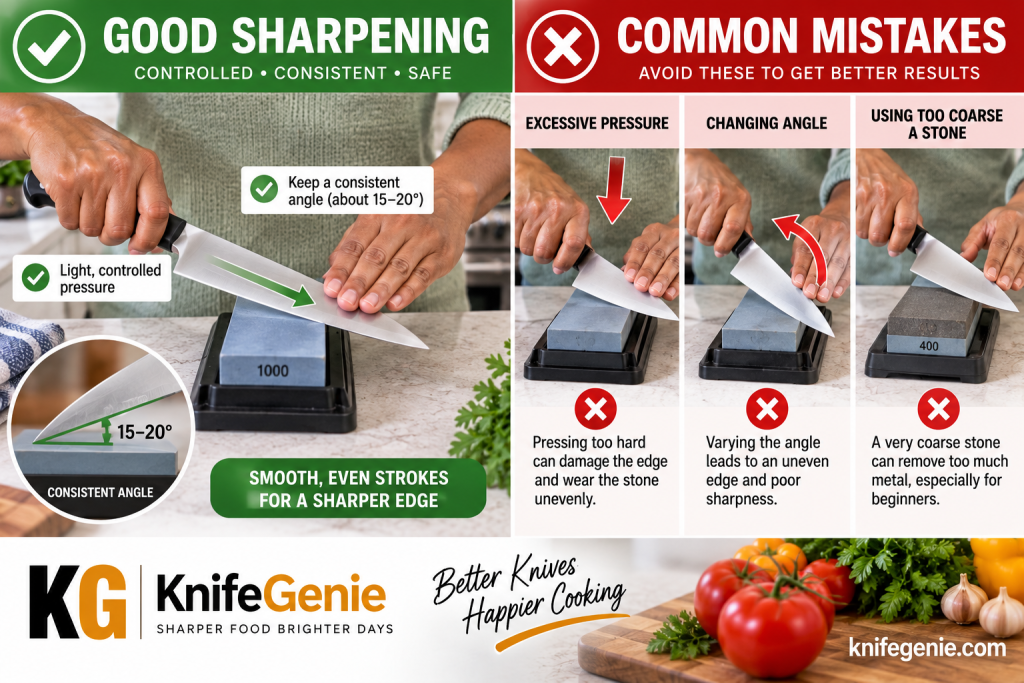
But if an 8-inch knife feels uncomfortable or intimidating in your hand, don’t force it.

A good Santoku is a perfectly legitimate first serious kitchen knife.


HANDLING TEST

Home cook comparing chef knife and Santoku handling
Handle shape, balance, blade length and weight can matter more than the name printed on the blade.


🔪 Does a Santoku Replace a Chef Knife?

For many cooks, yes.

There is no rule saying every kitchen must contain a Western chef knife.

If you primarily prepare:

🥕 Vegetables
🐟 Fish
🍗 Boneless chicken
🥩 Boneless meat
🌿 Herbs
🍎 Fruit

a good Santoku can handle an enormous percentage of your everyday prep.

But the chef knife’s additional length and curved profile make it somewhat more adaptable across different foods and cutting techniques.

That’s why KnifeGenie gives it the overall versatility crown.


⚔️ Do You Need Both?

No.

But owning both makes more sense than it might initially appear.

They overlap heavily, but their different personalities become useful once you understand them.

You might reach for your:

🔪 Chef Knife When…

✔ Cutting a cabbage
✔ Slicing a large roast
✔ Rock-mincing herbs
✔ Breaking down large produce
✔ Working with bigger ingredients
✔ You want maximum versatility

🇯🇵 Santoku When…

✔ Dicing onions
✔ Slicing carrots
✔ Preparing cucumbers
✔ Chopping peppers
✔ Making precise cuts
✔ Working on a smaller board
✔ You want a lighter knife

If you cook frequently, owning both isn’t redundant.

It’s convenient.


💰 Chef Knife vs Santoku: Which Should You Buy?

Here’s the easiest way to decide.

🥇 Buy a Chef Knife If…

✔ You want one primary kitchen knife
✔ You regularly cut large ingredients
✔ You like rocking cuts
✔ You prepare substantial cuts of boneless meat
✔ You want maximum versatility
✔ You have enough cutting-board space
✔ You like a little weight behind your knife

KnifeGenie Recommendation

Start with an 8-inch chef knife.


🇯🇵 Buy a Santoku If…

✔ You prefer lightweight knives
✔ You mostly prepare vegetables
✔ You like push cuts and straight chopping
✔ You use a smaller cutting board
✔ You prefer shorter blades
✔ Precision matters more than maximum reach
✔ An 8-inch chef knife feels unnecessarily large

KnifeGenie Recommendation

Start with a 7-inch Santoku.


BUYING DECISION

Choosing between a chef knife and Santoku for home cooking
Choose the chef knife for maximum versatility or the Santoku for compact, lightweight precision.


🏆 KnifeGenie’s Final Scorecard

Category Winner
🏆 Best Overall 🔪 Chef Knife
🥕 Vegetable Prep 🇯🇵 Santoku
🥩 Meat Preparation 🔪 Chef Knife
🐟 Boneless Fish 🇯🇵 Santoku
🌿 Rock-Mincing Herbs 🔪 Chef Knife
🧄 Small Precision Prep 🇯🇵 Santoku
✋ Maneuverability 🇯🇵 Santoku
⚖️ Lightweight Handling 🇯🇵 Santoku
📏 Large Ingredients 🔪 Chef Knife
🔄 Rocking Technique 🔪 Chef Knife
⬆️ Push Cutting 🇯🇵 Santoku
🏠 Small Kitchens 🇯🇵 Santoku
👨‍🍳 Beginner’s First Knife 🔪 Chef Knife
⚔️ Maximum Versatility 🔪 Chef Knife

🧙 KnifeGenie Final Verdict

🥇 OVERALL WINNER: 8-INCH CHEF KNIFE

This was closer than it might appear.

The Santoku actually wins several categories.

It’s lighter.

It’s exceptionally maneuverable.

It’s superb for vegetables.

And for a cook who prefers controlled push cuts instead of pronounced rocking cuts, it can feel better from the first slice.

But we’re answering a specific question:

Which is better for everyday cooking?

For the widest range of home cooks and the widest range of everyday foods, KnifeGenie gives the advantage to the 8-inch chef knife.

Its combination of blade length, pointed tip, curved cutting edge and broad versatility makes it extremely difficult to beat as the one knife you reach for every day.

🏆 KnifeGenie Winner

8-INCH CHEF KNIFE

Best for: Home cooks wanting one highly versatile kitchen workhorse.

🇯🇵 Santoku Runner-Up

7-INCH SANTOKU

Best for: Cooks wanting lighter handling, excellent vegetable performance and precise chopping.

The important thing is that there isn’t a bad choice here.

The better knife is the one whose size, weight and cutting style fit the way you actually cook.


Frequently Asked Questions

Is a Santoku better than a chef knife?

Not universally. A Santoku is generally shorter, lighter and flatter-edged, making it particularly good for controlled chopping and vegetable preparation. A chef knife’s longer blade and curved belly make it more versatile for large ingredients, slicing and rocking cuts.

Can a Santoku do everything a chef knife can?

It can perform most everyday jobs a chef knife handles, including chopping vegetables, slicing boneless meat, preparing fish and mincing herbs. A chef knife nevertheless has an advantage with larger ingredients and pronounced rocking cuts.

What size Santoku is best?

For most home cooks, around 7 inches provides an excellent balance between maneuverability and usable cutting length.

What size chef knife is best?

For most home kitchens, 8 inches remains the KnifeGenie recommendation because it balances control, reach and versatility.

Is a Santoku good for cutting meat?

Yes. Santokus work very well on boneless meat and poultry. Avoid using fine-edged Santokus on bones, frozen foods or other extremely hard ingredients.

Why do some Santoku knives have dimples?

Those indentations are generally intended to reduce contact between food and the blade, helping some ingredients release more easily while slicing. They do not completely eliminate sticking.

Is a chef knife or Santoku better for vegetables?

KnifeGenie gives the Santoku a slight advantage for routine vegetable prep because its flatter edge, broad blade and nimble handling work extremely well for chopping and push cuts.

Which is better for small hands?

Many people with smaller hands find a 5.5–7-inch Santoku easier to maneuver than a large chef knife. However, handle shape and balance matter just as much as blade length.

Should a beginner buy a chef knife or Santoku?

KnifeGenie recommends starting with an 8-inch chef knife if it feels comfortable in your hand. If it feels too large or heavy, a 7-inch Santoku is an excellent alternative.

Do professional chefs use Santoku knives?

Yes. Santokus are serious multipurpose kitchen knives, not merely specialty vegetable knives. Professional and home cooks choose them according to their preferred technique and the food they’re preparing.

Should I own both?

You don’t need both, but they complement each other nicely. Use the chef knife when you want reach, rocking ability and maximum versatility, and the Santoku when you want compact, lightweight precision.


🔪 One Last KnifeGenie Tip

Don’t buy your next knife solely because someone tells you Japanese knives are sharper, German knives are tougher or professional chefs use a particular style.

Hold the knife if you can.

Use a proper pinch grip.

Think about the size of your cutting board.

Consider what you actually cook.

And pay attention to whether you naturally rock, chop, push or slice.

A knife that fits your cooking technique will usually serve you better than one that simply has the most impressive specifications.

For most people, that leads us back to the 8-inch chef knife.

For plenty of others, however, the Santoku will be the knife they reach for first.


8-Inch vs 10-Inch Chef Knife: Which Should You Buy?

8-inch vs 10-inch chef knife comparison
Comparing 8-inch and 10-inch chef knives for control, versatility and large food preparation.

Choosing between an 8-inch and 10-inch chef knife might seem like a simple matter of blade length.

After all, it’s only a two-inch difference.

But those extra two inches can noticeably change how a knife feels, how much cutting-board space it needs, how quickly you can work through large ingredients, and how easy it is to control.

So, which should you buy?

For most home cooks, the answer is straightforward:

🏆 An 8-inch chef knife is the better all-around choice.

It gives you enough blade for onions, vegetables, herbs, chicken, boneless meats and most everyday prep without feeling unnecessarily large.

A 10-inch chef knife, however, can be the better tool if you regularly prepare large ingredients, cook in big batches, have a spacious cutting board and already feel comfortable controlling a longer blade. And if you want USA-made chef’s knives are good choices.

This KnifeGenie buying guide compares the two sizes side by side so you can decide which one belongs in your kitchen.


🧙 KnifeGenie Quick Take:
Buy the 8-inch chef knife if you’re unsure. Choose the 10-inch primarily when you know you need the additional cutting length and have enough workspace to use it comfortably.


🔽 Jump to What You Need

👉 Quick Answer
👉 8-Inch vs 10-Inch Comparison
👉 Why Choose an 8-Inch Chef Knife?
👉 Why Choose a 10-Inch Chef Knife?
👉 Control & Maneuverability
👉 Cutting Speed & Efficiency
👉 Cutting Board Size
👉 Knife Weight & Fatigue
👉 Rock Chopping & Slicing
👉 Beginners
👉 Small vs Large Hands
👉 Japanese vs German Knives
👉 Which Size Should You Buy?
👉 Frequently Asked Questions
👉 Final Verdict


🏆 8-Inch vs 10-Inch Chef Knife: The Quick Answer

If you simply want our recommendation:

🥇 Best Overall — 8-Inch Chef Knife

For most home cooks, 8 inches is the sweet spot.

It provides enough cutting length for almost everything you are likely to prepare while remaining relatively maneuverable.

💪 Best for Large Prep — 10-Inch Chef Knife

Choose a 10-inch chef knife if you regularly work with:

🥬 Large cabbages
🍉 Melons
🎃 Large squash
🥩 Large boneless cuts of meat
🥕 Big batches of vegetables
🍲 High-volume meal prep

The longer cutting edge can make these jobs faster and more efficient.

But bigger isn’t automatically better.

If you spend most of your time chopping an onion, slicing a tomato and preparing dinner for two or four people, you may rarely benefit from those additional two inches.


⚔️ 8-Inch vs 10-Inch Chef Knife — Side-by-Side Comparison

Feature 🔪 8-Inch Chef Knife 💪 10-Inch Chef Knife
Overall versatility ⭐⭐⭐⭐⭐ ⭐⭐⭐⭐
Control ⭐⭐⭐⭐⭐ ⭐⭐⭐½
Large ingredients ⭐⭐⭐⭐ ⭐⭐⭐⭐⭐
Bulk preparation ⭐⭐⭐⭐ ⭐⭐⭐⭐⭐
Small kitchens ⭐⭐⭐⭐⭐ ⭐⭐½
Beginner friendly ⭐⭐⭐⭐⭐ ⭐⭐⭐
Maneuverability ⭐⭐⭐⭐⭐ ⭐⭐⭐½
Cutting-board space needed Moderate Large
Typical weight Lower Higher
Best for Most home cooks Large-volume prep
KnifeGenie choice 🏆 Winner 💪 Specialist choice

🧙 KnifeGenie Tip

Don’t look at blade length in isolation.

Weight, balance, blade height, thickness, handle design and overall construction can make two chef knives of the same length feel completely different.


MAIN COMPARISON

8-inch vs 10-inch chef knife side by side comparison
An 8-inch chef knife offers excellent everyday versatility, while a 10-inch blade provides additional reach for large ingredients and high-volume prep.


🥇 Why Choose an 8-Inch Chef Knife?

There is a reason the 8-inch chef knife has become one of the most popular all-purpose sizes.

It occupies an extremely useful middle ground.

An 8-inch blade is long enough to handle most foods found in a home kitchen but short enough that most cooks can comfortably maneuver it on a normal cutting board.

Think about a typical evening meal.

You might need to:

🧅 Dice an onion
🧄 Mince garlic
🥕 Chop carrots
🥔 Cube potatoes
🌿 Mince herbs
🍗 Prepare boneless chicken
🍅 Slice tomatoes

An 8-inch chef knife can comfortably perform all of these jobs.

⚙️ Where the 8-Inch Excels

✔ Everyday vegetable preparation
✔ Chopping onions
✔ Mincing herbs
✔ Slicing fruit
✔ Preparing boneless meat
✔ General family meals
✔ Medium-sized cutting boards
✔ Precision work requiring good tip control

✅ Advantages

✔ Excellent balance of length and control
✔ Easier to maneuver than a 10-inch knife
✔ Fits most home cutting boards
✔ Comfortable for longer prep sessions
✔ Suitable for beginners
✔ Large enough for most ingredients
✔ Available in an enormous range of styles and prices
✔ Easy to store in most knife blocks and drawers

❌ Weak Points

✘ Less efficient than a 10-inch blade for very large ingredients
✘ Shorter cutting edge for bulk prep
✘ Large melons and oversized squash may require additional strokes
✘ Professional cooks doing high-volume prep may prefer more blade

🧙 KnifeGenie Verdict

BEST OVERALL FOR HOME COOKING

If you want one chef knife that can perform almost every normal kitchen preparation task, buy the 8-inch.

For most home cooks, the advantages of moving up to 10 inches simply aren’t large enough to outweigh the 8-inch knife’s easier handling.

See our Chef Knife vs Santoku guide


8-INCH KNIFE

8-inch chef knife used for everyday home cooking
An 8-inch chef knife provides enough cutting length for most everyday ingredients while remaining easy to control.


💪 Why Choose a 10-Inch Chef Knife?

A 10-inch chef knife isn’t simply a stretched 8-inch knife.

The additional blade length changes how you interact with the knife.

You gain a longer cutting edge and additional reach, which can be particularly useful when dealing with large foods.

Imagine slicing through a large cabbage.

With a shorter knife, you may need to reposition the blade or make multiple cuts.

A longer knife can potentially span more of the ingredient in a single motion.

The same principle applies when processing large quantities of food.

⚙️ Where the 10-Inch Excels

✔ Large vegetables
✔ Large fruit
✔ Cabbage
✔ Squash
✔ Melons
✔ Large boneless cuts
✔ Big batches of herbs and vegetables
✔ Meal preparation for large families
✔ High-volume kitchen work

✅ Advantages

✔ More cutting edge
✔ Greater reach
✔ Excellent for large ingredients
✔ Efficient for bulk food preparation
✔ Fewer strokes may be required for some jobs
✔ Useful for long slicing motions
✔ Experienced cooks may appreciate the additional working length

❌ Weak Points

✘ Requires more cutting-board space
✘ Usually heavier than the equivalent 8-inch knife
✘ More blade to control
✘ Can feel cumbersome in small kitchens
✘ Less beginner-friendly
✘ Takes more storage space
✘ Additional length provides little benefit during many small prep jobs

🧙 KnifeGenie Verdict

BEST FOR LARGE-SCALE PREP

A 10-inch chef knife makes sense when your cooking habits actually justify it.

If you frequently prepare large meals or oversized ingredients, the additional reach can be genuinely useful.

Otherwise, an 8-inch knife will usually be more convenient.


10-INCH KNIFE

10-inch chef knife cutting large vegetables for food prep
A 10-inch chef knife provides additional reach when cutting large vegetables, fruit and other oversized ingredients.


Which Gives You Better Control?

🏆 Winner: 8-Inch

For most home cooks, the 8-inch knife wins on maneuverability.

With two fewer inches extending beyond your hand, controlling the tip generally feels easier.

This becomes particularly noticeable when making smaller or more precise cuts.

An 8-inch knife can feel more natural when you’re:

🧄 Mincing garlic
🍓 Preparing small fruit
🧅 Dicing onions
🌿 Chopping herbs
🥕 Making smaller vegetable cuts

A 10-inch knife can perform these jobs too.

The question is whether the additional blade length provides any advantage.

Usually, it doesn’t.

🧙 KnifeGenie Tip

A chef knife should feel like an extension of your hand.

If you’re constantly thinking about where the tip of your knife is, the knife may be larger than you need.


Which Is Faster for Food Prep?

🏆 Winner for Large Batches: 10-Inch

This is where the 10-inch knife begins fighting back.

A longer cutting edge allows you to cover more food during each stroke.

Imagine preparing:

🥕 20 carrots
🧅 10 onions
🥬 Several heads of cabbage
🥔 A large batch of potatoes

A confident cook may find a 10-inch knife more efficient.

But there’s an important distinction:

Bigger batches don’t automatically require a bigger knife.

If you aren’t comfortable controlling the additional length, any theoretical speed advantage disappears.

For ordinary home dinners, the difference is unlikely to matter much.

For large meal-prep sessions, catering-style cooking or very large families, it can.

Read: Boning Knife vs Fillet Knife: Which One Do You Need?


📏 Cutting Board Size Could Decide This for You

Your knife and cutting board need to work together.

This is one of the most overlooked factors when choosing between an 8-inch and 10-inch chef knife.

Put a 10-inch knife on a cramped cutting board and you’ll immediately understand the problem.

You need space not only for the blade, but also for:

🥕 Your ingredients
✋ Your guiding hand
🔪 Your cutting motion
🥗 Your prepared food

Small Cutting Board

Choose: 8-inch

A 10-inch knife is likely to feel unnecessarily cumbersome.

Medium Everyday Cutting Board

Choose: 8-inch

This is the natural pairing for most home kitchens.

Large Cutting Board

Choose: 8-inch or 10-inch

Now the choice can be based more on ingredients and personal preference.


CUTTING BOARD COMPARISON

Cutting board size for 8-inch and 10-inch chef knives
A longer chef knife needs enough cutting-board space for both the blade and the ingredients you’re preparing.


⚖️ Weight & Fatigue: Two Inches Can Make a Difference

Blade length isn’t the only difference.

Within the same knife series, moving from 8 inches to 10 inches generally means more blade material and therefore additional overall size and often weight.

How noticeable that feels depends heavily on the knife.

A thin Japanese 10-inch gyuto may still feel surprisingly agile.

A substantial 10-inch forged German chef knife can feel considerably more imposing.

That extra mass isn’t necessarily bad.

Some cooks like letting the knife’s weight contribute to the cutting action.

Others prefer a lighter, quicker feeling.

Choose the 8-inch if you prefer:

⚡ Agility
🎯 Precise control
✋ Less knife to manage
🏠 Normal home preparation

Consider the 10-inch if you prefer:

💪 More substantial tools
📏 Additional reach
🥬 Large-ingredient preparation
🍲 High-volume cooking


🔄 Which Is Better for Rock Chopping?

There isn’t an automatic winner here because blade profile matters as much as blade length.

Traditional Western chef knives often have a curved belly that facilitates rocking cuts.

A longer blade can give you a substantial rocking surface, which experienced cooks may enjoy when working through herbs and vegetables.

But don’t assume every 10-inch knife rocks better than every 8-inch knife.

A flatter Japanese-style gyuto behaves differently from a deeply curved German chef knife regardless of length.

🧙 KnifeGenie Tip

Choose your cutting technique first.

Then look at blade profile + length, rather than length alone.


🥩 Which Is Better for Slicing Meat?

Slight Advantage: 10-Inch

Longer blades can be useful for slicing because they allow longer, smoother strokes.

That makes a 10-inch chef knife attractive when working with larger boneless cuts.

However, a chef knife isn’t always the ideal specialist slicing tool.

If carving roasts or slicing large proteins is a regular part of your cooking, a dedicated slicing or carving knife may ultimately perform that job better.

For normal chicken, steaks and smaller boneless cuts, an 8-inch chef knife remains perfectly capable.


👶 8-Inch vs 10-Inch Chef Knife for Beginners

🏆 Winner: 8-Inch

We recommend that most beginners start with an 8-inch chef knife.

Why?

Because you’re learning:

✋ Grip
🎯 Tip control
🔄 Cutting motions
👆 Guiding-hand position
⚖️ Balance
📏 Spatial awareness

There is little reason to make that process more difficult by adding blade length you don’t need.

An 8-inch chef knife gives beginners plenty of room to develop proper technique while still being capable enough to remain useful long after their skills improve.

What if 8 inches still feels too big?

Try a 7-inch chef knife.

Or even a 6-inch model.

Comfort and control matter more than following an arbitrary rule.


Does Hand Size Matter?

Yes—but don’t make your decision based solely on hand size.

Someone with large hands isn’t automatically better suited to a 10-inch knife.

Likewise, someone with small hands doesn’t necessarily need a tiny blade.

Consider the entire knife:

🔹 Handle circumference
🔹 Handle length
🔹 Balance point
🔹 Blade height
🔹 Weight
🔹 Bolster design
🔹 Grip style
🔹 Overall construction

A well-balanced 10-inch knife can sometimes feel more comfortable than a poorly balanced 8-inch knife.

And a thin 8-inch Japanese chef knife can feel dramatically lighter than a thick 8-inch German model.


HANDLING TEST

Home cook choosing between 8-inch and 10-inch chef knives
Use your normal grip and cutting position when deciding which chef knife length feels most natural and controllable.


🇯🇵 Japanese vs 🇩🇪 German: Size Doesn’t Tell the Whole Story

This is particularly important when comparing chef knives.

🇯🇵 Japanese-Style Knives

Japanese gyutos often emphasize:

⚡ Lower weight
🔪 Thin blade geometry
🎯 Precise cutting
✨ Harder steels
🥕 Efficient slicing

Common metric sizes include:

210 mm ≈ 8.3 inches

240 mm ≈ 9.4 inches

A 240 mm gyuto therefore sits close to the 10-inch category, although it is technically a little shorter.

Because Japanese knives can be relatively thin and light, a 240 mm gyuto may feel much more maneuverable than you expect from looking at its length.

🇩🇪 German-Style Chef Knives

Traditional German knives commonly emphasize:

💪 Robust construction
⚖️ More substantial weight
🔄 Curved blade profiles
🔨 Toughness
🥩 General-purpose versatility

A substantial forged 10-inch German chef knife can therefore feel considerably larger than a thin Japanese knife of similar length.

🧙 KnifeGenie Tip

Never compare chef knives by length alone.

Length tells you how long the blade is—not how large the knife will feel in your hand.


🔍 Real-World Example: What Do Popular Chef Knives Tell Us?

Many highly regarded all-purpose chef knives cluster around the 8-inch range.

For example, KnifeGenie’s Best Imported Kitchen Knives comparison includes the MAC Professional MTH-80 at approximately 8.5 inches alongside 8-inch-class models from Miyabi, Wüsthof, Shun and GLOBAL.

That doesn’t prove 8 inches is universally superior.

But it does illustrate how practical the roughly 8-inch format is for an all-purpose chef knife.

If you want to compare several Japanese and German examples, see:

👉 KnifeGenie: 5 Best Imported Kitchen Knives of 2026


🧪 How to Test 8-Inch vs 10-Inch Before Buying

If you can handle both sizes before purchasing, do it.

Don’t simply pick up the knife and hold it in the air.

Try to approximate your normal cooking position.

Ask yourself:

1️⃣ Can I comfortably control the tip?

The knife shouldn’t feel as though it’s pulling your hand around.

2️⃣ Can I use a proper pinch grip?

Your normal grip should feel comfortable and secure.

3️⃣ Do I have enough knuckle clearance?

Blade height matters here—not just length.

4️⃣ Does the knife feel balanced?

You shouldn’t feel as though you’re fighting the front or rear of the knife.

5️⃣ Is the 10-inch actually helping me?

This is perhaps the most important question.

If the longer knife doesn’t improve how you cut, why carry the additional blade?

6️⃣ Will it fit my cutting board?

Imagine the knife in your actual kitchen rather than on a large store counter.

7️⃣ Could I comfortably use it for 20 minutes?

A knife that feels impressive for 30 seconds can become tiring during a long prep session.


🛒 Which Size Should You Buy?

Here’s the easiest way to decide.

🥇 Buy an 8-Inch Chef Knife If…

✔ You want one all-purpose chef knife
✔ You prepare normal family meals
✔ You’re a beginner
✔ You use a medium-sized cutting board
✔ Control matters more than maximum reach
✔ You have limited counter space
✔ You want good maneuverability
✔ You’re uncertain which size to choose

🧙 KnifeGenie Verdict

For most readers, this is the right choice.


💪 Buy a 10-Inch Chef Knife If…

✔ You regularly prepare large quantities of food
✔ You cut large vegetables and fruit
✔ You have a spacious cutting board
✔ You prefer long slicing strokes
✔ You’re already comfortable using chef knives
✔ You like longer blades
✔ You want more cutting edge per stroke
✔ Your kitchen has sufficient working space

🧙 KnifeGenie Verdict

Buy it because your cooking requires it—not simply because bigger sounds better.


🎯 KnifeGenie Buying Decision

Still undecided?

Use this simple guide:

Your Situation KnifeGenie Recommendation
First chef knife 🥇 8-inch
Beginner 🥇 8-inch
Average home cook 🥇 8-inch
Small kitchen 🥇 8-inch
Medium cutting board 🥇 8-inch
One chef knife for almost everything 🥇 8-inch
Large cutting board Either
Large family 8-inch or 10-inch
Frequent meal prep 💪 10-inch
Large vegetables and fruit 💪 10-inch
Experienced cook who likes long blades 💪 10-inch
High-volume preparation 💪 10-inch

BUYING DECISION

Home cook choosing between 8-inch and 10-inch chef knives
Use your normal grip and cutting position when deciding which chef knife length feels most natural and controllable.


🚫 5 Mistakes to Avoid When Choosing Chef Knife Size

❌ Mistake #1: Assuming Bigger Means Better

A 10-inch knife isn’t an upgrade from an 8-inch knife.

It’s a different size designed to suit different preferences and jobs.

❌ Mistake #2: Ignoring Your Cutting Board

Your beautiful new 10-inch chef knife won’t be much fun if your cutting board barely accommodates it.

❌ Mistake #3: Choosing Based Only on Hand Size

Handle design, blade height, balance and weight matter too.

❌ Mistake #4: Copying Professional Chefs

A professional cook processing large quantities of ingredients has different needs from someone preparing dinner at home.

Buy for your kitchen.

❌ Mistake #5: Ignoring Weight

Two additional inches can also mean more material.

Compare the actual weight and balance of the knives you’re considering whenever possible.


🧙 KnifeGenie Pro Tips

🔪 Start With 8 Inches

If this is your first serious chef knife, an 8-inch model gives you an excellent baseline.

You can always add a longer knife later.

📏 Measure Your Cutting Board

Don’t guess.

Put a ruler on your board and visualize a 10-inch blade before ordering one.

✋ Test Your Grip

Use a proper pinch grip when comparing knives. Holding a knife by the very end of its handle doesn’t tell you much about how it will feel during actual prep.

⚖️ Compare Weight, Not Just Length

A light 10-inch knife may suit you better than a heavy 8-inch model.

🍉 Buy According to What You Cook

If the largest thing you regularly cut is an onion, the extra length probably won’t transform your cooking.

If you’re constantly breaking down cabbages, melons and large piles of vegetables, that’s different.


🔗 Related KnifeGenie Guides

Continue with these KnifeGenie guides:

👉 What Size Chef Knife Is Best for Home Cooking?
Learn how 6-inch, 8-inch and 10-inch chef knives compare for everyday home use.

👉 5 Best Imported Kitchen Knives of 2026
Compare popular Japanese and German chef knives.

👉 How to Hold a Chef Knife
Learn the pinch grip and basic handling techniques before moving to a larger blade.

👉 Forged vs Stamped Knives: What’s the Difference?
See how knife construction affects weight, feel, balance and price.


Frequently Asked Questions

Is an 8-inch or 10-inch chef knife better?

For most home cooks, an 8-inch chef knife is better because it offers an excellent balance between cutting length, maneuverability and control. A 10-inch knife becomes more attractive when preparing large ingredients or large quantities of food.

Is a 10-inch chef knife too big for home cooking?

Not necessarily. A 10-inch chef knife can work extremely well at home if you have enough cutting-board space and feel comfortable controlling the longer blade. Most home cooks, however, don’t need the extra length.

Is an 8-inch chef knife big enough?

Yes. An 8-inch chef knife is large enough for the vast majority of everyday kitchen preparation, including vegetables, herbs, fruit, chicken and boneless meats.

Should a beginner buy an 8-inch or 10-inch chef knife?

Most beginners should start with an 8-inch chef knife. It provides excellent versatility without introducing unnecessary blade length.

Is a 10-inch chef knife better for large hands?

Not automatically. Hand size is only one factor. Handle dimensions, knife weight, blade height and balance may have a greater effect on comfort.

Does a 10-inch chef knife cut faster?

It can during large-volume preparation because the longer cutting edge covers more food per stroke. For normal home cooking, the speed difference may be insignificant.

Is a 10-inch chef knife heavier?

Within the same knife line, a longer version will commonly contain more blade material and may weigh more. However, construction varies significantly, so check the specifications of the individual knife.

Is an 8-inch chef knife easier to control?

Generally, yes. The shorter blade gives you less length extending beyond your hand, which is one reason 8-inch chef knives are so popular for everyday cooking.

What is the Japanese equivalent of an 8-inch chef knife?

A 210 mm gyuto measures approximately 8.3 inches and is a very common general-purpose Japanese chef-knife size.

What is the Japanese equivalent of a 10-inch chef knife?

A 240 mm gyuto measures approximately 9.4 inches and provides a similar step up in working length, although it isn’t a full 10 inches.

Do I need both an 8-inch and 10-inch chef knife?

Probably not.

Most home cooks can perform nearly all everyday chef-knife tasks with a good 8-inch knife. Consider adding a longer chef knife only if your cooking habits show that you genuinely need more reach.


🏆 Final Verdict: 8-Inch vs 10-Inch Chef Knife

After comparing the two sizes, KnifeGenie’s recommendation is clear:

🥇 For most home cooks, buy the 8-inch chef knife.

It offers the strongest combination of:

✔ Control
✔ Versatility
✔ Maneuverability
✔ Cutting length
✔ Cutting-board compatibility
✔ Beginner friendliness
✔ Everyday usefulness

The 10-inch chef knife isn’t worse.

In the right kitchen, it may actually be better.

Its additional reach makes sense for large vegetables, large fruit, long slicing strokes and high-volume food preparation.

But that’s exactly the point.

A 10-inch knife is worth buying when you have a reason to need those additional two inches.

For everyday cooking, the 8-inch knife hits the sweet spot.

🧙 KnifeGenie Final Recommendation

🥇 8-INCH — BEST FOR MOST HOME COOKS

💪 10-INCH — BEST FOR LARGE INGREDIENTS & HIGH-VOLUME PREP

When in doubt, choose 8 inches.

“What Size Chef Knife Is Best for Home Cooking?”