
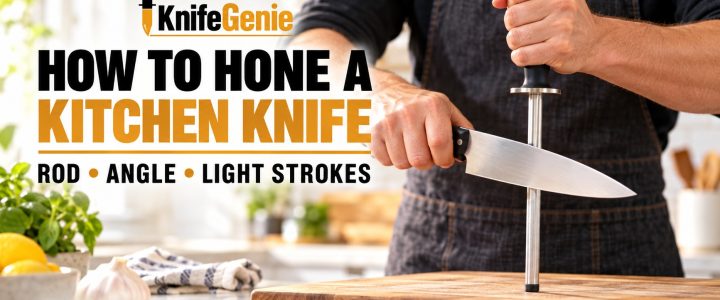
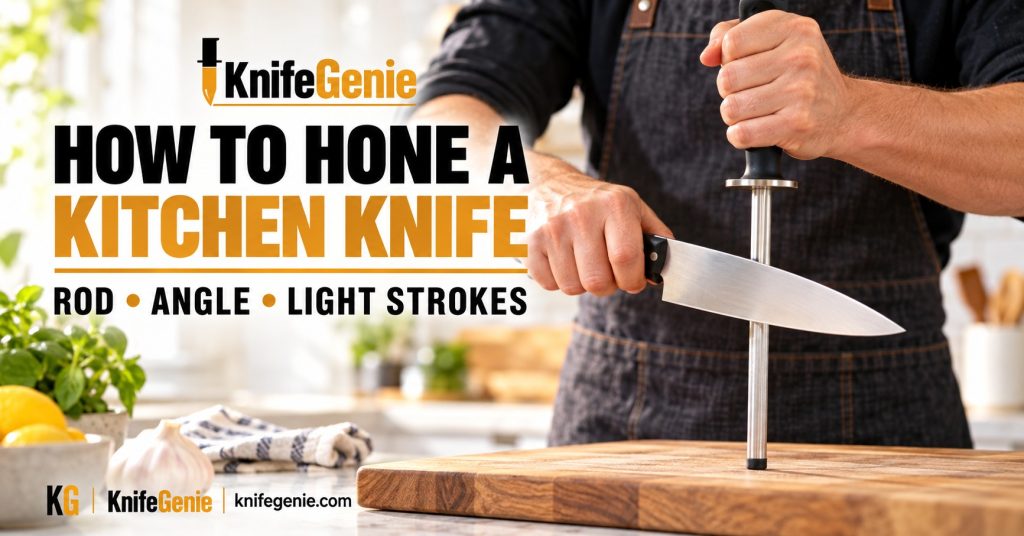
A kitchen knife that has lost a little of its bite may need a quick touch-up before you start dinner. The important part is knowing how to use the rod without making the edge worse.
Learning how to hone a kitchen knife comes down to a few manageable habits: choose a compatible rod, match the knife’s edge angle, use gentle strokes, and keep everything steady.
You do not need fast, dramatic movements. A slow, supported method makes it easier to see what you are doing and keep the angle consistent.
Research note: This guide draws on published knife-manufacturer care instructions. It does not claim hands-on testing of the knives or rods mentioned. Follow the instructions for your particular knife and maintenance tool when they differ from general guidance.
▶️ Jump to What You Need
👉 Quick Answer
👉 Choose a Honing Rod
👉 Find the Correct Angle
👉 How to Hone: Step by Step
👉 How Many Strokes?
👉 How Often Should You Hone?
👉 Honing Safety
👉 Common Honing Mistakes
👉 When Honing Does Not Help
👉 KnifeGenie Pro Tips
👉 Frequently Asked Questions
👉 Final Recommendation
🏆 How to Hone a Kitchen Knife: The Quick Answer
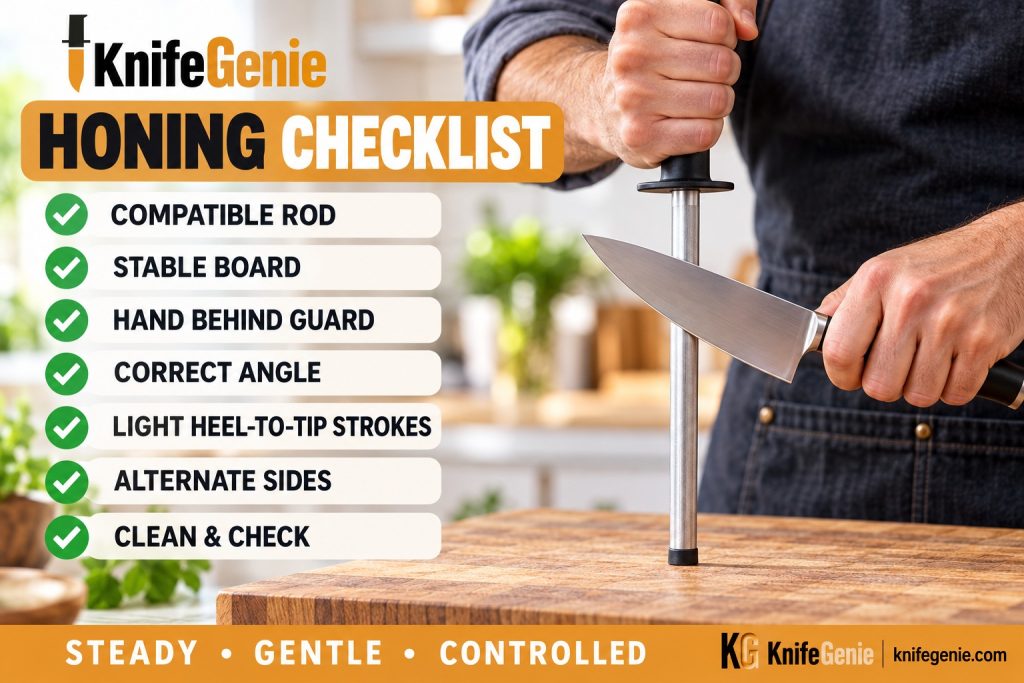
For a compatible, straight-edged, double-bevel steel knife:
- Hold a suitable honing rod vertically, with its tip supported on a stable cutting board.
- Keep your rod-holding hand behind the handle guard.
- Set the knife against the rod at the knife maker’s recommended angle.
- Draw the edge slowly down the rod, working from heel to tip with light pressure.
- Alternate sides for a few strokes, then clean the knife and check how it cuts.
Stop when cutting performance improves. If a brief, careful session does not help, inspect the knife rather than pressing harder.
Honing maintains an existing edge; a worn or damaged edge needs different attention. Our honing vs sharpening guide explains that distinction in detail.
🧙 KnifeGenie Rule
Steady rod. Correct angle. Light pressure. Full edge.
🔧 Choose a Honing Rod That Suits Your Knife
The rod supplied with a knife block is not automatically suitable for every knife you own. Check both the knife maker’s advice and the rod’s surface.
| Rod type | What to know | Practical use |
|---|---|---|
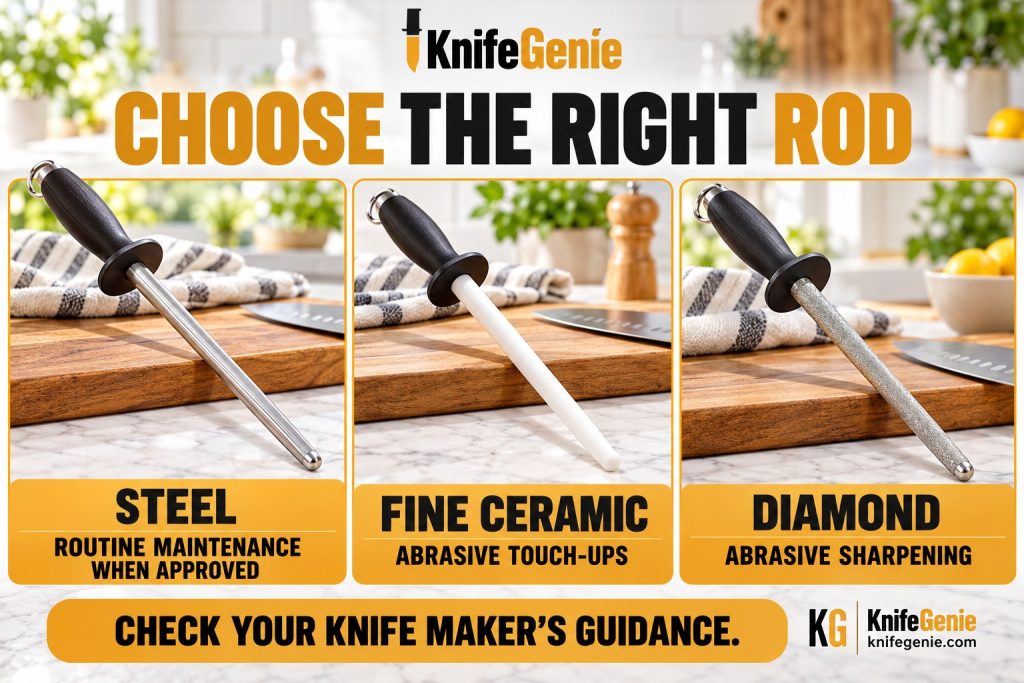
| Smooth or finely textured steel | Commonly used for routine edge maintenance; suitability varies by blade | A sensible option for many everyday steel knives when approved by the maker |
| Fine ceramic | Abrasive: removes some steel while refining the edge | Light touch-ups when compatible; use sparingly rather than automatically |
| Diamond-coated | An abrasive sharpening tool; aggressiveness depends on grit | Deliberate sharpening or repair work rather than the default rod for this beginner routine |
A ceramic honing rod is a tool for suitable steel knives. It does not mean you should hone a ceramic knife.
For very hard, thin-edged knives, do not assume a coarse steel or any ceramic rod is appropriate. Some makers approve a specific honing steel; others favor stones or other maintenance methods. Single-bevel blades, serrated knives, and ceramic knives are outside this alternating-stroke lesson.
Choose Enough Working Length
Select a rod whose usable honing surface is at least as long as the blade. For an 8-inch chef knife, a 10- or 12-inch usable rod gives comfortable room for a full stroke. Check whether a listed length includes the handle.
A secure handle and protective guard matter more than decorative styling. Inspect ceramic rods for cracks, and keep all rod surfaces clean according to their care instructions.
STEEL, CERAMIC AND DIAMOND RODS
📐 Find the Correct Honing Angle
Use the angle recommended for your particular knife—not a blanket rule based on its country of origin.
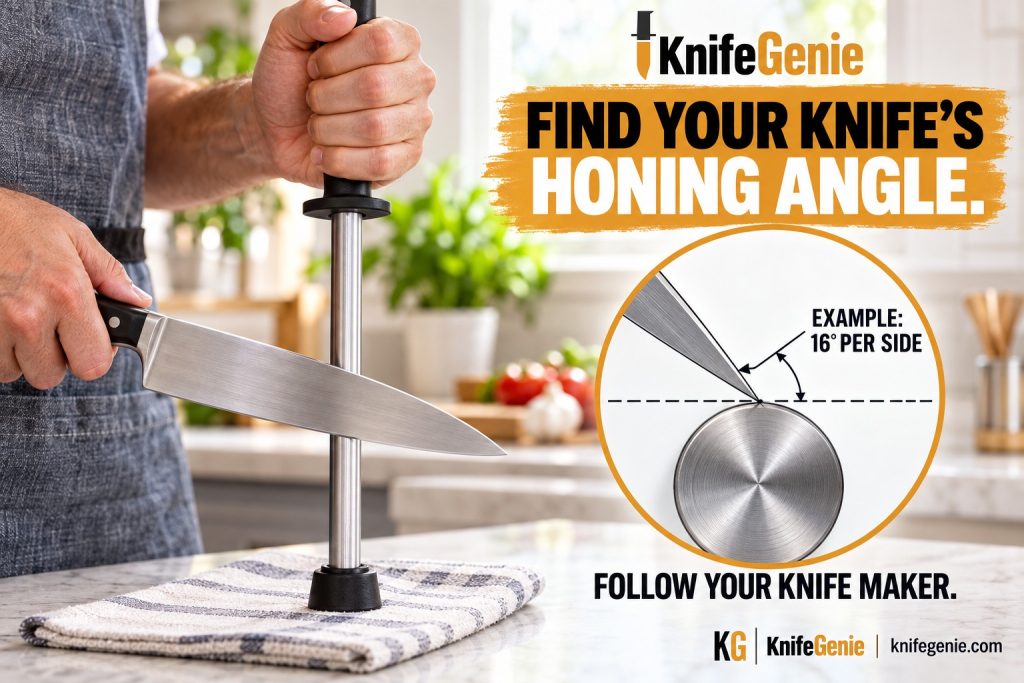
For example, WÜSTHOF’s published instructions specify 14° for its standard knives and 10° for its Asian-style knives. ZWILLING’s guidance gives approximately 15° for ZWILLING knives, while Shun describes a 16° honing guide for its knives. These are manufacturer-specific examples, not universal settings.
The angle is measured between the side of the blade and the rod’s contacting surface. A 16° angle on each side is not a 32° angle to use on each stroke.
How to Estimate the Angle
Imagine the blade held at 90° to the rod. Half of that is 45°, and half again is 22.5°. Close the gap a little further to approach a 15–20° setting, where appropriate for your knife.
This is only a visual estimate. A compatible built-in angle guide can help you establish the starting position. Keep that position steady throughout the stroke, including around the curved tip.
If the blade lies almost flat against the rod, you may miss the edge. If you hold it too upright, you can damage or unnecessarily alter the edge. When the angle is unknown, look up the model’s care instructions before proceeding.
🔪 How to Hone a Kitchen Knife: Step by Step
This supported method keeps the rod planted while the knife moves. Right- and left-handed cooks can use the same sequence with hands reversed.
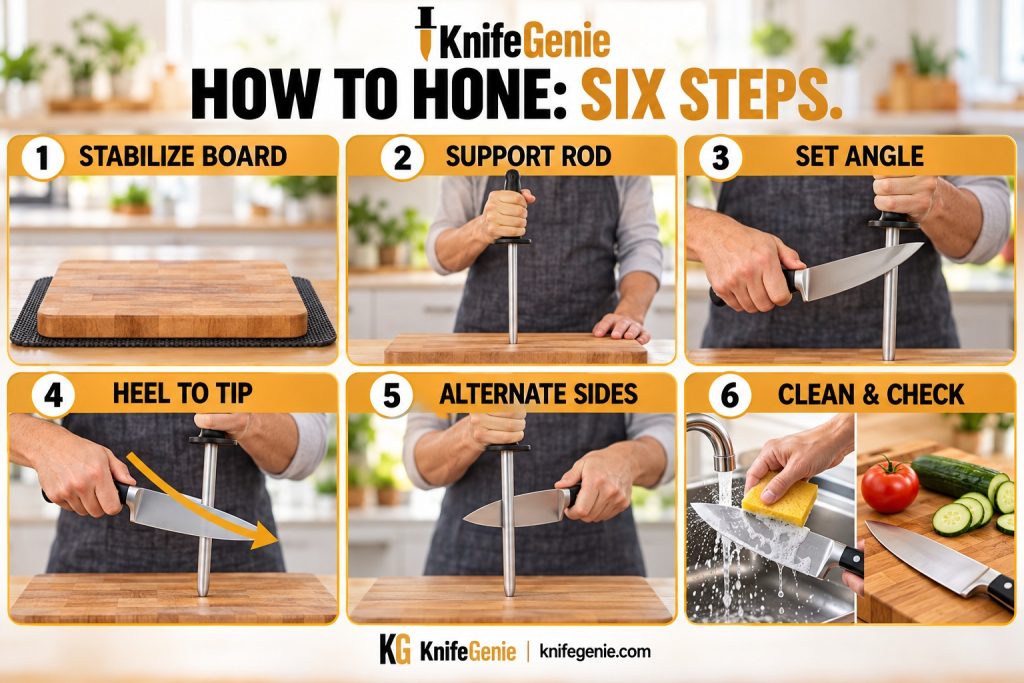
Step 1: Prepare a Stable Work Area
Place a wooden or plastic cutting board on a secure counter. If it slides, put a damp towel or non-slip mat underneath the board. Keep the board’s working surface and your hands dry.
Clear away food and give yourself room to move the blade without reaching across anything. Begin with a clean knife and clean rod.
Step 2: Hold the Rod Vertically
Hold the rod handle in your non-dominant hand and rest its tip securely on the board. Keep your fingers behind the guard and the rod upright.
If the tip slips, stop and correct the setup. Do not try to compensate while the knife is moving.
Step 3: Position the Heel of the Knife
Hold the knife securely in your dominant hand. Place the heel—the cutting edge nearest the handle—against the upper working section of the rod, below the guard.
Set the recommended angle. Make sure the cutting edge contacts the rod rather than the broad side of the blade or a protruding bolster.
Step 4: Draw the Edge Down, From Heel to Tip
With light pressure, glide the blade downward while drawing it across the rod so that contact travels from heel to tip.
Think of one smooth slicing movement: the heel makes contact first, the middle follows, and the tip finishes the pass.
Keep the angle steady and stop before the knife strikes the board. Do not twist the edge sideways against the rod or flick the tip at the end.
Step 5: Repeat on the Other Side
Lift the knife clear. Position it against the other side of the rod at the same angle, then repeat the heel-to-tip stroke.
Alternate sides instead of repeatedly working one side. Keep the rod stationary and make each pass slow enough to control.
Step 6: Clean the Knife and Check the Result
After a few alternating passes, hand-wash the knife carefully and dry it thoroughly. Follow the rod maker’s cleaning instructions too; not every handle or rod should be soaked.
Try a controlled slice through a familiar food on your board, using a safe guiding-hand position. Look for easier cutting with less pressure. Do not test sharpness by running a finger along the edge.
If cutting improves, finish there. If it does not, check the angle, tool compatibility, and edge condition before doing more.
🔄 How Many Honing Strokes Should You Use?
Start with 3–5 light strokes per side, alternating after each stroke, unless your maker specifies otherwise. This is a conservative starting routine, not a guaranteed number for every knife.
One pass on the left and one on the right count as one stroke per side—two strokes total. A knife that needs only a small touch-up may require fewer passes.
The goal is improved cutting, not reaching a large stroke count. Clean and check the knife after the first short session. If appropriate, make a few additional gentle passes, then reassess.
Avoid turning a quick maintenance task into dozens of repeated strokes. More passes and more pressure will not make a traditional honing steel repair a chipped or heavily worn edge.
🗓️ How Often Should You Hone a Kitchen Knife?
Let cutting performance, knife type, and rod type guide the routine.
| Situation | Practical approach |
|---|---|
| Everyday knife, maker-approved steel rod | Check before food prep; hone briefly when the edge loses a little crispness |
| Occasional cooking | Assess when you use the knife rather than following a daily schedule |
| Hard, thin-edged knife | Follow its maker’s maintenance advice; do not assume it needs daily rod use |
| Fine ceramic rod | Use for an appropriate light touch-up, recognizing that it removes steel |
| Knife already cuts cleanly | Continue using it; unnecessary passes add little benefit |
Manufacturers differ: WÜSTHOF describes frequent honing with a suitable steel, while Shun suggests that some users may need to hone only about weekly. Neither creates a universal timetable for every kitchen.
Honing frequency also does not determine sharpening frequency. See how often to sharpen kitchen knives for signs that the edge needs restoration.
🛡️ Honing Safety: Keep the Movement Controlled
- Support the rod: Keep its tip planted throughout each stroke.
- Protect the holding hand: Keep fingers behind the rod’s guard.
- Move down, away from that hand: Lift the knife clear to reset; do not slide it back toward your fingers.
- Keep a secure grip: Dry hands and handles make control easier.
- Use light pressure: Do not force the edge against the rod.
- Stop above the board: Avoid striking the knife’s tip or edge against it.
- Work without interruptions: Pause if someone enters your working space.
- Leave damage for appropriate repair: A rod is not the place to force out chips.
You do not need to progress to an unsupported, midair technique. The supported method remains useful even as your confidence grows.
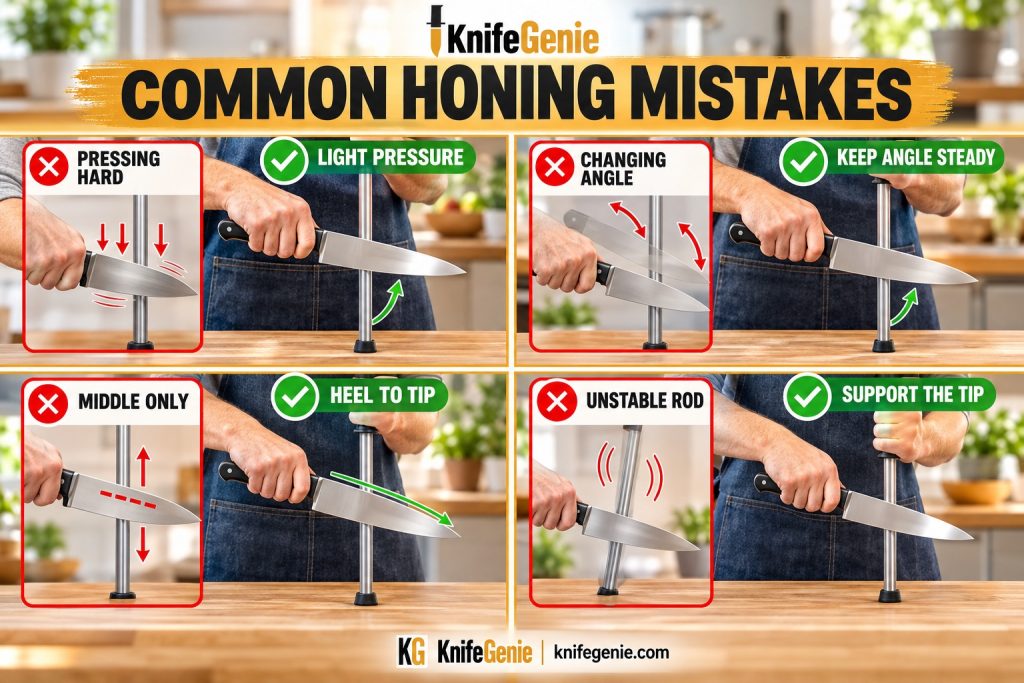
❌ Common Honing Mistakes—and How to Correct Them
| Mistake | Why it causes trouble | Better habit |
|---|---|---|
| Using one angle for every knife | The rod may miss or alter the intended edge | Check the model’s recommended angle |
| Pressing hard | Makes edge damage more likely | Maintain gentle contact |
| Moving too fast | Makes angle and tip control harder | Slow down until each pass is consistent |
| Honing only the middle | Leaves the heel and tip untreated | Work heel to tip on every pass |
| Twisting or flicking at the tip | Changes the angle near the end | Follow the blade curve smoothly |
| Using an unsuitable rod | Can abrade or damage the edge | Match the tool to the knife maker’s guidance |
| Continuing despite no improvement | Delays proper sharpening or repair | Stop and inspect the edge |
| Skipping cleaning afterward | Can leave maintenance residue on the blade | Clean and dry before food prep |
🪨 What If Honing Does Not Help?
First, check that the rod is compatible, clean, and contacting the edge at the correct angle. If those basics are right and a brief session does not restore useful cutting, the knife may need sharpening.
Visible chips, a broken tip, or an edge that remains blunt need appropriate sharpening or repair. Avoid increasing pressure to try to solve them with a honing steel.
Our guide to knife sharpeners for beginners explains options for restoring an edge. Choose a method compatible with your knife’s angle and construction.
If improvement disappears unusually quickly, look beyond honing technique. Cutting surfaces, sideways scraping, and storage can all affect the edge. See why kitchen knives get dull so quickly for habits to check.
🧙 KnifeGenie Pro Tips
✔ Set the angle before moving. Pause at the start of each stroke instead of guessing halfway through.
✔ Keep the routine short. A few controlled passes are easier to assess than a long session.
✔ Finish gently. Keep pressure light, especially on the last alternating passes.
✔ Use the same cutting task to compare. A familiar food makes changes easier to notice.
✔ Maintain the rod too. A dirty abrasive surface can work less effectively; clean it as directed.
❓ Frequently Asked Questions
Can I hone a knife every day?
Some everyday knives can be maintained frequently with a compatible steel rod. Daily honing is not necessary for every knife, and abrasive rods should not be treated as automatic daily maintenance. Follow the maker’s guidance and assess cutting performance.
Should I hone before or after cooking?
Either can fit your routine. Checking before prep lets you assess the edge before cutting food. If you hone afterward, clean the knife first, then clean and dry it again after maintenance.
Can I use a honing steel on a Japanese knife?
Sometimes. Shun, for example, approves a suitable honing steel for its knives. Other knives have different requirements. Check the specific model rather than assuming all Japanese knives use the same maintenance method.
Do I need oil or water on the rod?
Do not add either unless the rod maker instructs you to. Many common rods are used dry; follow the instructions supplied with your tool.
Can I hone a serrated bread knife this way?
No. This alternating heel-to-tip routine is for suitable straight-edged, double-bevel steel knives. Serrations need a maintenance method appropriate to their shape.
Is a ceramic rod the same as a ceramic knife?
No. A ceramic rod is an abrasive maintenance tool commonly used on suitable steel blades. Ceramic knives require their own specialized care.
Will honing repair chips?
No. Chips require material removal and edge repair through an appropriate sharpening method. Ask the manufacturer or a qualified sharpener if you are unsure.
✅ Final Recommendation
To hone a kitchen knife confidently, begin with a compatible rod and a stable setup. Match the knife’s recommended angle, make a few light heel-to-tip strokes on alternating sides, then clean the blade and check the result.
Make consistency your goal. When honing stops helping, move on to appropriate sharpening rather than adding force.
For the wider maintenance routine, explore KnifeGenie’s Sharpen & Care guides.
📚 Research Sources
- WÜSTHOF: Using a Steel — supported technique, tool length, model-specific angles, cleaning and rod materials.
- ZWILLING: Knife Sharpening Guidance — manufacturer angle and alternating strokes.
- Shun: Frequently Asked Questions — compatible rods, 16° guide, ceramic abrasion and honing frequency.
- Kramer Knives: Sharpening and Honing — slow movement, consistent angle, and light pressure.